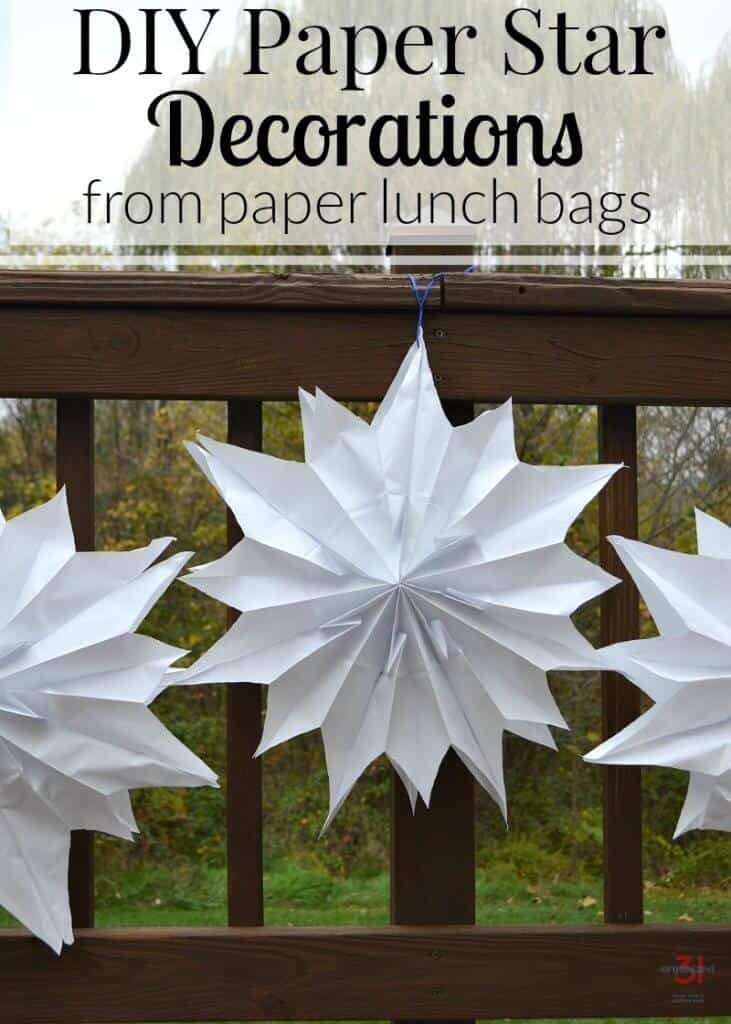
DIY Paper Star Decorations
This post may contain affiliate links provided for your convenience. We earn commissions if you shop through the links on this page. I am also an Amazon Associate and earn from qualifying purchases Read my full disclosure policy.
Originally published April 10, 2017 and updated December 7, 2022.
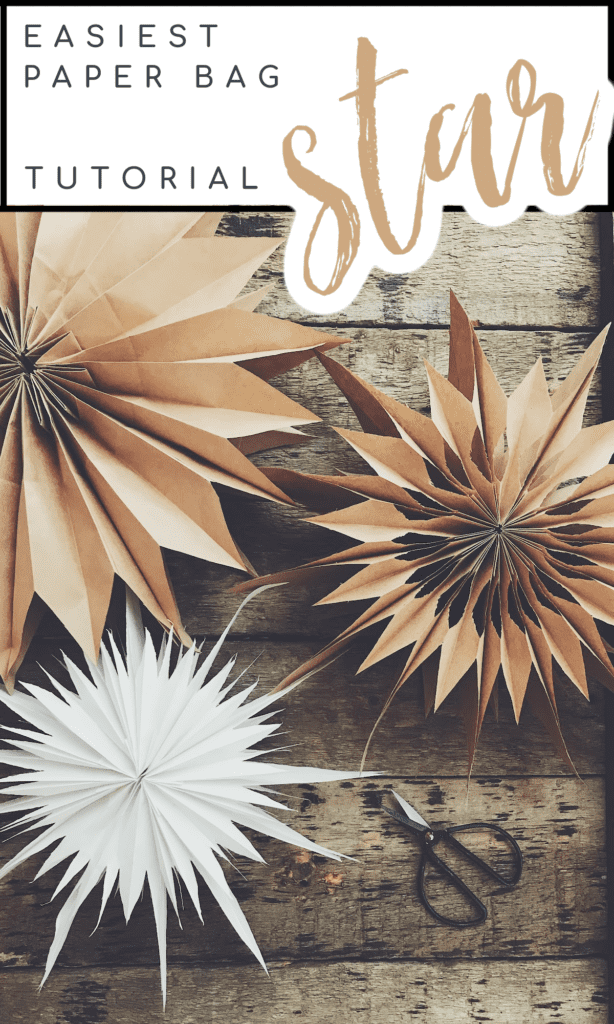
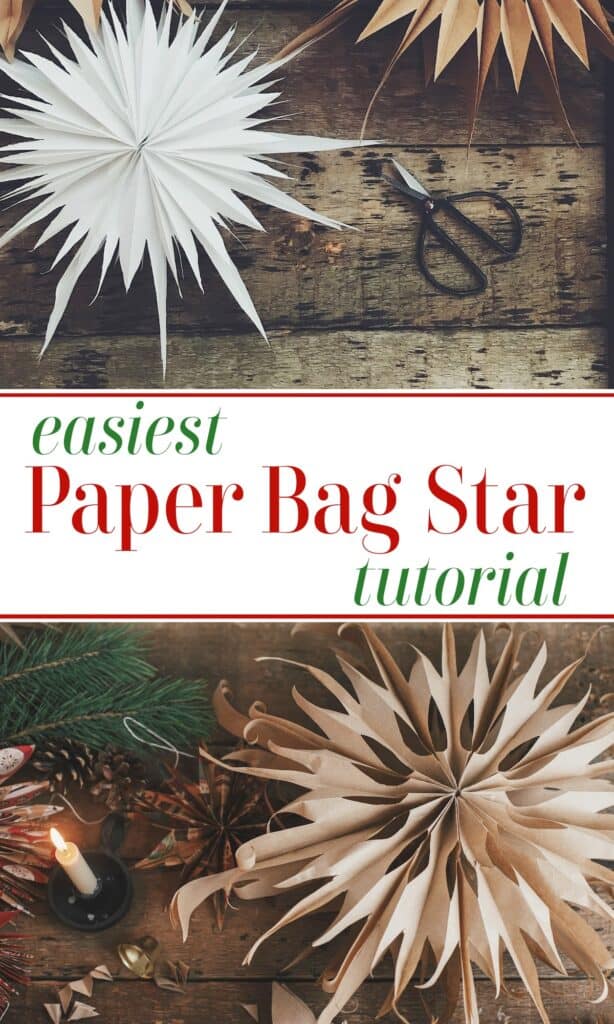
Looking for an easy tutorial to make a paper bag star? This simple tutorial shows you step-by-step how to make DIY paper bag star decorations that make a big impact for parties or home décor. Includes 15+ tips on supplies and how to make easy paper bag stars and also more complex, unique designs.
There are many different ways to use these DIY paper stars:
- Simple holiday décor and Christmas décor
- You can also easily turn these stars into paper snowflakes
- College dorm room décor
- Inexpensive party decorations
- Birthday parties
- Wedding showers
- Baby shower and baby gender reveals
- Graduation parties – you’ll see how I used them for my daughter’s graduation party
- Sweet Sixteen party
- Christmas tree decorations
- Classroom party decorations
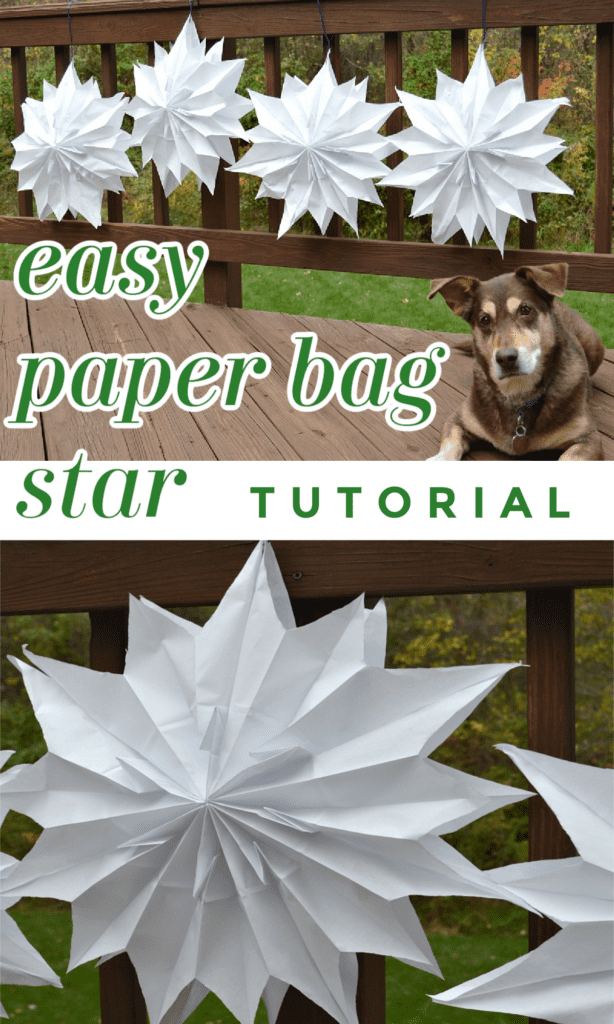
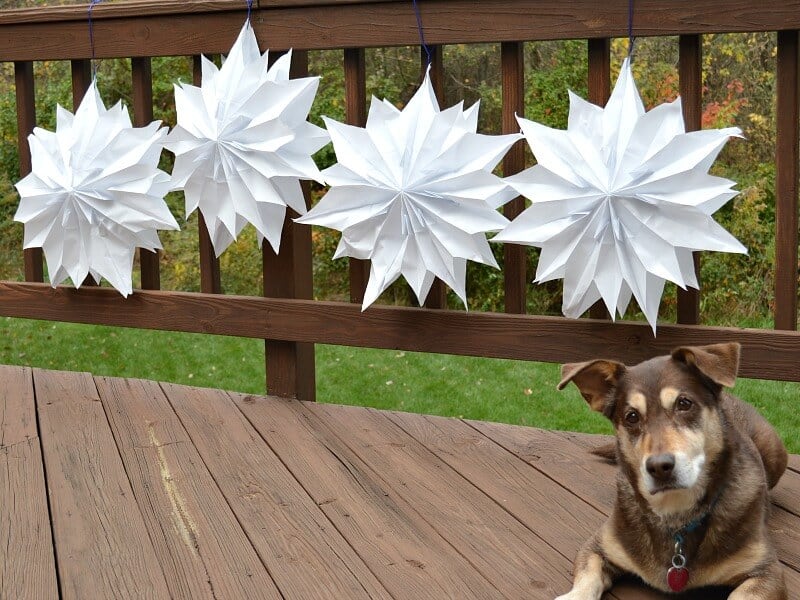
When I throw a party, I want it to be as festive as possible. I’m a woman that shows my love and affection through crafting for friends and family (and I know that many of you do the same thing). Last year, when my second “baby” graduated from high school, we threw a graduation party at home for her. To save money and to show my love, I made my own DIY Paper Star Decorations. They’re very easy to create and make a large, festive impact. And best of all, my daughter loved the star decorations.
These DIY paper star decorations were a big hit with my daughter and with our guests. In fact, one of my friends borrowed the stars after our party to use at her own party the following weekend. I took that as a huge compliment.
These paper star decorations are super easy to make. It took about 4 minutes to make each star, plus drying time for the glue. The paper lunch bags are inexpensive so this is a frugal way to decorate for a party.
After the party, you can even fold the paper bag stars up and save them for your next party. If you don’t want to save them for yourself, you can donate them to your local Head Start center, senior center, domestic abuse or homeless shelter. ![]()
DIY Paper Star Decorations
Supplies
- Paper Lunch Bags – Paper lunch bags come in many different colors. Choose a color to coordinate with your party theme. You’ll need 8 bags for each star.
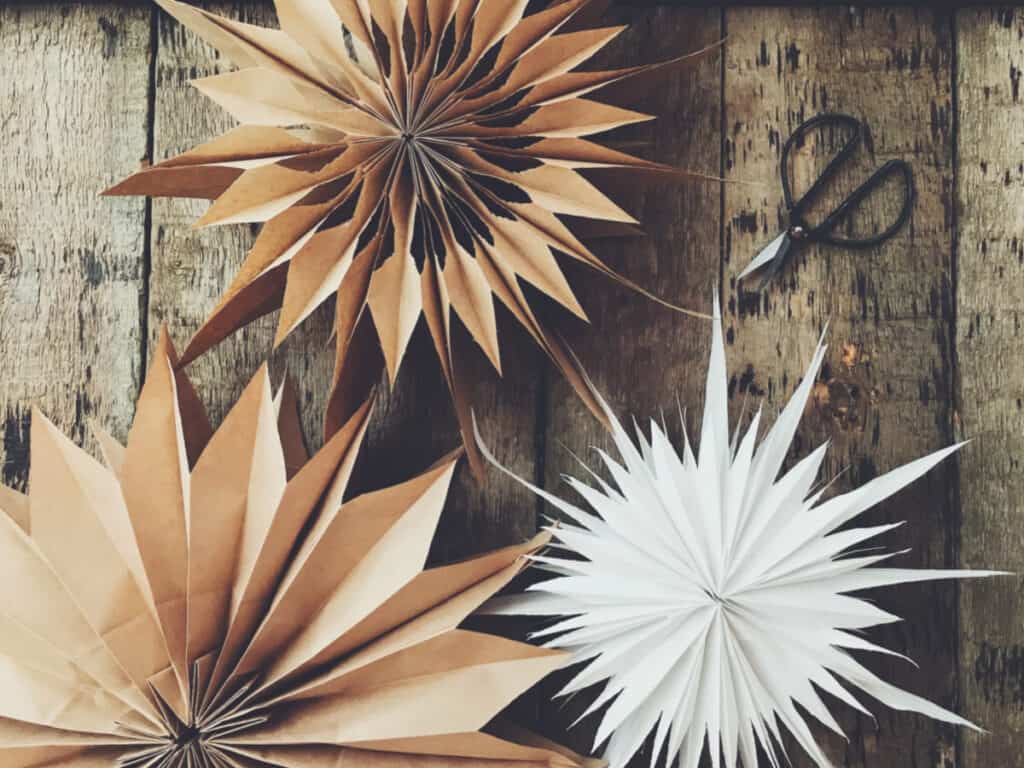
- Choose white paper bags or very light tan brown paper bags for making snowflakes.
- Extra Strength Glue Stick or hot glue gun – You can use craft glue, but it takes a bit longer to allow the glue to dry.
- Craft Ribbon – Choose a coordinating ribbon color.
- Pair of Scissors
- Hole Punch
Step-by-Step Tutorial
Step 1 – Stack 8 paper sacks on top of each other and cut a point on the open end of the top of the bag. This creates the points of the star. To create a uniform shape, but the stack of bags at once or in cut stacks of 2 to 3 bags, using the last bag as a template.
Step 2 – Run a line of glue down the center of a bag and across the bottom in a T shape. Place the next bag on top of the glue. Press the bags together well. Continue until all 8 bags are glued together. Be sure to keep all the bags facing the same direction (all the bottom folds up or down) as you glue bags together.
Step 3 – Open the bags up like an accordion and glue the star closed. With the hole punch, punch holes in the final tips of the star that you just glued together.

Step 4 – Lace a piece of ribbon through the punched hole. Be sure to determine how long you need the ribbon to be to tie the stars in place.
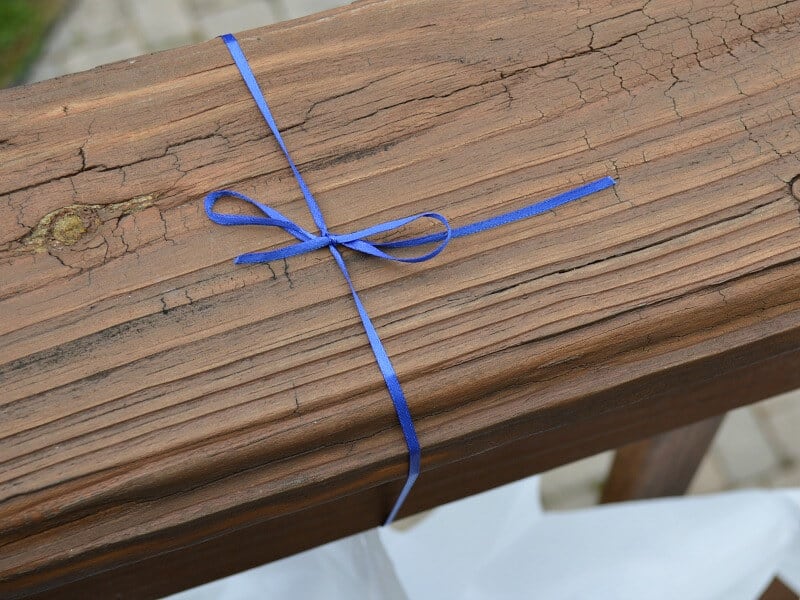
Tie the paper bag star decorations in place using the ribbon. If you tie a bow, it’s simple to remove the stars after the party and reuse them later.
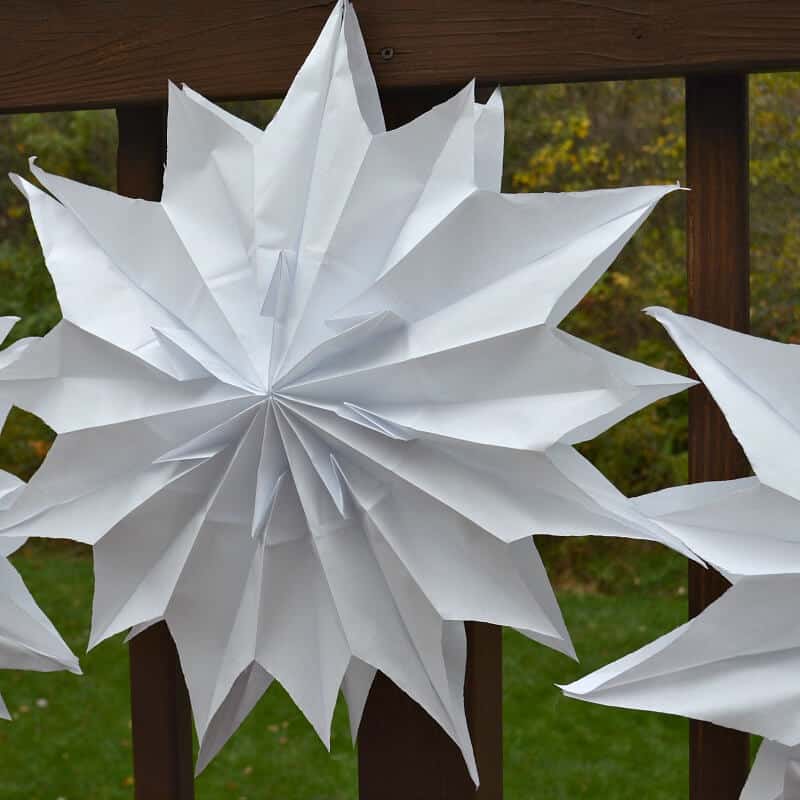
These beautiful DIY paper bag stars make quite a big impact for an investment of just minutes in making them. Each star is approximately 22 inches across and costs less than a dollar each.
Create Variations in Making Beautiful Star Shapes
You can vary the size of your star by using different sized paper bags and cutting the bags you have shorter.
Use different colors of bags to match your décor or party colors. You can even cover the front and back of the bags with wrapping paper to add more drama or to better coordinate with the rest of your party decorations.
You can create different designs by alternating longer bags with shorter bags. Simply cut 2-4 inches off the top alternating lunch bags.
Cut the point on the top of the bags in different angles to make a wider or narrower point. You can also vary the type of point between the first bag and second bag and then alternate.
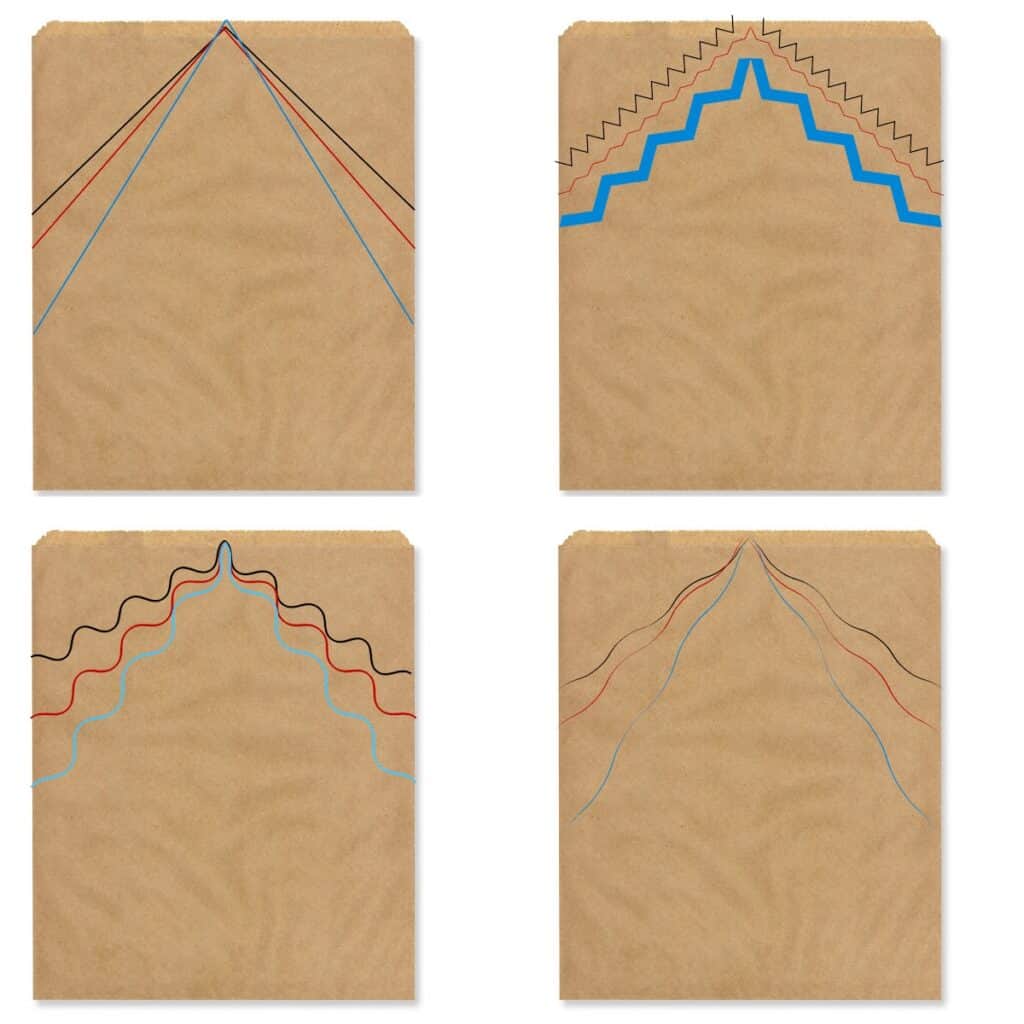
You can use decorative scissors to make different types of cuts:
- Zig zag edges
- Wavy edges
- Curved edges
You can also vary the angle of decorative edges to make wider or narrower star points.
Create templates like the ones below to make beautiful paper bag stars or snowflakes. Ideas for creating decorative stars:
Cut a triangle shape on opposite sides of the bag. You can also cut several small triangles down each side.
Use a hole punch to make small circles on the sides of the bag.
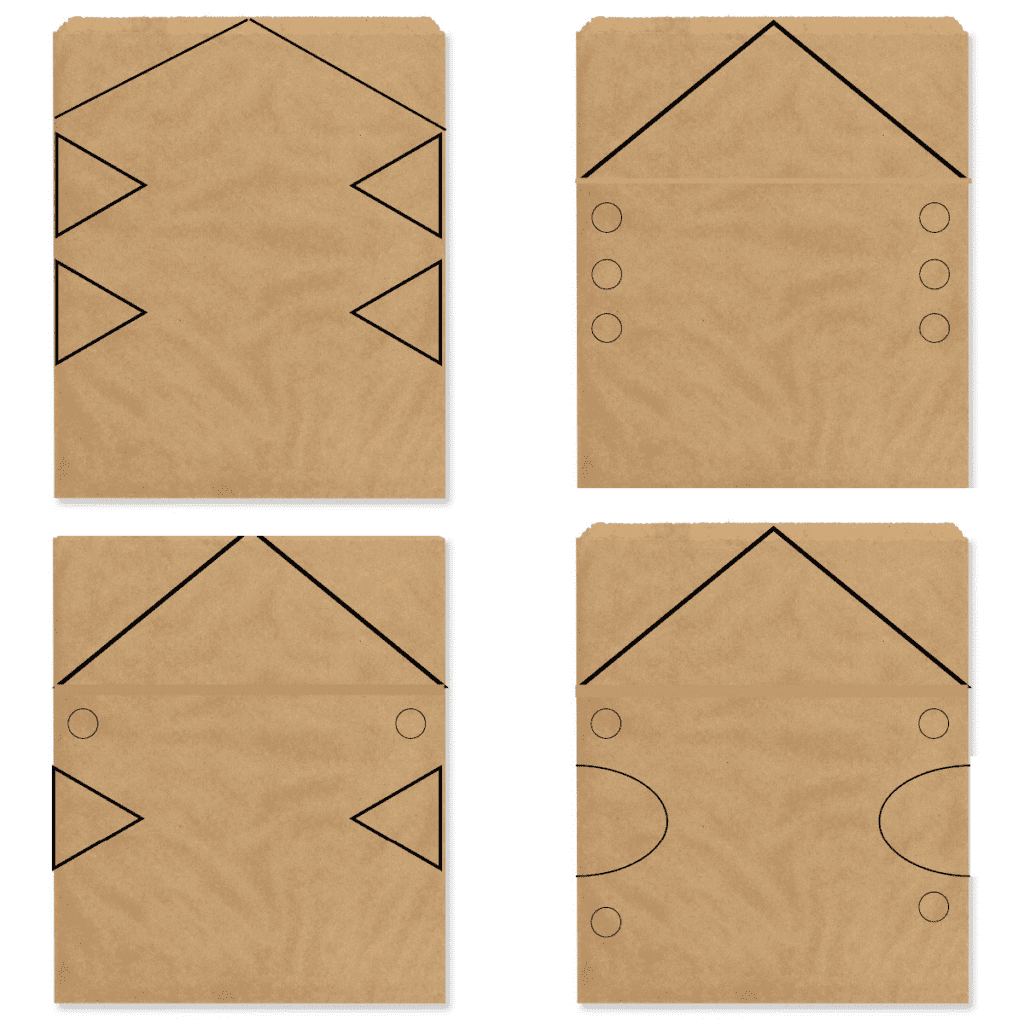
Mix triangles and circles to create unique patterns.
Cut half-circle or half-oval shapes instead of triangles.
You can mix different sizes of triangles, hole punches and half circles on the side of the paper bags to create unique designs. This is the fun part of this DIY project – let your creativity go wild.
FAQs about DIY Paper Stars
How many lunch bags does it take to make a star?
It takes between 8 and 12 paper bags to make a star. The number you choose depends on the thickness of the bags you’re using and how full you want the completed star. I recommend you make one with 8 and test the fullness before you do the final gluing to close the star. You can add more bags at this step, if you need.
How do you make a snowflake out of paper bags?
You use the same steps as above to make a DIY paper bag star, but cut the bag edges to make the snowflake cutouts. You can use the suggested templates above or create your own. Just make sure you cut each bag in the same pattern or cut alternating bags with the same patterns and use an even number of paper bags.
For more craft ideas, see the table below. You can scroll through the table and look for ideas or search for specific ideas with the magnifying glass in the upper right-hand corner (on desktop). Click on the topic and then click through the specific article.

I’m a mom of 3, a veteran, military spouse. I’ve moved into 20+ homes all around the world. My passion is helping busy people make the space and time for what’s really important to them. Learn more about Organized 31 and me.


I love these paper stars! I can see them having on my sun porch all year round. I love that you made the instructions so easy too. As someone who is not the biggest crafter, I need step by step!
Susan,
These are fabulous. A great bang for the buck. I love that you can easily change the color scheme by using different colored bags. I’m definitely making these for the 4th.
Pinning!
Have fun with them, Cheri. Warning – it’s an addictive project! 🙂
These are awesome paper stars, but oh my gosh, your dog is SO cute! I love his cocked little ear! Anyway, I’m totally going to make these for my daughters next birthday!
Thanks, we certainly think she’s adorable! 🙂 Have fun crafting for the birthday party.
Originally I found a very fancy version of this, billed as snowflakes, for an afterschool craft project. This one has a spectacular “wow” factor and a more straight forward plan to make it SO quick. My ONLY change was to cut the standing bottoms off before gluing bags together. I’m probably type A though, those details are noticed by me alone.
I am all about easy projects that don’t look easy, Jennifer ;). I’ll be making some more of these stars next month and will give your variation a try. Thanks for sharing it.