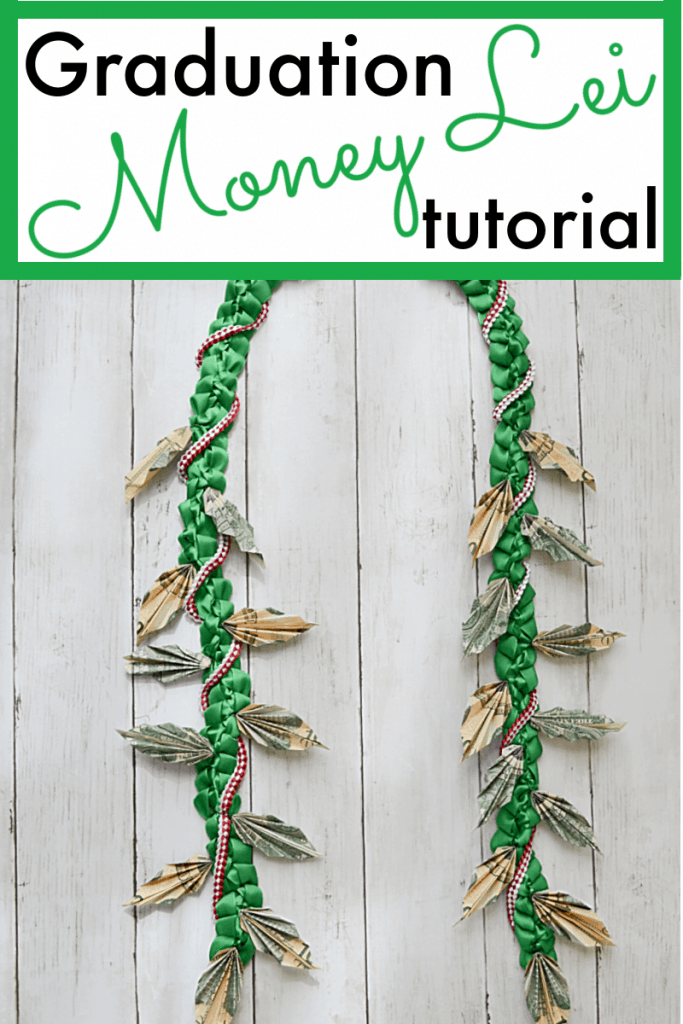
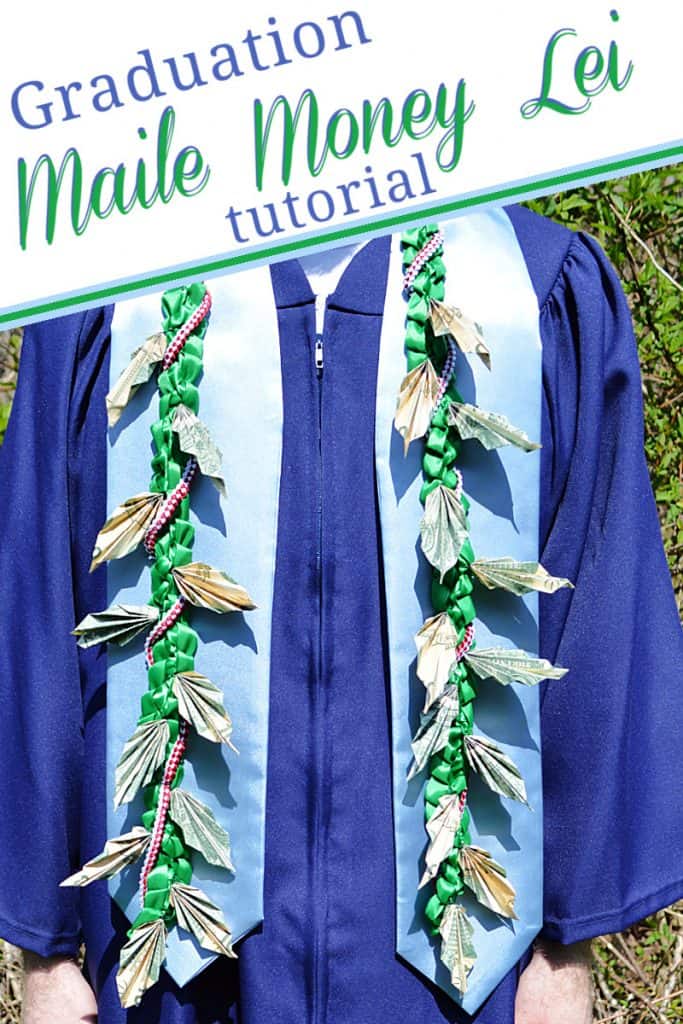
Money Lei – Maile Lei Style
This post may contain affiliate links provided for your convenience. We earn commissions if you shop through the links on this page. I am also an Amazon Associate and earn from qualifying purchases Read my full disclosure policy.
This money lei tutorial is easy to follow even if you’re not super crafty. It’s a unique way to celebrate your graduate and is a great gift and keepsake.
I grew up in Hawai’i and so giving leis as a graduation gift is as integral to graduation as a cap and gown. There are many different kinds of graduation leis given:
- Traditional garland of flowers or flower leis
- Yarn lei
- Origami money lei
- Ribbon lei
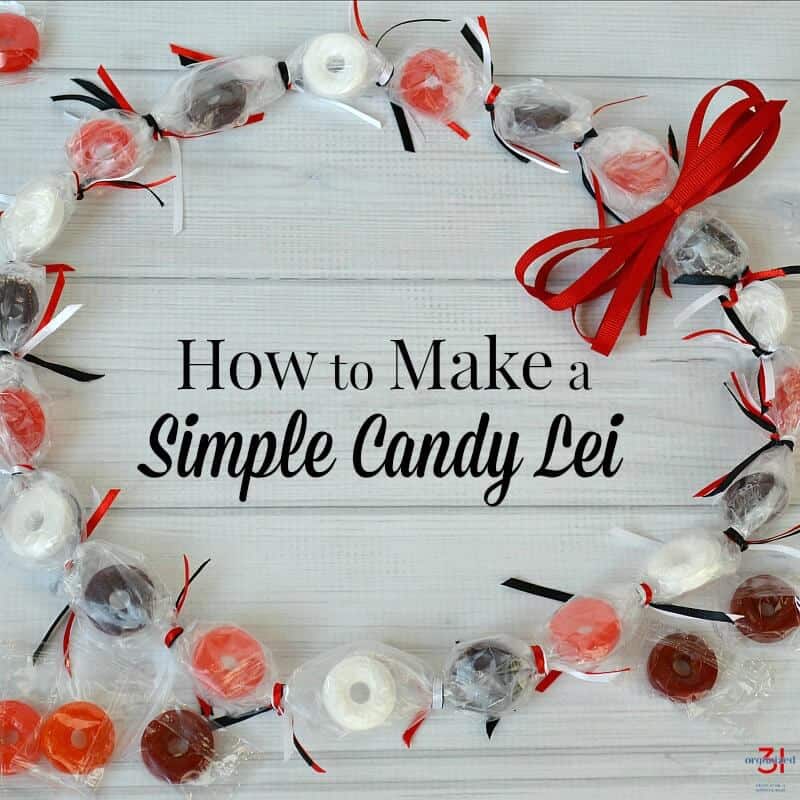
- Candy lei
- Eyelash yarn lei
The great thing about this money lei is that the graduate can keep the maile lei ribbon as a keepsake even after they’ve used the gift of money portion.
What is a money lei?
A traditional fresh flower lei is given to share aloha, to recognize an accomplishment and to celebrate a happy occasion.
Money leis are popular gifts given to a graduating senior for both high school graduations and college graduations. It combines the Hawaiian lei for graduation tradition with the tradition of giving a monetary gift for graduation.
People familiar with Hawaiian culture and the lei giving tradition understand that a DIY money lei is a creative way with a personal touch to celebrate a special occasion. The lei and your effort will be treasured.
How much money do you need for a money lei?
The amount of money you need depends on how much you’d like to give, the style of money lei you make and how long the lei will be (which is usually based on how tall the graduate is).
- Decide the amount (how much money) you’d like to give as a graduation gift.
- Next determine how many different dollar bills you need for the style of lei you’re making.
- Then figure out what combination of denominations will meet the number of bills you need for your lei style. You can mix any combination of bills to meet your needs.
- You can substitute folded decorative paper or construction paper to fill in the number of money flowers or maile leaves you need for your lei.

Money Lei – Maile Lei Style
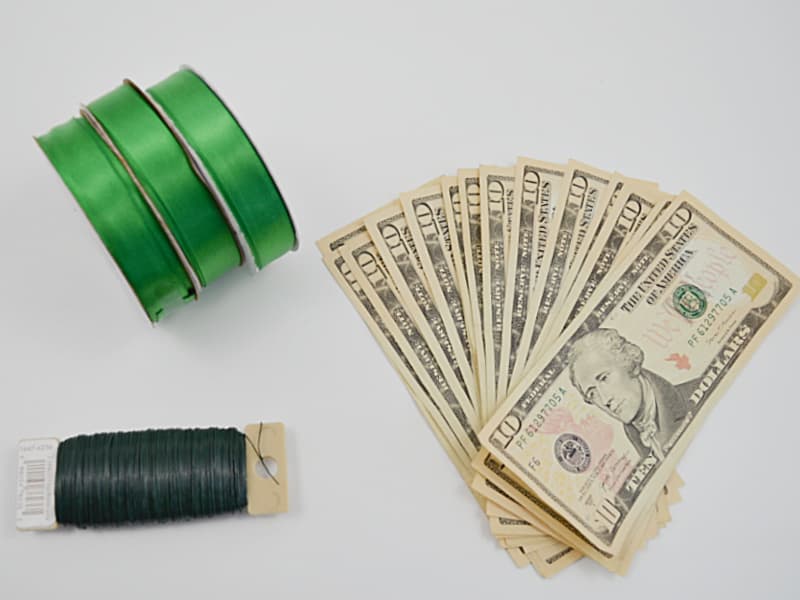
Money Lei Supplies
- 3/4 inch satin ribbon in green for a thinner ribbon lei, you can use 1/2 inch satin ribbon
- You can choose any ribbon color you’d like. I chose green to mimic a traditional green maile lei.
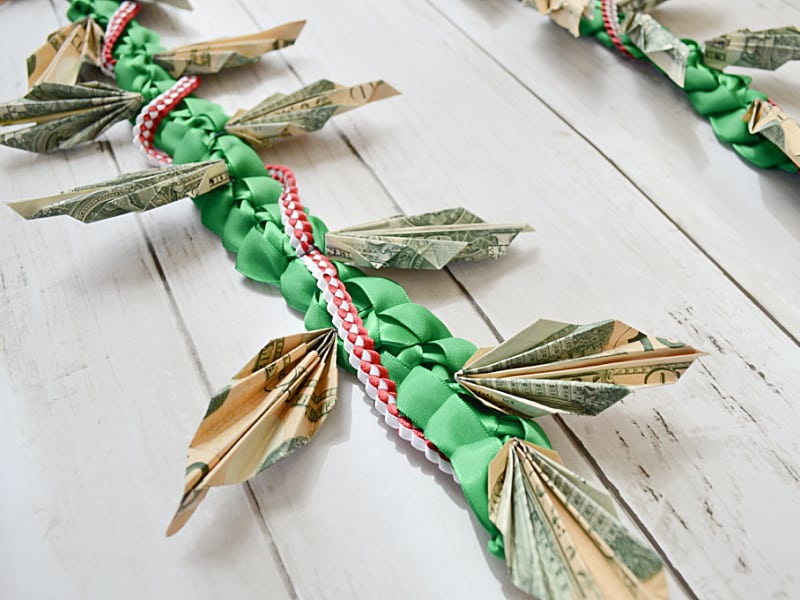
- You can also choose to make the ribbon base in the graduate’s school colors as you do for a traditional ribbon lei. I chose to wrap a ribbon lei in school colors around the green maile lei ribbon base. I used 1/8 inch satin ribbon and this ribbon lei tutorial.
- An even number of bills, 24 is the number I used for this lei
- Floral wire or green thread and needle
- Scissors
- Clear tape
- Kukui nuts or wood beads, optional
Money Lei Tutorial
There are three parts to making your maile lei money lei:
- Creating the ribbon lei base.
- Folding the origami money leaves.
- Attaching the money leaves to the ribbon lei.
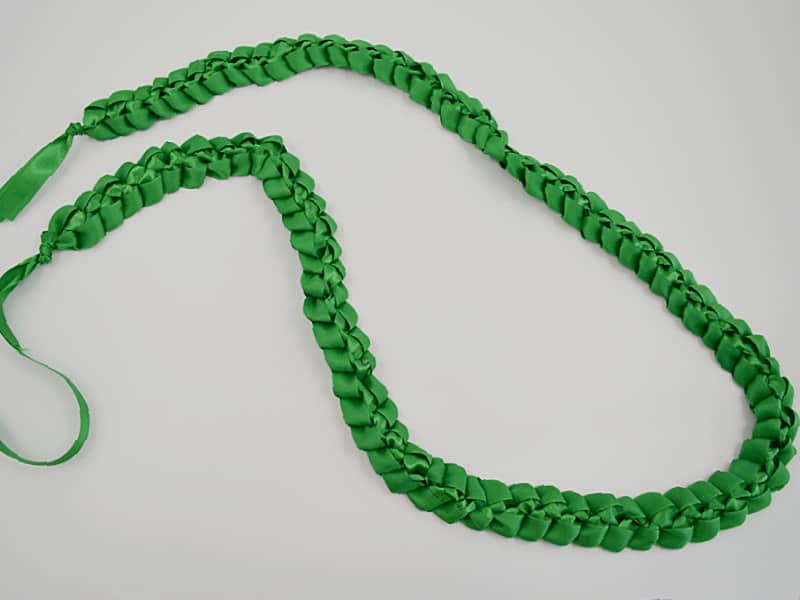
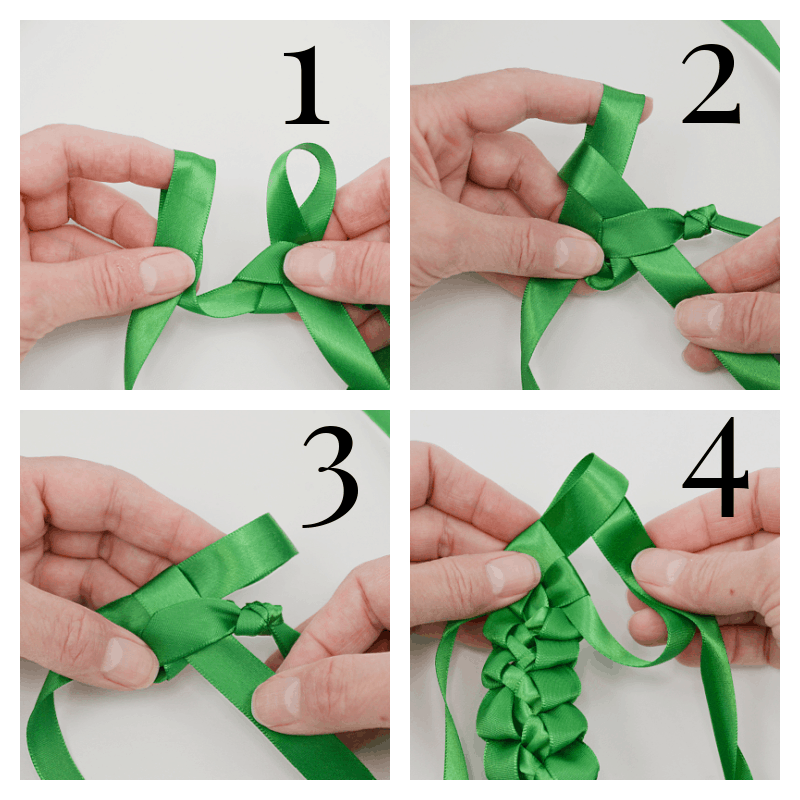
Making the Ribbon Lei Base
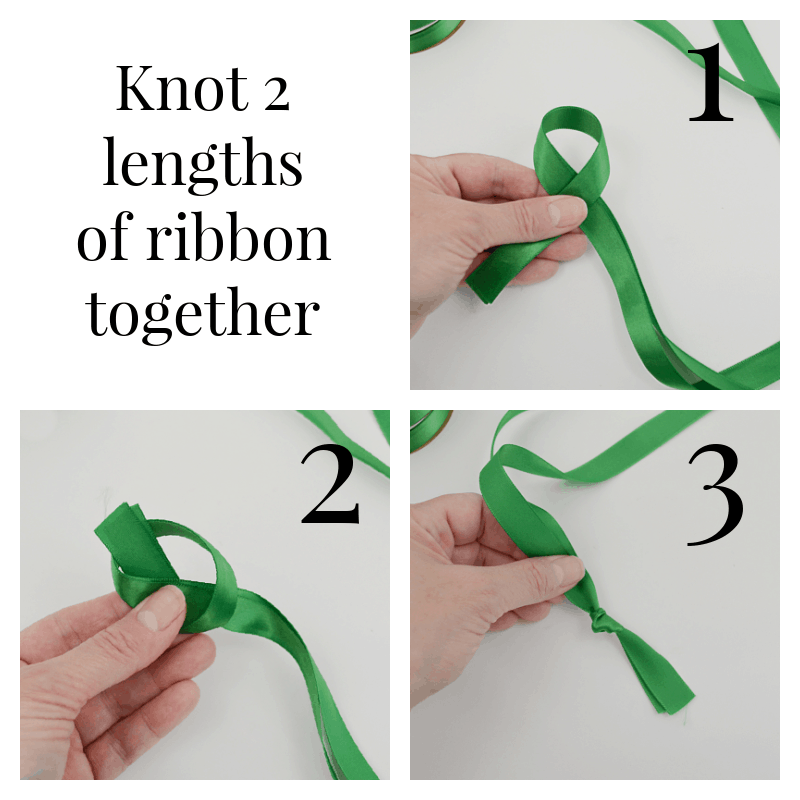
- Lay one ribbon on top of the other and make a loop about 4-5 inches from the bottom.
- Tie a knot.
- Pull the knot tight, leaving 3-4 inches of ribbon.
- Make loops from both ribbons near the knot. Fold the ribbon from the back to the front so that the length of the ribbon is in the front.
- Place the right loop through the left loop.
- Pull the left loop tight. The left loop will come apart, but hold it in place with your hand. The next step will hold it all in place.
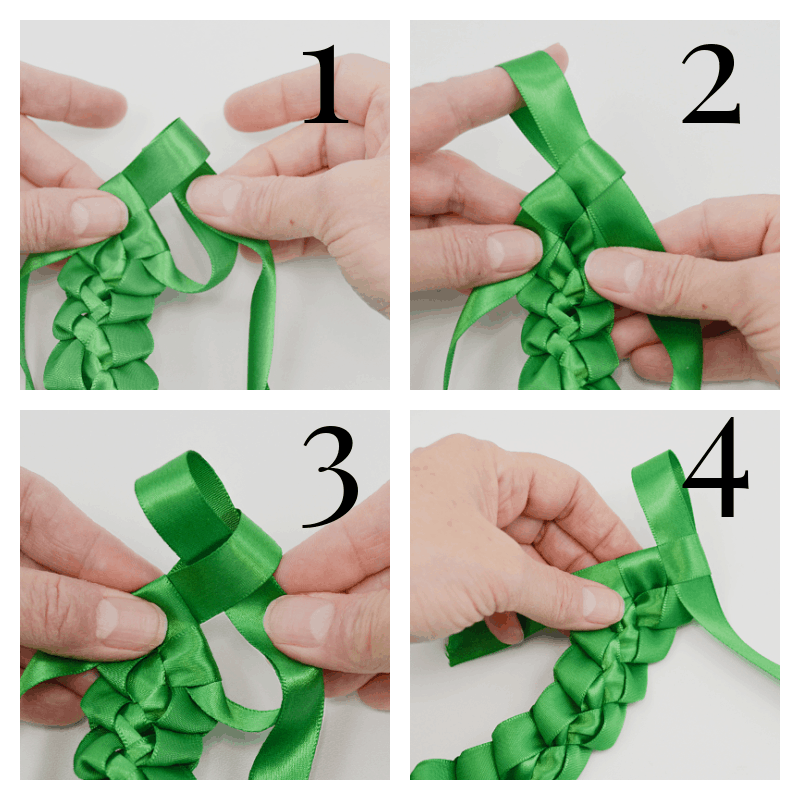
- Fold the left ribbon into a loop. Keep ribbons smooth and taut, but not wrinkled.
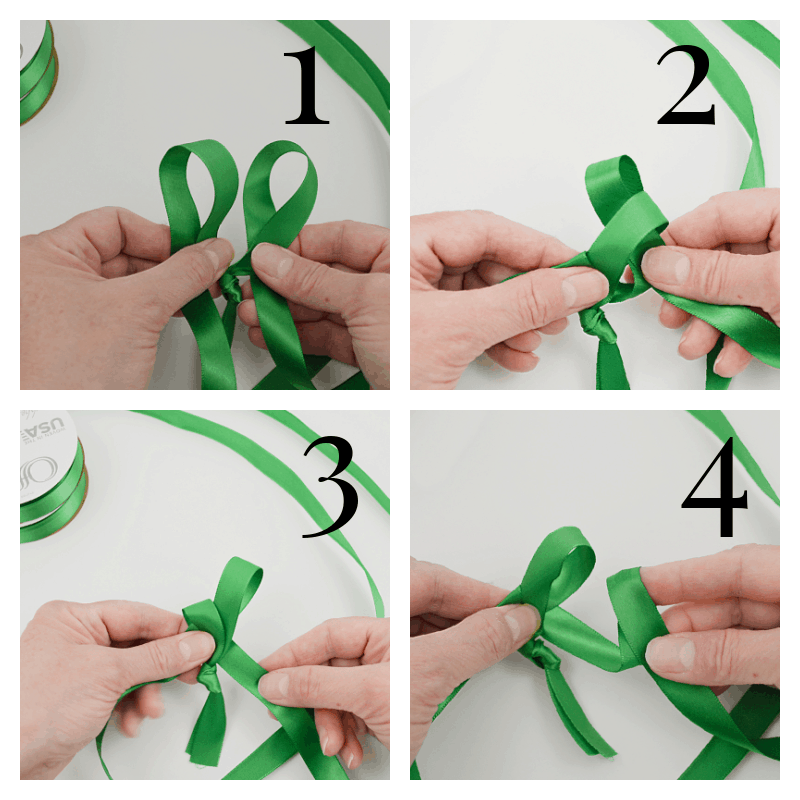
- Make a loop with the left ribbon. Keep the length of ribbon in the front.
- Place the left loop through the right loop.
- Pull the right ribbon down to the right loop. Keep the ribbon smooth, taut but not wrinkled. The first 5 or 6 times of weaving these loops is difficult. It will get easier as the length of braided ribbon you can hold gets longer and as you have practice. Don’t give up, you’ll get the hang of it.
- Make a loop with the right ribbon and slip it through the left loop.
- Continue making loops with the length of ribbon in the front. Keep the loops smooth.
- Tighten the loop down to by pulling the length of the ribbon. Be sure to keep the ribbons smooth and unwrinkled.
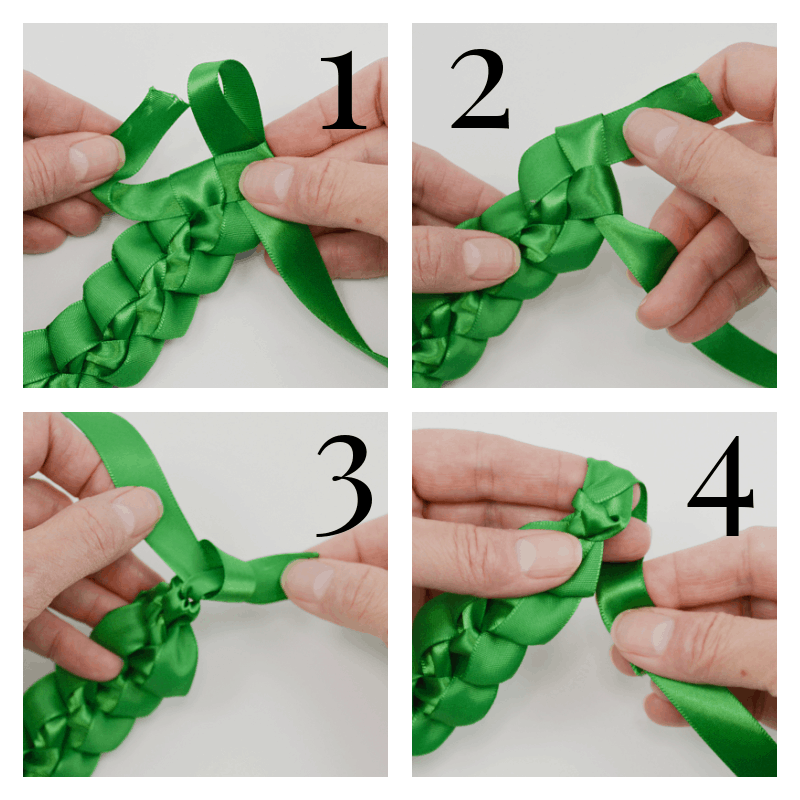
- Continue braiding back and forth.
- Continue braiding until you reach the end of the ribbon or your desired length. I make my braided maile ribbon lei between 56 and 64 inches long.
You can watch my YouTube video on how to make a ribbon lei. While I use different width and colors of ribbon, the steps are the same.
- Braid the ribbons until your desired length is reached or there is about 4-5 inches remaining.
- Slip the shortest end of ribbon through the last loop.
- Pull the loop tight and tie a knot.
- Loop both ribbons together to tie a final knot.
Folding Origami Money Maile Leaves
It’s best to use new, crisp dollar bills. While the bills don’t have to be perfectly crisp, you don’t want excessively wrinkled bills.
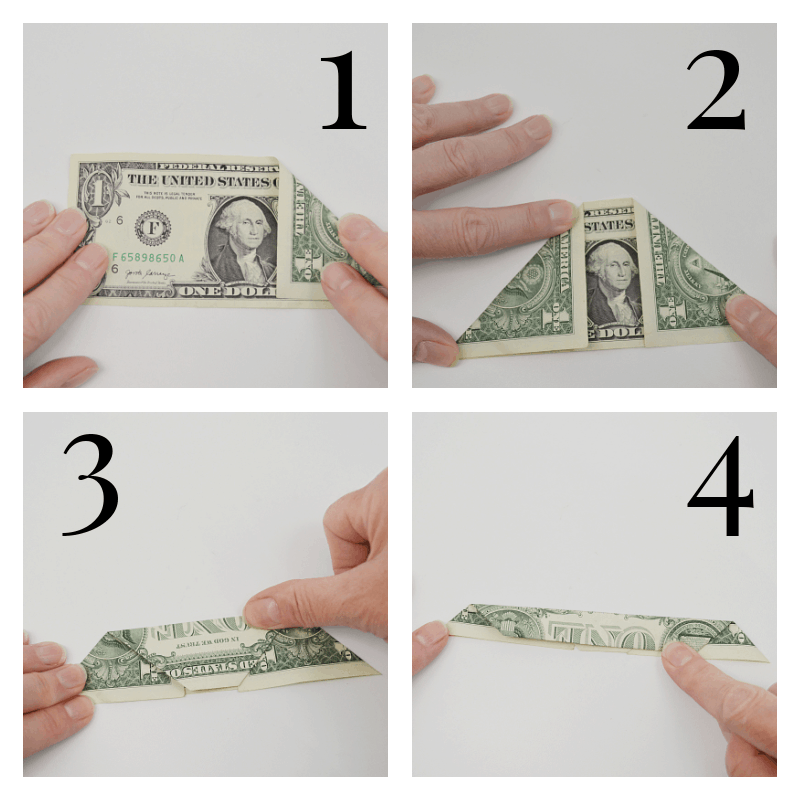
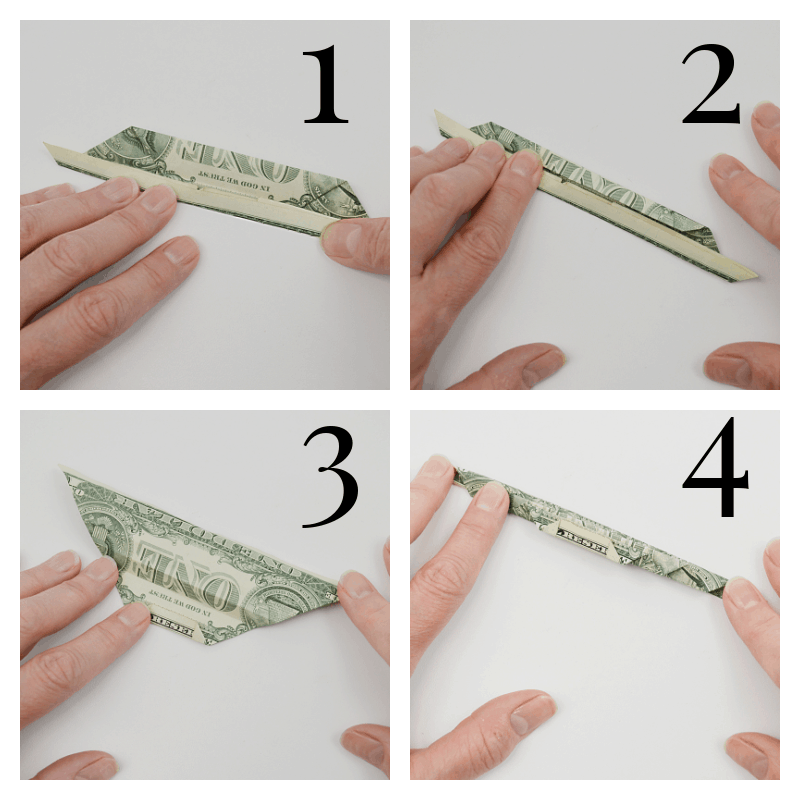
After each fold. firmly crease each new fold with your thumbnail or fingernail.
- Fold the upper right corner down to the bottom of the bill.
- Fold the upper left corner down to the bottom of the bill.
- Fold the top of the bill down to the bottom of the bill.
- Fold the new top down to the bottom of the bill.
- Open the previous fold and fold the bottom up to the middle line.
- Fold the top down to the middle line. Crease well.
- Open the folds up until you’re back to just the two corners folded down. Fold the top down and and use an accordion fold, folding the bill back and forth (in the opposite directions), until you reach the other side and the entire bill is folded.
- Fold the leaf in half. and line up the points.
- I use a small piece of tape to hold the point of the leaf together. Other tutorials will tell you to tuck one side into the other, but I find using a very small piece of tape much easier. And the graduate can easily remove the tape later.
- Cut a piece of floral wire about 5-6 inches long and thread it through the small hole at the end with the fold.
- Twist the wire tight to the base of the leaf.
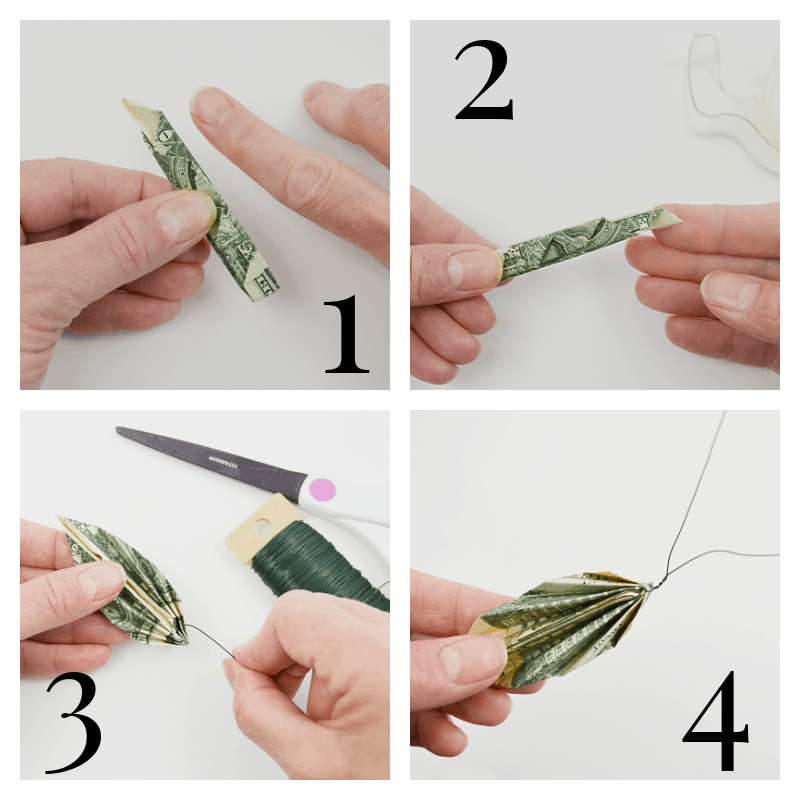
Gently unfold and form the leaf. Gather all the folded money leaves and the ribbon lei.

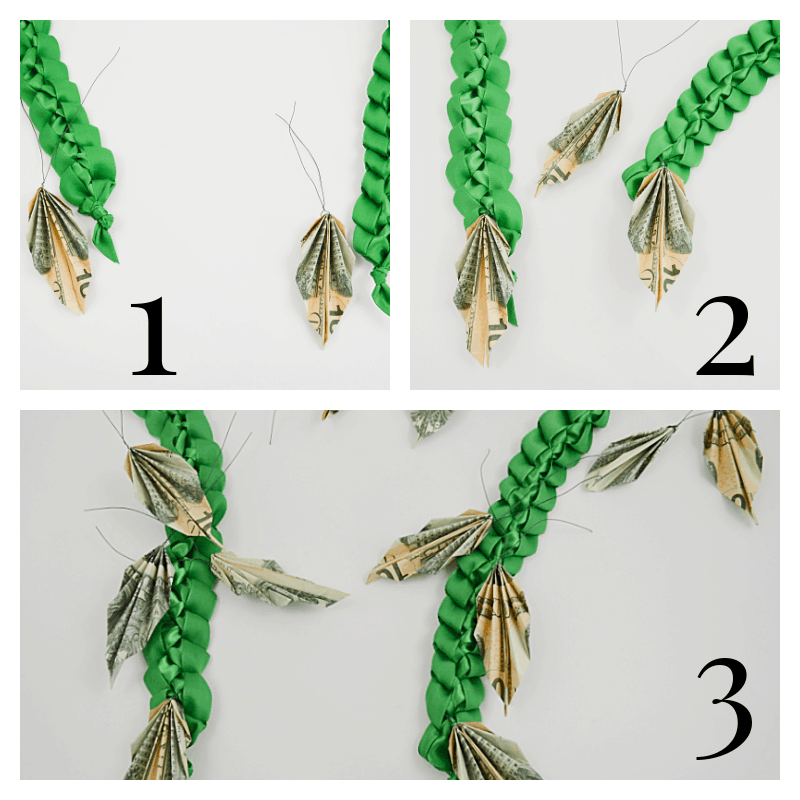
- Start with the excess ends of ribbon near the knots. Use ribbon and thread to sew the knot to the back of the ribbon lei. You could also use a sturdy fabric glue.
- If you want to use kukui nuts or wood beads, instead of sewing the knot to the back of the lei, you thread the end of the lei through the kukui nut or bead.
- You may have to untie the knot to thread it through the kukui nut or bead.
- Use the floral wire to attach a money leaf to each end of the lei. Simply weave the wire through the ribbon lei and twist the wires closed in the back of the lei. You may need to trim the floral wire shorter and then bend the ends down.
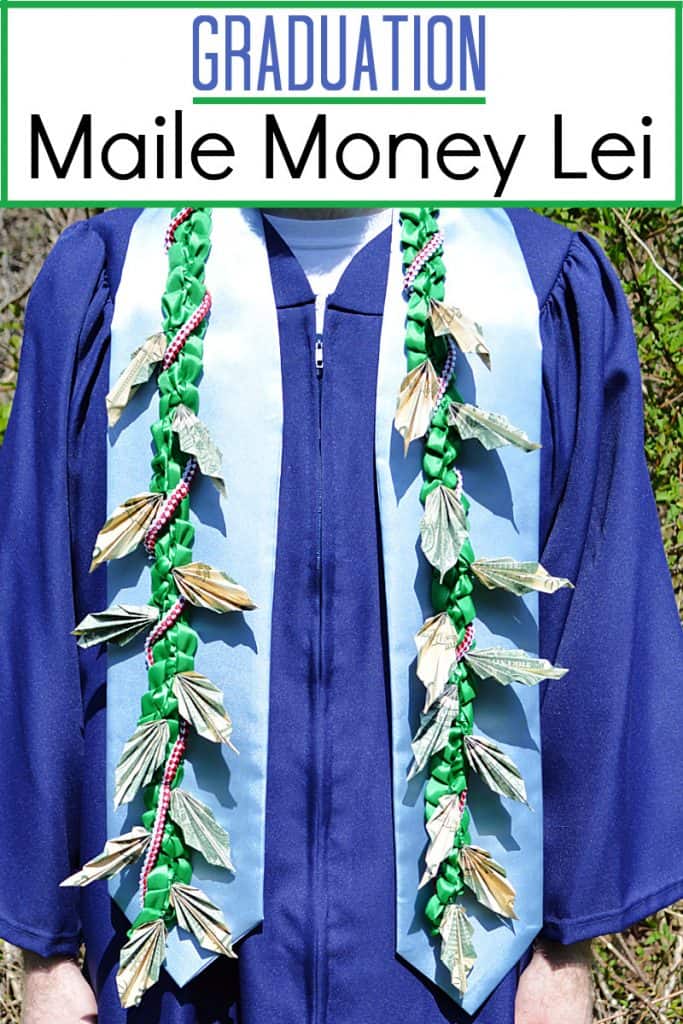
- Lay out the money leaves and plan where you want to place them. Usually the leaves are alternated on the right and left side of the lei. Plan a balanced placement of leaves. Leave space so that no leaves are too close to the graduate’s neck. You don’t want the lei to irritate your graduate during the graduation ceremony or celebrations.
I created a more traditional ribbon lei using 1/8 inch ribbon in the graduate’s school colors to wrap about the maile lei. You don’t have to do this, but it’s an easy way to make this graduation money lei even more special. You simply make a smaller ribbon lei with different colors that are meaningful to the graduate.
When to give the money lei
Be sure to check with your graduate and the school’s graduation ceremony policies. Some graduation ceremonies require leis only be given after the ceremony. Other schools allow a graduation gift lei to be given prior to the ceremony.
More lei Tutorials
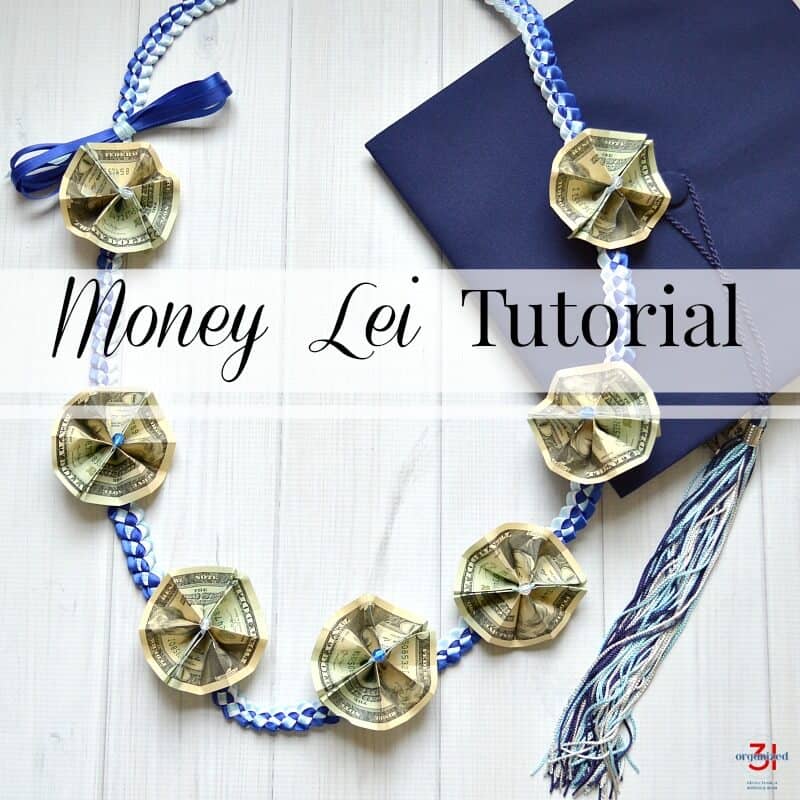
Money Lei made with a ribbon lei – The Hawaiian tradition of giving a money lei for graduation is a memorable gift. This tutorial is easy to do & makes a comfortable to wear graduation lei.
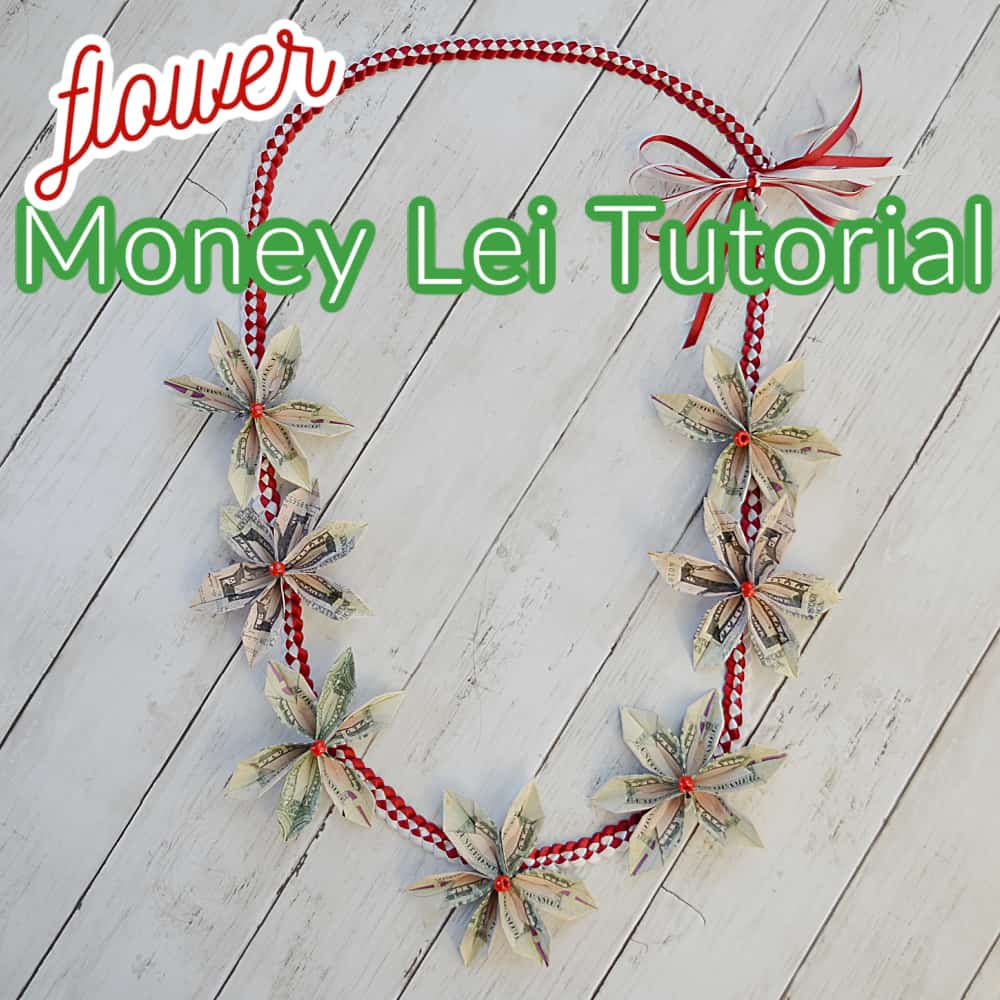
Flower Money Lei Tutorial – A graduation lei made with real money. This easy flower money lei tutorial makes a great gift for any graduate.
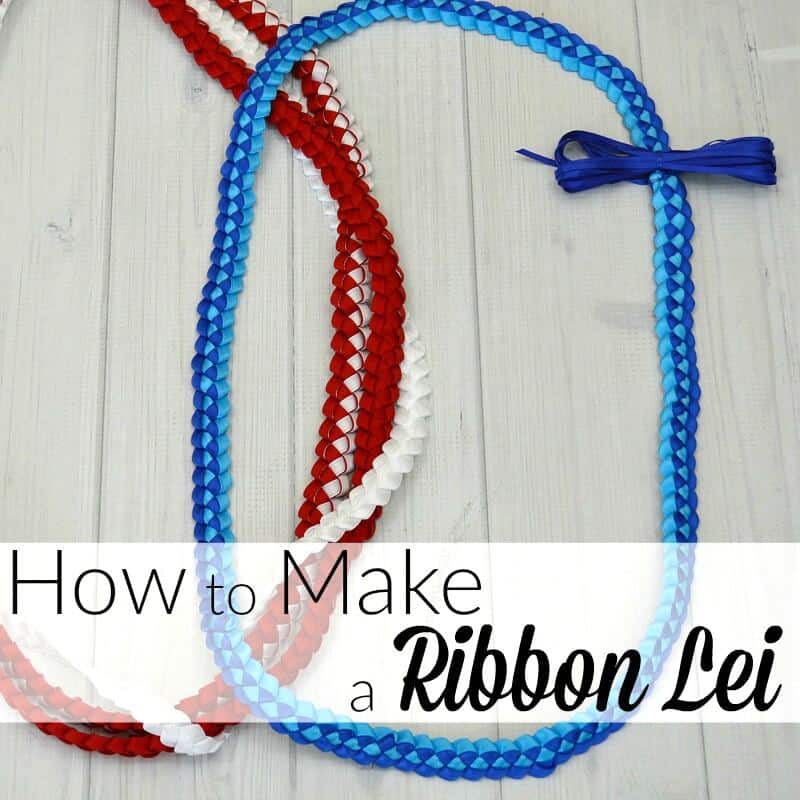
How to Make a Ribbon Lei – Easy-to-follow make tutorial on how to make a ribbon lei in about 30 minutes. Hawaiian ribbon leis are traditional made for graduation in the graduate’s school colors.
How to Make a Candy Lei- Learn how to make a candy lei with this simple tutorial. A candy lei is the perfect gift to celebrate graduation, birthday or any occasion.
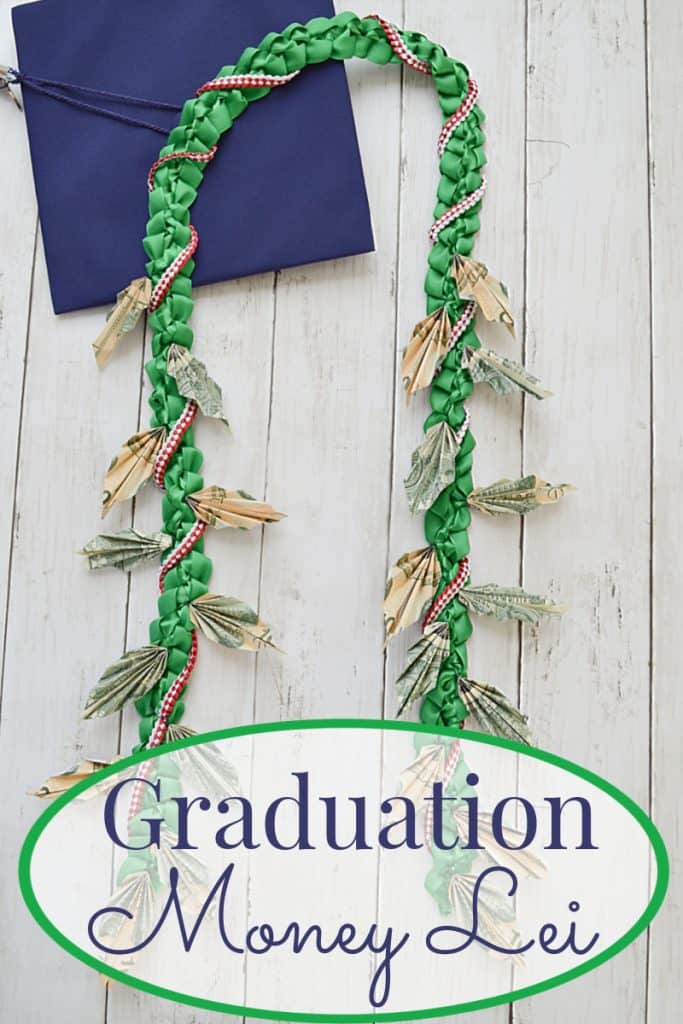
Be sure to pin this money lei maile lei style tutorial so you can find it year after year for every graduation gift you want to give.
See all my favorite graduation crafts, party ideas, printables and recipes in the table below. You can scroll though the table and look for ideas or search for specific ideas with the magnifying glass in the upper right-hand corner (on desktop). Click on the topic and then click through the specific article.

I’m a mom of 3, a veteran, military spouse. I’ve moved into 20+ homes all around the world. My passion is helping busy people make the space and time for what’s really important to them. Learn more about Organized 31 and me.