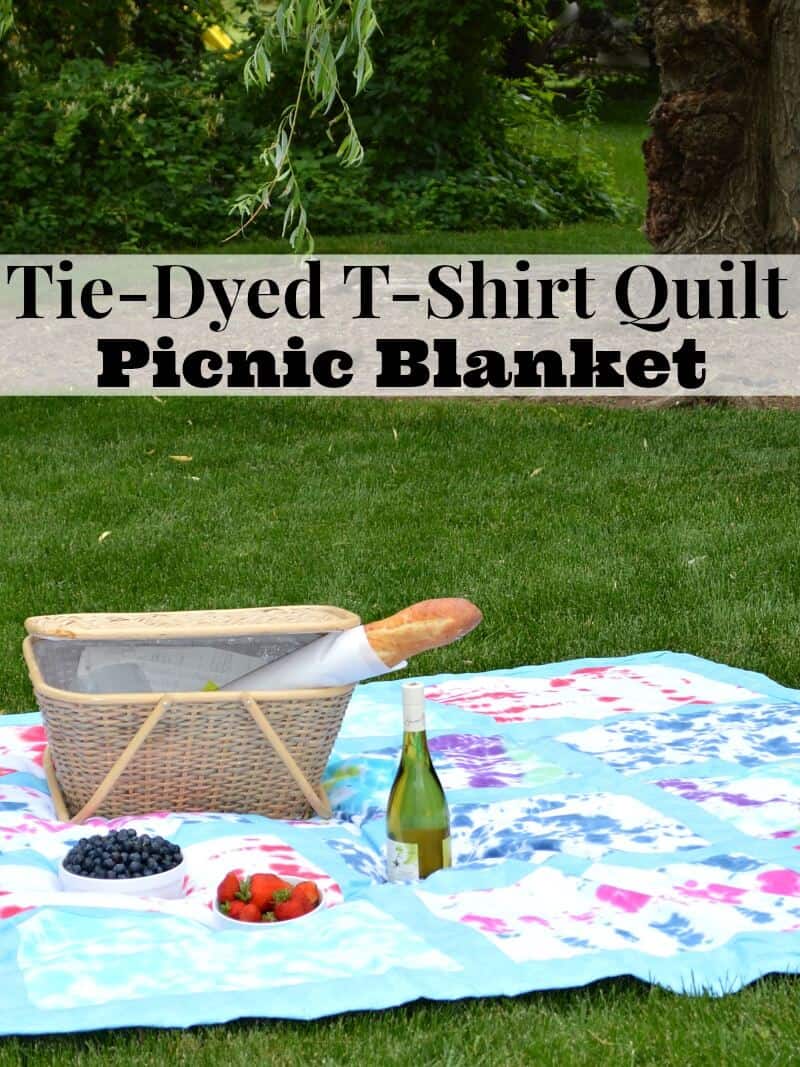
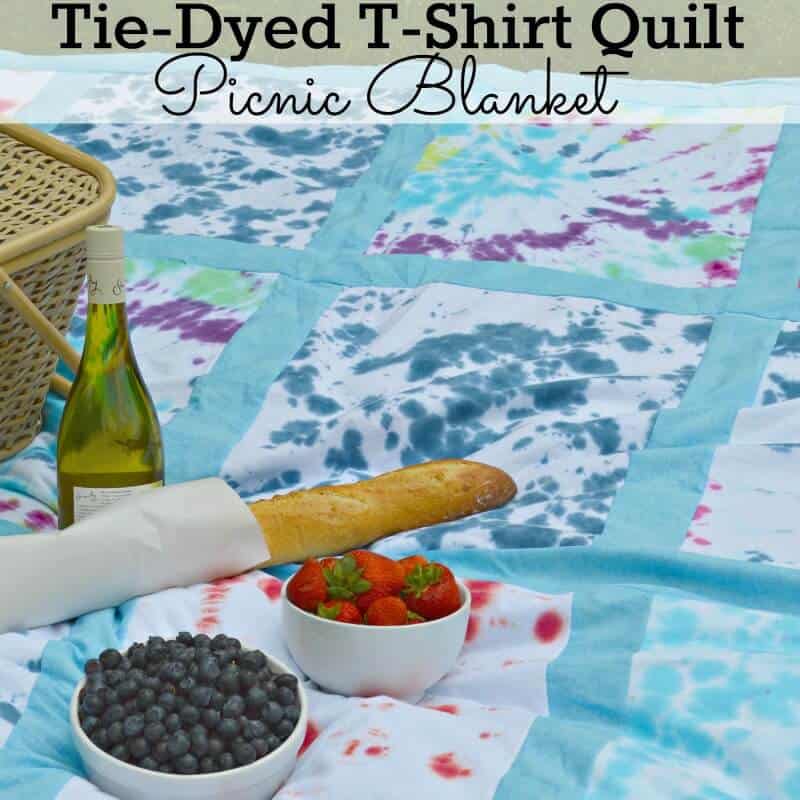
Tie-Dyed T-Shirt Quilt Picnic Blanket
This post may contain affiliate links provided for your convenience. We earn commissions if you shop through the links on this page. I am also an Amazon Associate and earn from qualifying purchases Read my full disclosure policy.
There’s something about summer that just says tie-dye and picnics to me. Since I’ve discovered how fun tie-dyeing can be, I’ve become addicted. I thought I’d combine the two to make a DIY tie-dyed t-shirt quilt picnic blanket that’s perfect for summer picnics and absolutely perfect for a 4th of July picnic or for watching fireworks.
Tie-Dyed T-Shirt Quilt Picnic Blanket
Last summer I tried tie-dying for the first time and I was immediately hooked. I’ve made several different tie-dyed projects since then, but this picnic blanket may be my favorite so far.
If you don’t have the time to make your own t-shirt quilt, you can have one made for you from your own t-shirts. Project Repat makes quilts right here in the USA from the t-shirts you supply.
Supplies
Tie-Dye Kit – thanks to Tulip for my kit – I prefer using a tie-dye kit because it contains everything I need for a project.
Cotton t-shirts – You can use old white t-shirts or purchase new shirts. I recommend using men’s size large or larger. The larger the shirt, the larger the square you can get for your quilt and the less sewing you have to do.
Iron-on Lightweight Interfacing – you need this to stabilize the t-shirt material. Without the interfacing, the t-shirt material will stretch as you sew it, making your quilt wonky, buckled and not square.
Backing fabric or bed sheet – I purchased a soft, inexpensive fabric for my quilt back, but you can also use a flat bed sheet in the size you’d like your finished quilt to be (minus the side seams).
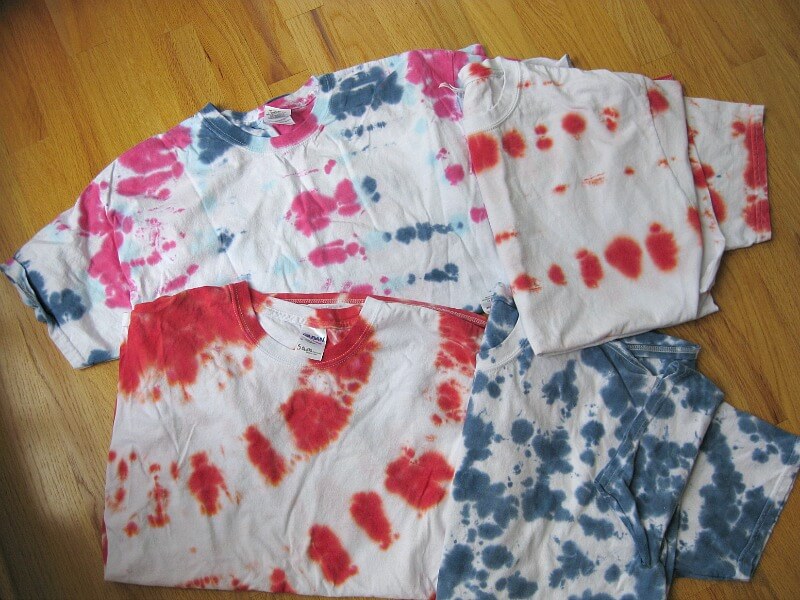
Tie-dye your t-shirts according to the directions in the kit and check out my 10 Tie-Dye Tips from Our First Time Tie-Dyeing. I used 6 t-shirts, but you may need more or less depending on the size of your t-shirts and the desired size of your quilt.

Cut the t-shirt front and backs out. Cut them a bit larger than your desired size. I cut the squares as large as I could so I had less sewing to do. My finished squares came out to 14 1/4 by 19 inches (so the squares before sewing were 15 1/4 by 20 inches).
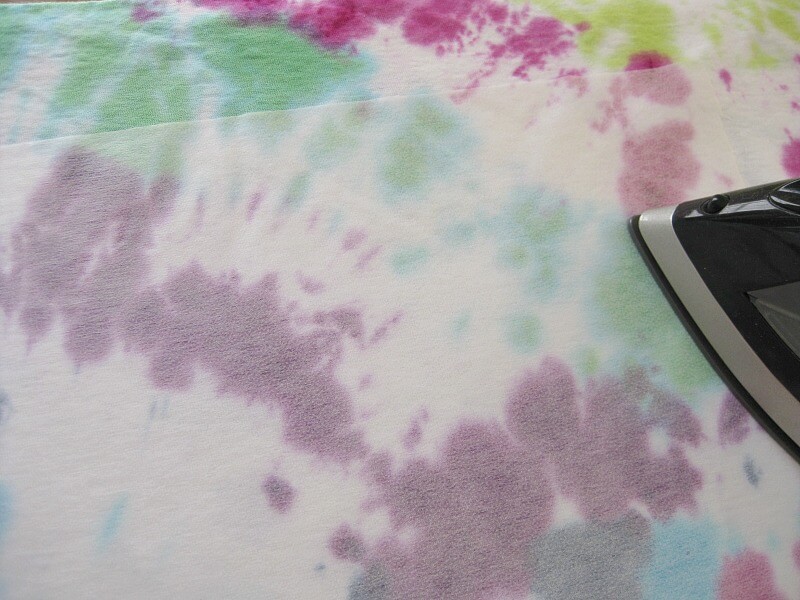
Iron the interfacing to the t-shirt squares following the directions on the package.

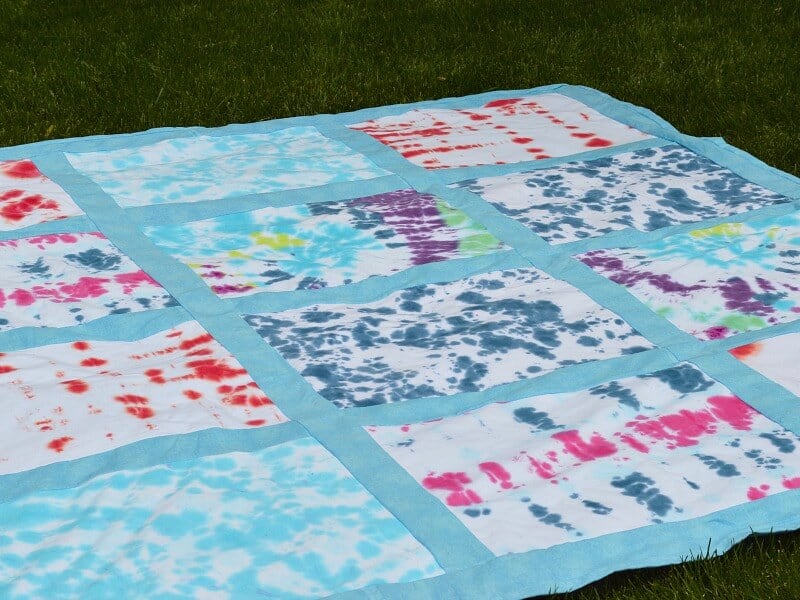
Cut the t-shirt squares to the desired size. I then cut sashing pieces approximately 3 1/2 inches wide (with 1/2 inch seams, the finished width of the sashing piece is 2 1/2 inches). The sashing pieces helps stabilize the t-shirt material and keep it square over time. I sewed the quilt back to the finished top of the quilt and chose not to add any batting to the quilt since I plan to use it as a picnic blanket. If you want to use the t-shirt quilt for warmth, you’d want to add quilt batting.

The tie-dye makes such cheerful and interesting quilt blocks.
The t-shirt material is so soft and flexible, …
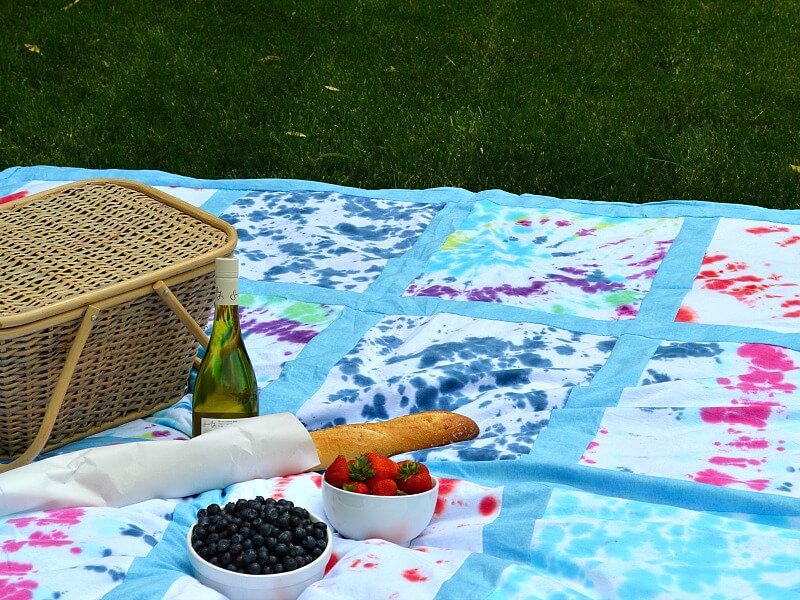
… which makes it perfect for a picnic or beach blanket.

Using red and blue tie-dye makes this picnic blanket perfect for a 4th of July picnic, trip to the beach or watching Independence Day fireworks.
I’m so in love with this tie-dyed t-shirt quilt picnic blanket that I’ve already started planning the next one I want to make. It’s a great project to make with older children and results in a memory making picnic blanket for your family to share for years to come.
More amazing 4th of July ideas from my friends:
- Homemade bug spray, which is much needed for 4th of July celebrations, from Andrea at Homemade for Elle
- The Essential Guide to a Stree-Free 4th of July Picnic from Corinne at Wondermom Wannabe.

I’m a mom of 3, a veteran, military spouse. I’ve moved into 20+ homes all around the world. My passion is helping busy people make the space and time for what’s really important to them. Learn more about Organized 31 and me.

You are the queen of Tie-Dye! I love all of your great projects but I think this one is my very favorite. I love to quilt but, at times, hate the amount of time it takes to complete one. This picnic quilt is so quick and easy and fun! I really want to make one now!
That is cute! I have never fathomed being able to make a quilt… but I think I could actually pull this off! Love the tie-dye as well!
I love this quilt. I want to make one with my kids so we can have a “family” picnic blanket. This one would be tons of fun to make together and is such a nice change from the traditional picnic blanket pattern.
So cute!
Thanks, Heather. It was fun to make and has been perfect for picnics and activities so far this summer.
This is soooooooo beautiful and soooooooo creative!!
Believe me – if I try, There will be a huge mess…..
I really like this quilt = very nice pattern and colors!
Thanks so much, Winnie. I’m so happy with this quilt, but I promise that it wasn’t hard to make (and I’m not a seamstress).
you know, i have like 1 zillion tie dye shirts so I have to totally try this blanket! love how you edged it with the blue – I did do a tshirt quilt without edging and it didn’t look so great but this one looks awesome! so now I know what to do 🙂 Thanks!
The edging covers a multitude of mistakes. 🙂 Have fun making your next tie-dye t-shirt quilt, Millie. I’d love to see a photo when you’re done.
Good to know about the interface backing and the edging. My plan is for a t-shirt memories quilt, using old concert / souvenir shirts. Patch work style I think, as they’ll be different sized squares.
That sounds like a fun keepsake quilt, DeeDee. I’ve been hesitate to try different sizes because I’m nervous about figuring out how to fit all the sizes in. I think it’s a great idea and would love to see how your quilt turns out.
When you sewed the front to back did you have any stitching to hold the 2 pieces together other than the outer edge seams.
Funny you ask that, Cindy. It’s been two years with no stitching (quilting), but the quilt is sitting right now waiting for me to quilt the top and bottom together. I’d recommend it, otherwise the top and bottom twist and stretch in the wash.
I can’t wait to try this! love the colors you used!
Thanks, Wanda. I hope you have as much fun creating your quilt as I did this one!