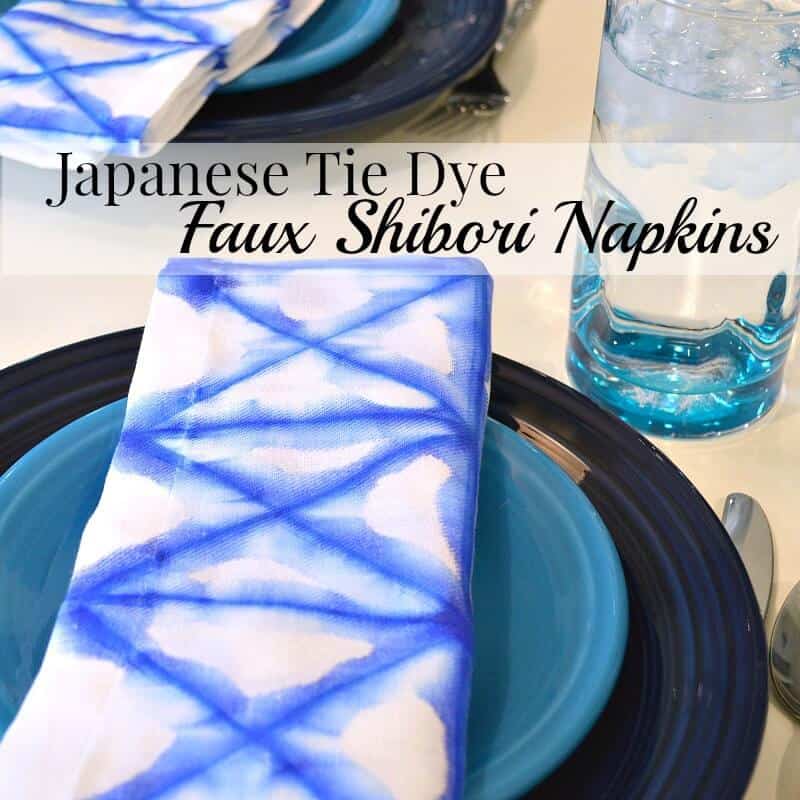
Japanese Tie Dye Shibori Napkins
This post may contain affiliate links provided for your convenience. We earn commissions if you shop through the links on this page. I am also an Amazon Associate and earn from qualifying purchases Read my full disclosure policy.
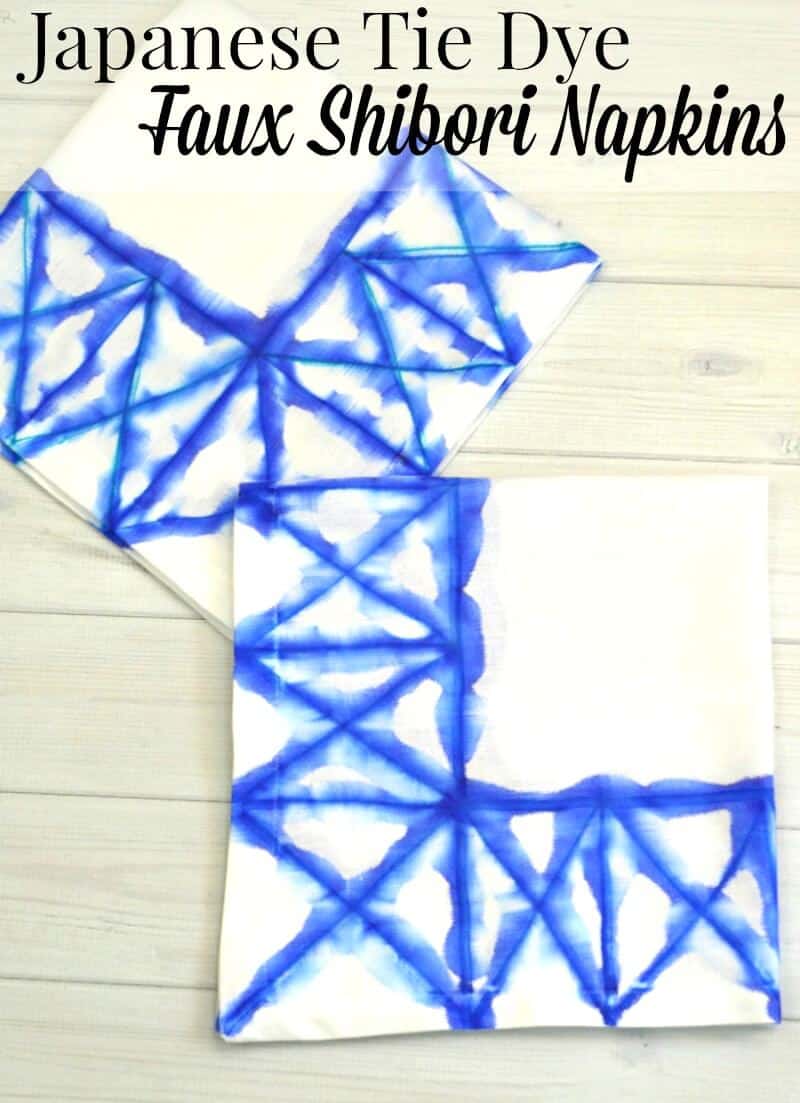
I’ve always loved the combination of blue and white and I especially love it in the kitchen. We renovated our kitchen last year and you won’t be surprised to learn that our new kitchen is white with blue accents. I’d been looking for the perfect blue and white napkins for our kitchen table, but hadn’t been able to find what I wanted. I knew I wanted the look of blue and white Japanese tie dye shibori fabric. Since I couldn’t’ find what I wanted, I decided to make my own and I couldn’t be happier with the way these Japanese Tie Dye Shibori napkins turned out.
I adore the clean fresh look of white and blue in the kitchen and dinning room and, well, every room of the house. I also find tie dyed patterns so intriguing. The combination of white and blue and tie dye makes me over-the-moon happy.
Japanese Tie Dye Shibori Napkins
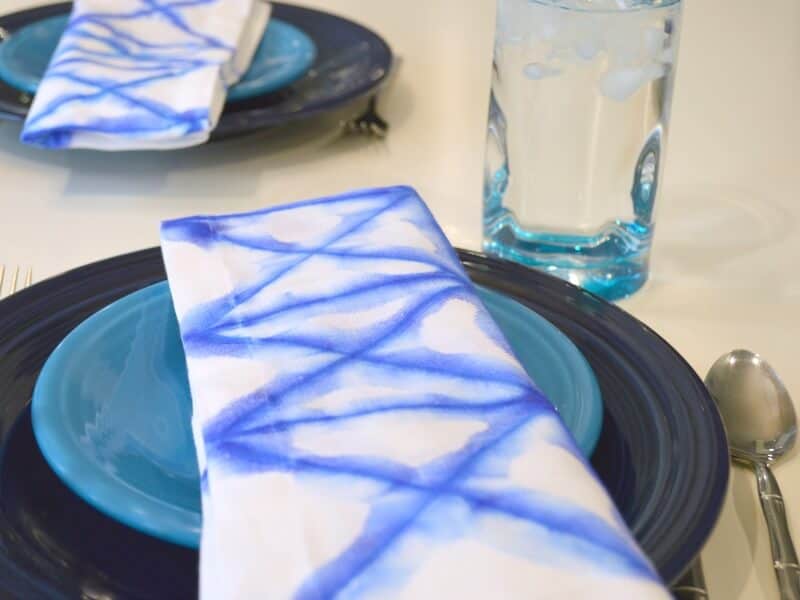
I grew up in Hawai’i where there is a strong Japanese influence and we were stationed in Japan for two years. I fell in love with the simplicity of Japanese design and in particular Japanese tie dye shibori designs. Look at how lovely my blue and white napkins look with my blue and peacock Fiesta dinnerware.
Japanese Tie Dye Shibori
I recently stumbled upon a tutorial for making your own faux shibori tie dye using a permanent marker. I’ve done tie dye projects before, was fascinated with this new (and I think much easier) tie dye technique.
Supplies
Permanent Marker with Chisel tip
Rubbing Alcohol
Paint Brush
Ruler
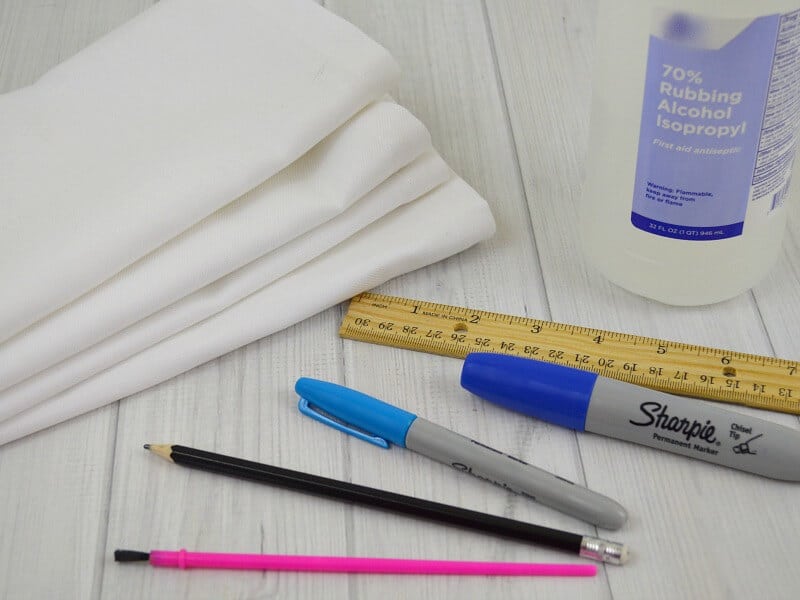
Vinyl Table Cloth, Cardboard or Towel (that you don’t mind getting stained)

I wanted to make a border design and not tie dye the entire napkin. I measured and marked off a 4 inch border around my napkin. I then measured five approximately 4 inch squares across each edge and made an “X” in each box.
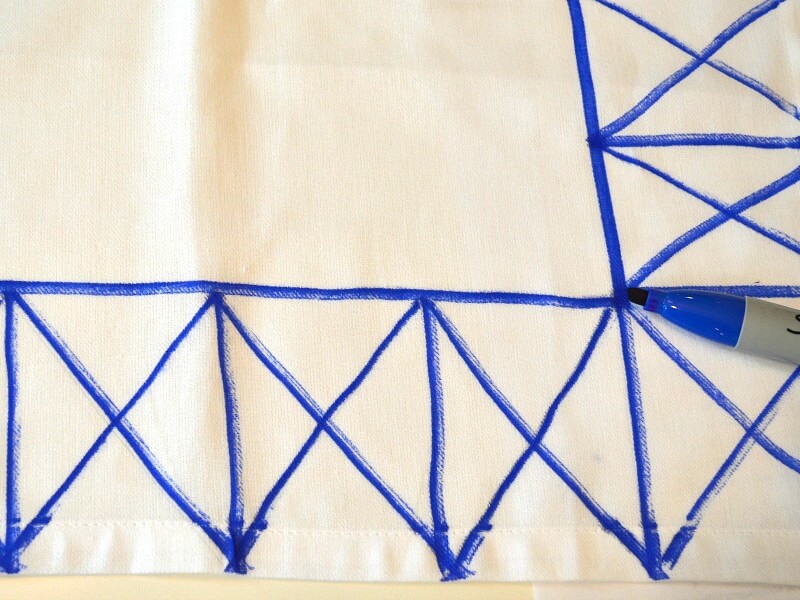
Be sure to put a piece of cardboard under the edge of the napkin because the marker will bleed through the napkin and mark your surface underneath the napkin. I used the wide edge of the marker to make the inner line of the border and the thin edge of the marker to make the rest of the lines. The lines don’t have to be perfect since you’ll be blurring them in the next step.
For this next step, be sure to cover your work surface with a vinyl table cloth or a thick towel that you don’t mind getting stained. The marker ink will bleed through napkin and stain your work surface.

I found it easiest to pour the rubbing alcohol into a bowl. Then I used the paint brush to drip and brush the rubbing alcohol along the blue marker lines. You’ll get the hang of it after a couple of squares, but it’s really more dripping the rubbing alcohol than brushing it.
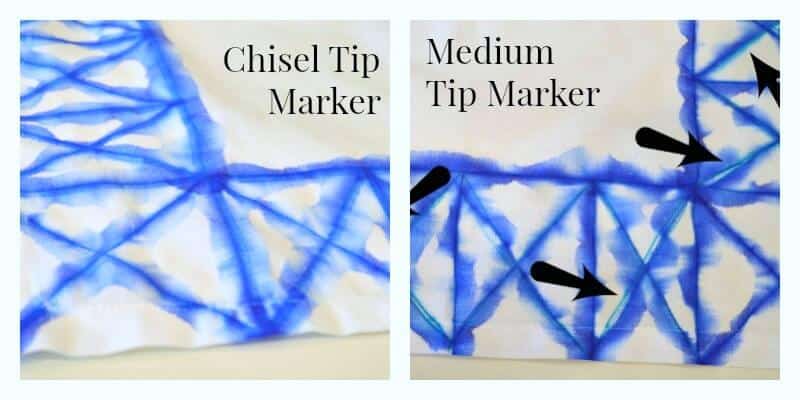
I had planned on using both a cobalt blue and a turquoise marker to make my designs. I only had a medium tip turquoise marker and thought it couldn’t really make a difference whether it’s a chisel or thinner tipped marker. Guess what? It did make a difference. The thinner tipped turquoise marker didn’t bleed and spread when I added the rubbing alcohol the way it did with the chisel tip marker lines. To recover my not-spreading-n0t-looking-like-tie-dye turquoise lines, I drew over them with the cobalt blue chisel tip marker and used the rubbing alcohol to blur those lines. I’m actually okay with the way the hints of turquoise look with the cobalt blue, but next time I’ll make sure I have a chisel tipped turquoise maker.
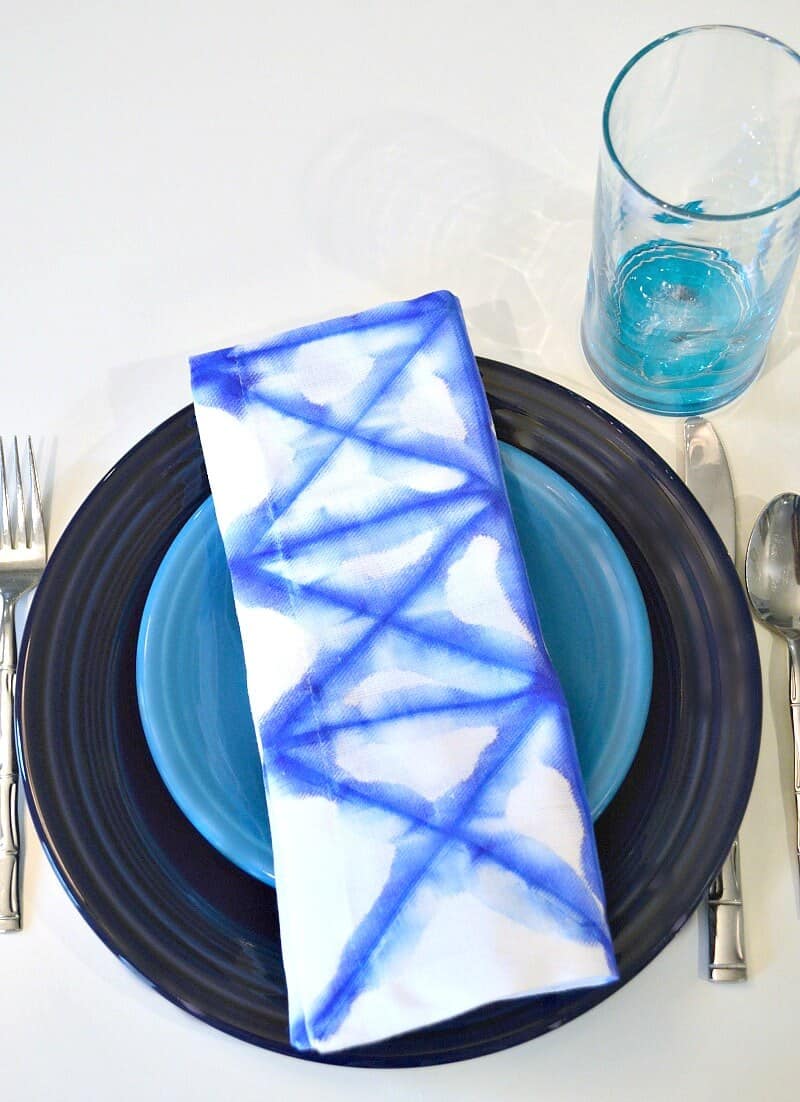
I’m so happy with the way my Japanese tie dye shibori napkins turned out. They’re exactly what I was envisioning.
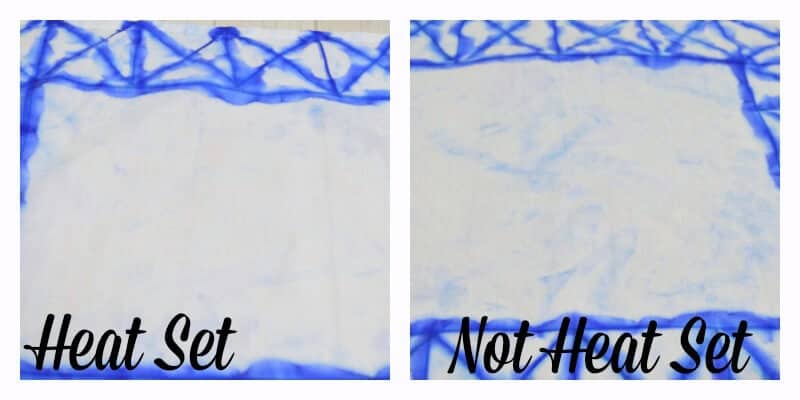
I took time to wash the napkins so I could let you know how they hold up after washing. I heat-set one napkin and not the other. You can see that the napkin that was not heat-set had a lot more bleeding of the ink. It still looks gorgeous and the bleeding actually makes the fabric look more handmade. But since I’d been going for a white center to the napkin with the pattern on the edge, I prefer the heat-set napkin that has minimal ink bleeding. I recommend heat-setting and next time I use this technique, I’ll do a careful job of heat-setting the ink before I wash the dyed fabric.
This permanent marker tie dye technique is so easy to do. Be ready to see many more faux shibori tie dye projects around here in the future. I maybe faux tie dyeing everything in my home now.
Update – I was asked if I prewashed the napkins and whether I used fabric softener. I did prewash the napkins and I did not use fabric softener.
Learn more about Shibori Tie Dye from FaveCrafts.
More Tie Dye Ideas for the Home:

I’m a mom of 3, a veteran, military spouse. I’ve moved into 20+ homes all around the world. My passion is helping busy people make the space and time for what’s really important to them. Learn more about Organized 31 and me.


Susan, I really love these napkins. I do think I like the added turquoise to them, it just give a certain pop to the napkins. I really do think I need to make some of these. I am a fan of blue and white also, but I can see these in any color. Great idea.