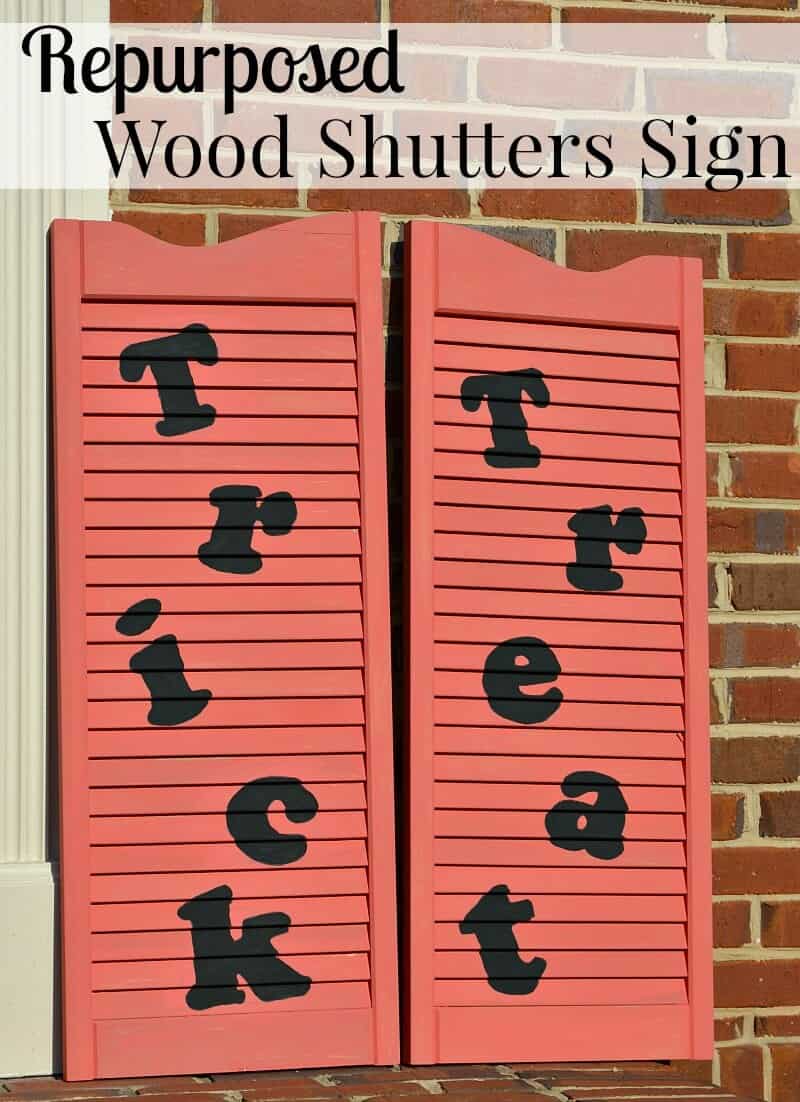
Repurposed Wood Shutters Sign for Halloween
This post may contain affiliate links provided for your convenience. We earn commissions if you shop through the links on this page. I am also an Amazon Associate and earn from qualifying purchases Read my full disclosure policy.
These Halloween shutters are a two-for-one decoration. I am just as in love with these repurposed shutters sign for Halloween, maybe even more so since it’s now a two-for-one holiday decoration.
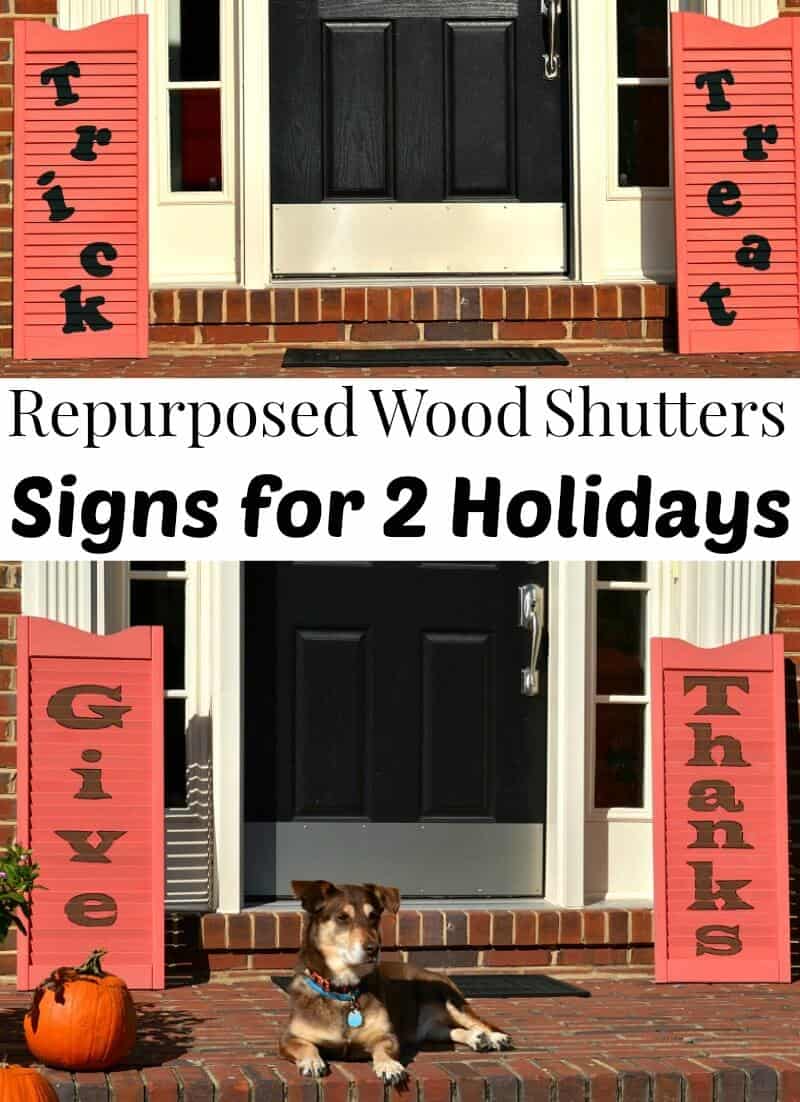
You may remember that last year I found free wooden shutters on Freecycle and created repurposed shutters sign for Thanksgiving. I loved them so much, that I decided to make it work for more than one holiday. Since there are two sides to this outdoor Halloween decoration wooden shutters, why not take advantage of both sides?
I love how these DIY Halloween decorations make a large impact in a charmingly rustic style. They’re exactly what my front porch needed.

How to Make Halloween Shutters
Supplies
- Wood Shutters
- Orange Paint
- Sponge Paint Brush
- Computer Paper
- Pencil
- Black Paint Pen or Permanent Marker
Step One
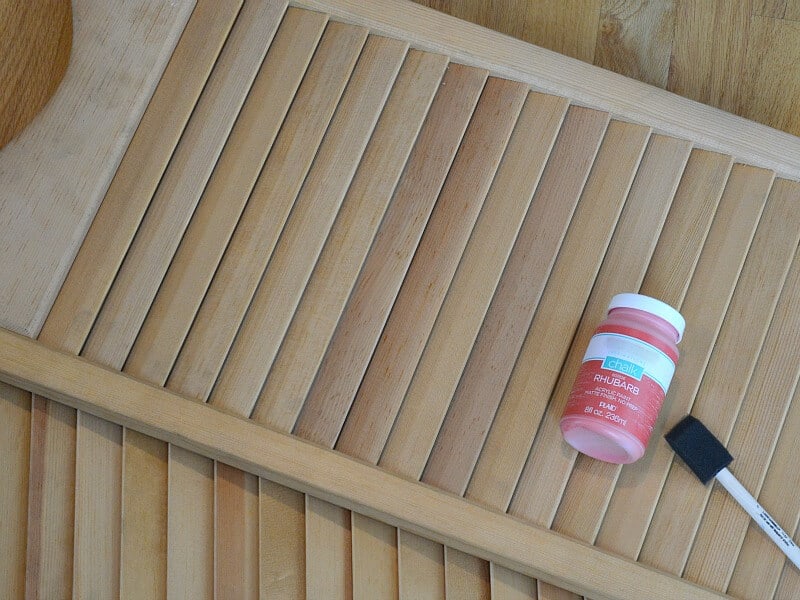
It all started with these salon style doors I got for free from Freecycle. You can use wooden shutters or doors like these. You can also find them at thrift stores. The only cost I had in making these Halloween shutters was the rhubarb chalk paint that I picked up for about $5.
Step Two
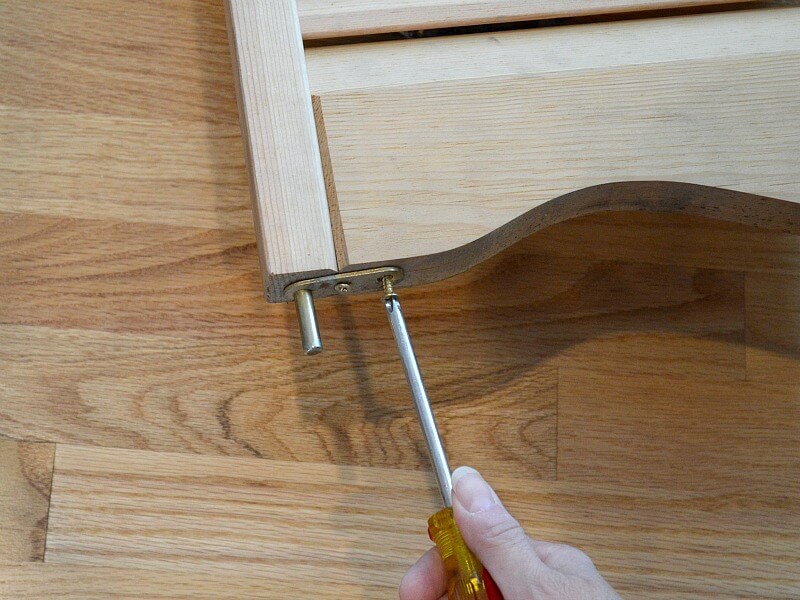
I first removed the hardware, which only took about two minutes.
Step Three
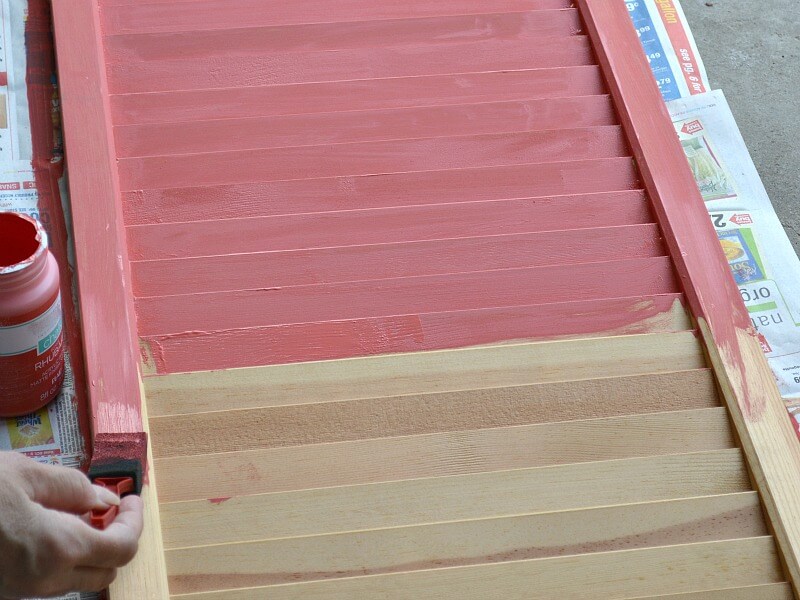
Then I painted two coats of chalk paint on the shutters. It’s the perfect paint for this more rustic looking sign. And even better, I didn’t have to do any prep work before I started painting. You can put in the extra work to distress the sign but I liked the simple look without distressing.
Step Four
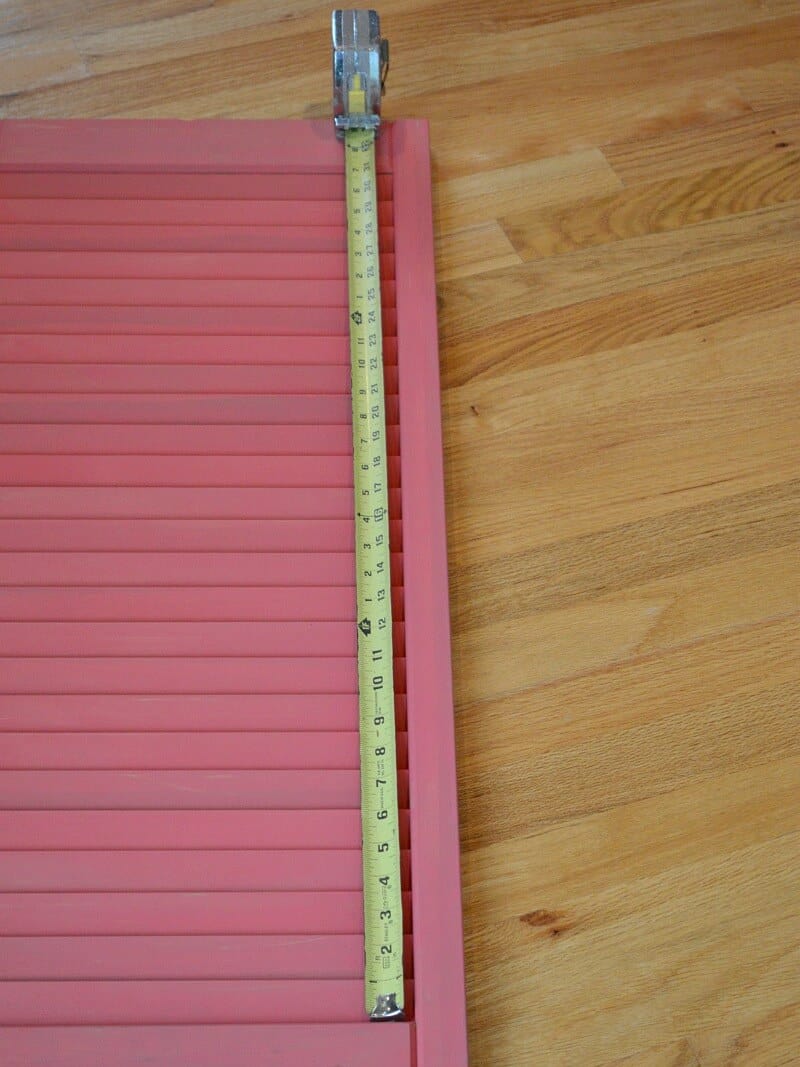
Next I measured the louvered area to determine the size of my sign and font.
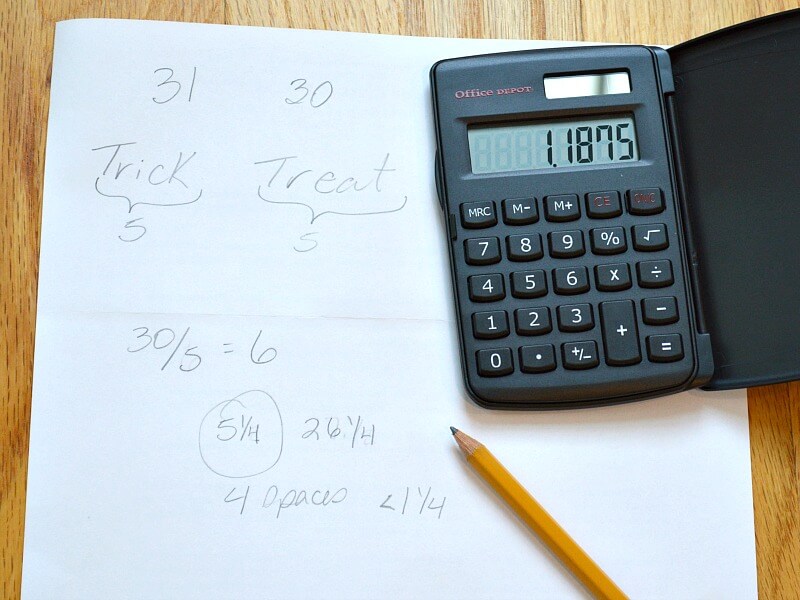
I did some figuring and determined the height of the letters and the space between each letter.
Step Five
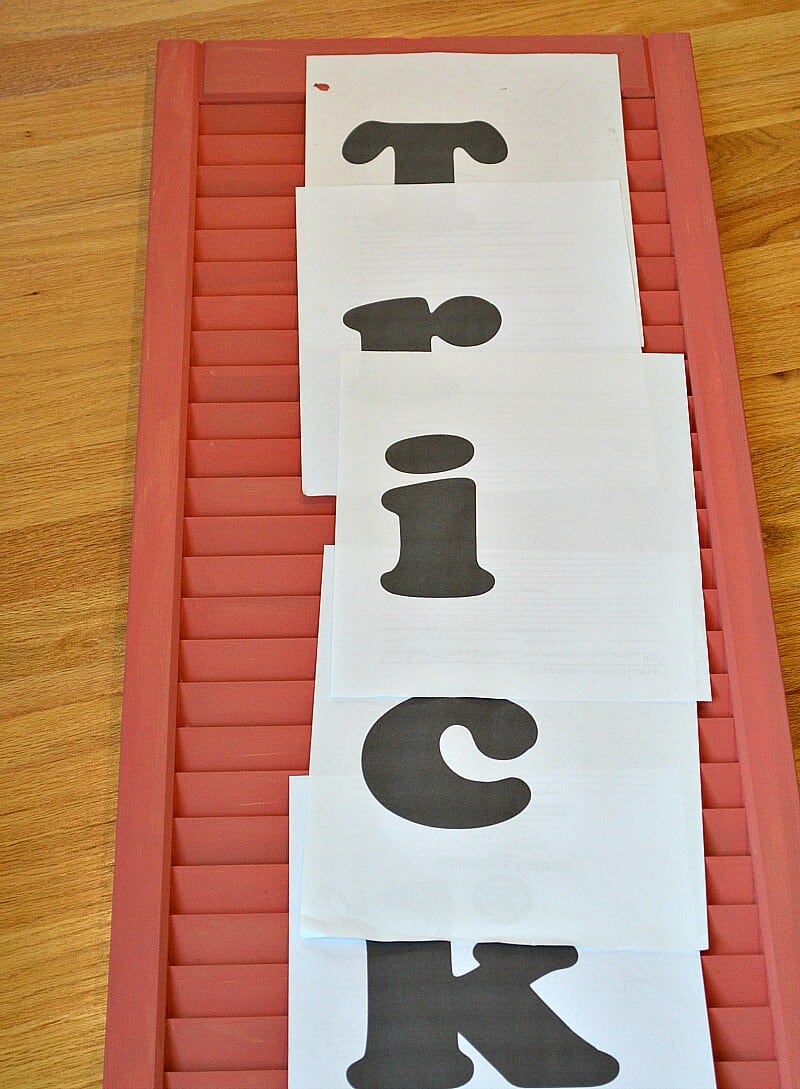
I chose a bold font in Word and printed out the letters. Be sure to lay the letters out with the curved accent part of the shutters on top or your sign won’t stand up straight (ask me how I know) .
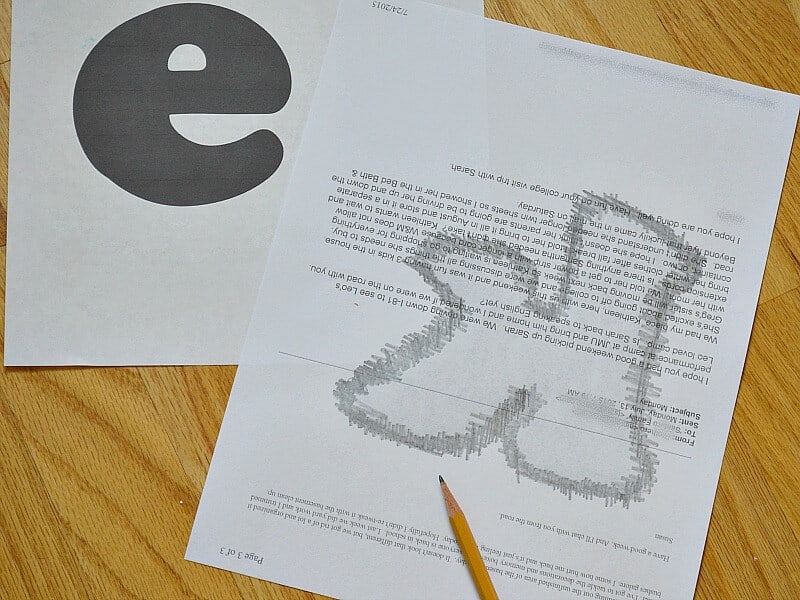
Print each letter out and shade the outline of the letters on the backside of the paper with a pencil so you can transfer the letters to the sign. This is the same technique I used for the DIY Pool Storage I created.
Step Six
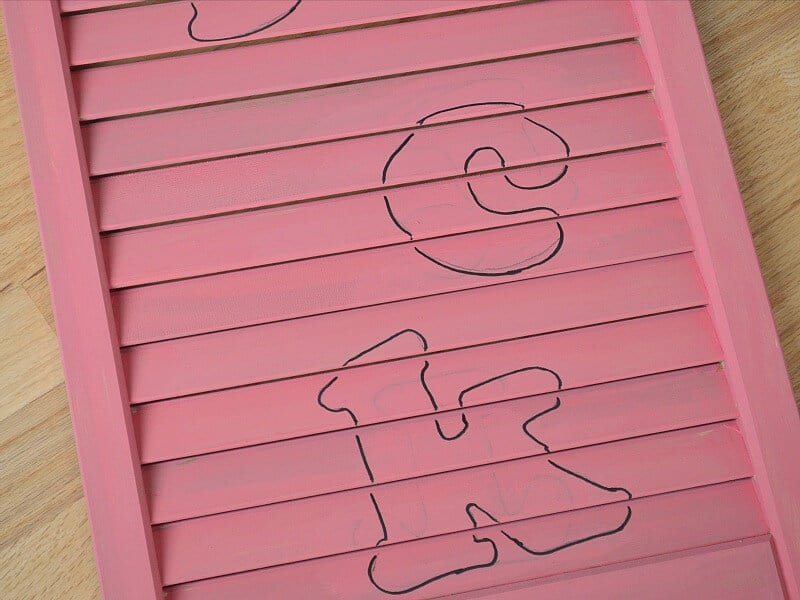
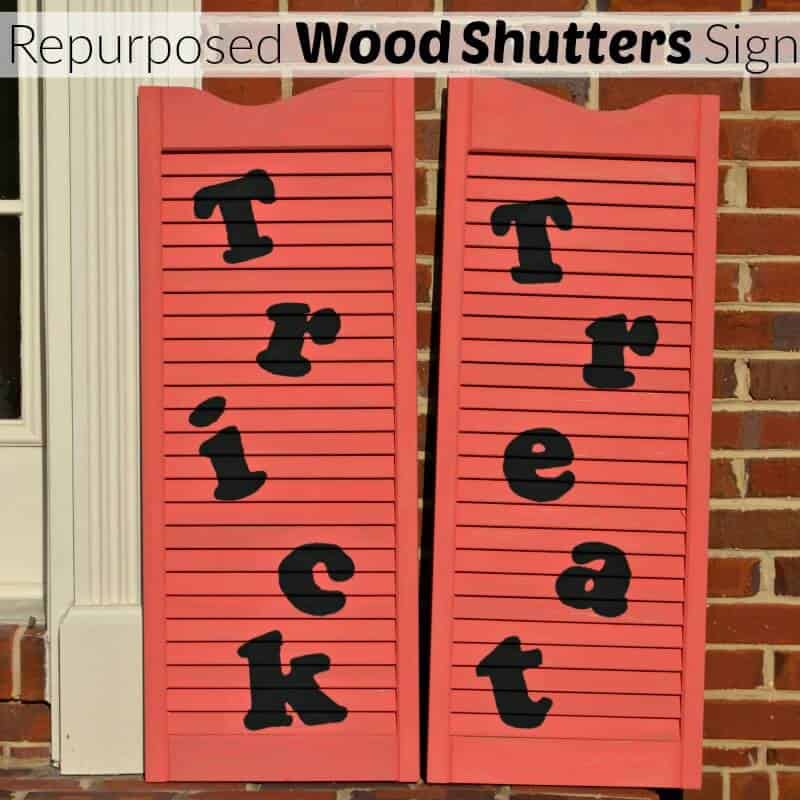
I laid each letter onto the sign and traced over the outline of the letter so that it transferred to the sign. I then outlined each letter with a paint pen and painted the letter with craft paint.

I love the way the sign looks next to the black door. I’m also happy with the scale of the shutters on our wide-open front porch.
I know you’ll now be on the look out for your own repurposed wood shutters so you, too, can make charming Halloween shutters. Be sure to flip the shutters over and make a Repurposed Wood Shutters Sign for Thanksgiving. It’s two signs in one.
For more Halloween decorations and crafts check out these Halloween Ideas and Recipes.
Pin for inspiration later for outdoor Halloween decorations.

I’m a mom of 3, a veteran, military spouse. I’ve moved into 20+ homes all around the world. My passion is helping busy people make the space and time for what’s really important to them. Learn more about Organized 31 and me.


Susan, I love these! You are so lucky that you found these for free. What a great find. I am super glad you shared the directions on how to figure out how to size the letters. Math is not my strong point!
These are super cute! I love how they turned out! I am craft challenged, so I appreciate your instructions… I think I could actually make this work 🙂
Andrea, this is a great beginner’s craft project with a lot of impact (read – worth the effort). Give it a try and have fun.
These are great! I love that they’re reversible.
Thanks, Dianna. I’m so happy with how they turned out.