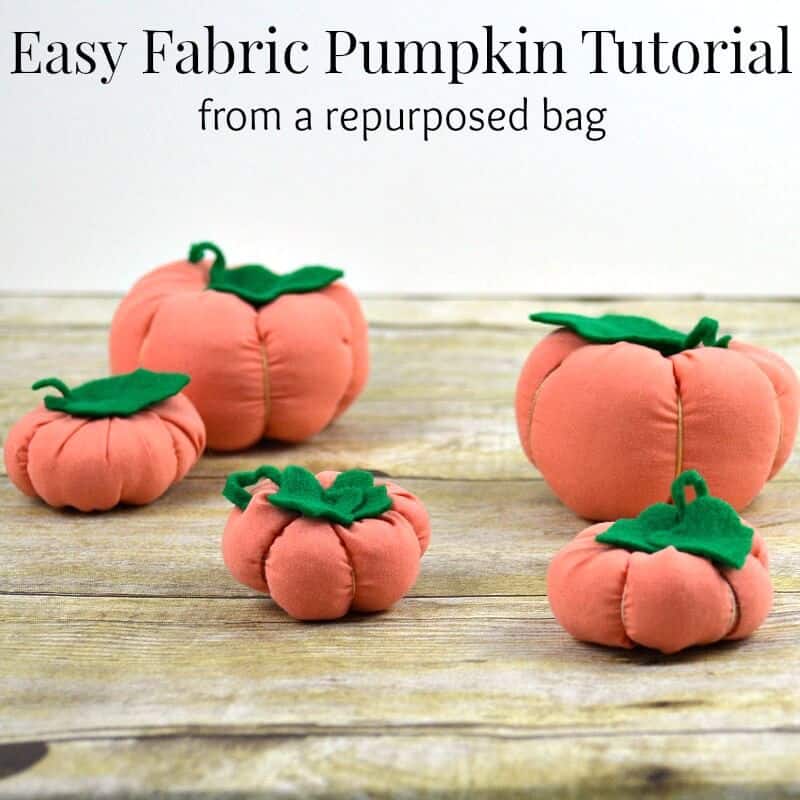
Easy DIY Fabric Pumpkin Tutorial
This post may contain affiliate links provided for your convenience. We earn commissions if you shop through the links on this page. I am also an Amazon Associate and earn from qualifying purchases Read my full disclosure policy.

With just beginner level sewing skills, you can make these adorable DIY fabric pumpkins. They make great gifts for family, neighbors and coworkers. If you really don’t want to use a sewing machine, you can use this simple pumpkin pattern with fabric glue.
If you’re a friend of Organized 31, then it comes as no surprise that everything that is about to be thrown away in my home gets a second look before it goes into the trash or recycle can. I absolutely can’t stand to waste anything. Anything.
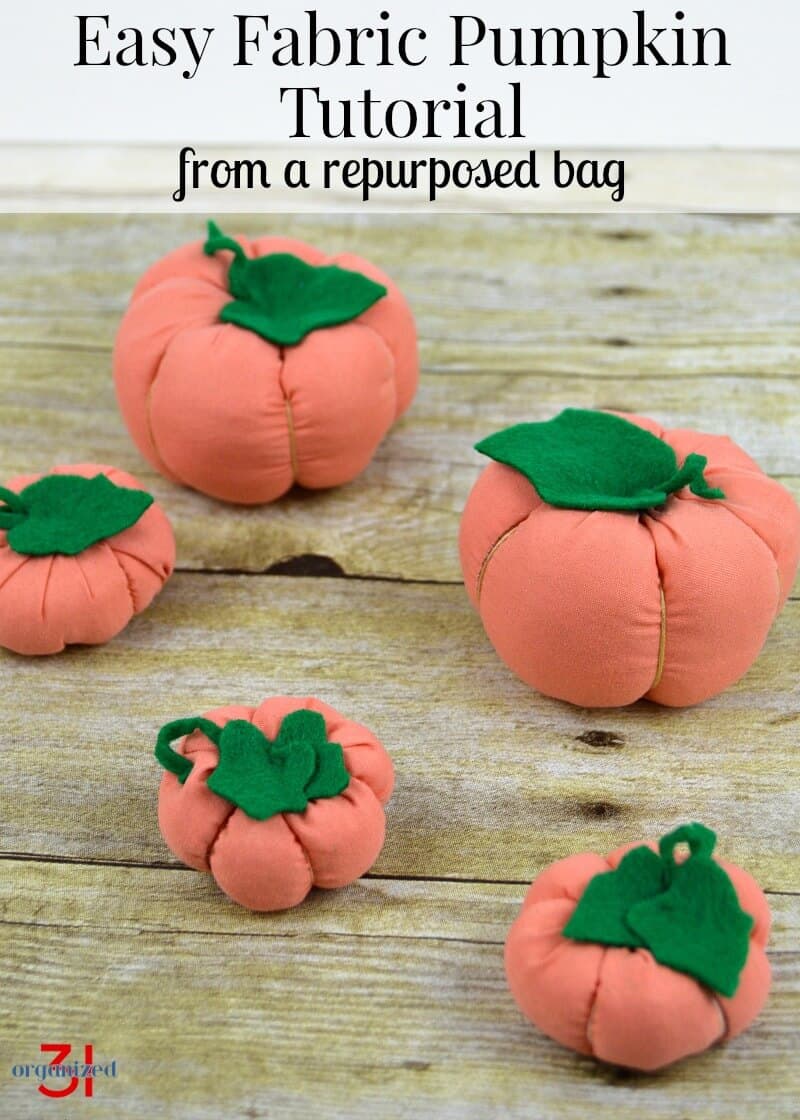
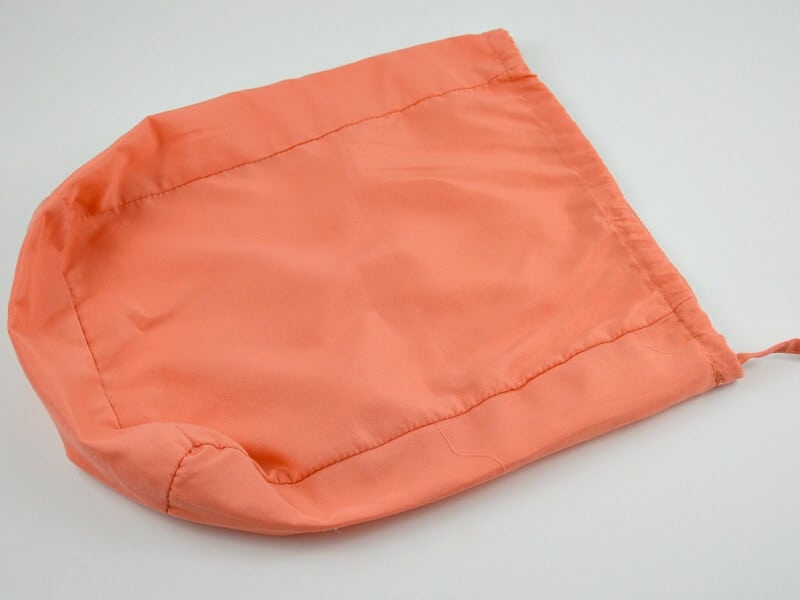
As I’ve been planning Halloween college care packages for my children, it hit me – use the castoff orange bag from a sheet set to make DIY fabric pumpkins. I’m thrilled with the way these pumpkins turned out and I made five of them in less than a half an hour. Really.
These fabric pumpkins are ad-dorable! They’re also perfect for sending in a college care package because they’re unbreakable and lightweight. I’m addicted to making these pumpkins now.
DIY Fabric Pumpkin Tutorial
While I chose to use repurposed fabric, you could also find discount fabric remnants to use. An d be sure to check out my simple tutorial on how to fold fabric for storage.
Supplies
- 1/8 yard fabric or larger for larger pumpkins
My fabric pumpkin all started with this bag that a sheet set came in. You can use any fabric, new or upcycled. You can also don’t need a lot of fabric. Smaller pieces of fabric work perfectly to make smaller pumpkins. So the perfect opportunity to use up those scraps you’ve been holding onto.
- You can choose any fabric that you’d like
- Chenille pumpkins can be made from repurposed or purchased chenille fabric.
- DIY Velvet Pumpkins can be made with this simple tutorial. You can even make large velvet pumpkins by simply increasing the measurements and creating a larger pattern.
- Buffalo check pumpkins look chic and are easily made from upcycled clothing, similar to these grunge pumpkins made from old flannel shirts.
- Scraps of wide burlap ribbon or burlap fabric can be used to make a burlap pumpkin.
- You can use this tutorial for a felt pumpkin pattern. Thicker felt will be a more difficult to sew and manipulate, but will still work.
- Looking to create a higher end decoration? A linen pumpkins can be made from linen fabric.
- Stuffing
- Complimentary colored embroidery thread
- Green Felt
- Used for pumpkin leaves
- You can use green fabric, but choose thicker fabric like felt to give body to the leaves.
- Used for a pumpkin vine.
- You can also use green pipe cleaners or cording.
- Used for pumpkin leaves
- Small stick, dowel rod or wine cork to create a pumpkin stem (optional)
Fabric Pumpkin Tutorial Steps
The size of the fabric is not critical. Smaller fabric will make smaller pumpkins. At a minimum, thought, I’d recommend that the piece of fabric be at least 3 inches by 7 inches to make it easier to sew and manipulate.
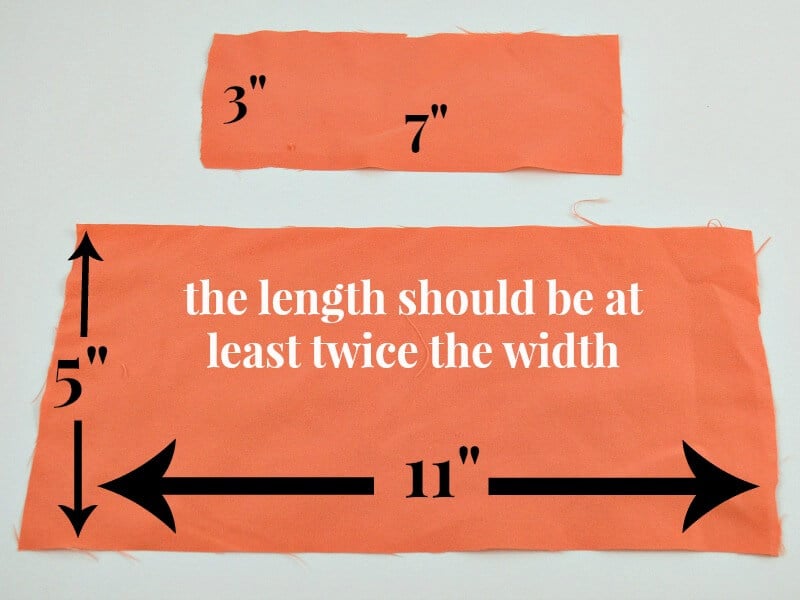
You want to cut the fabric with the length at least twice the width. I added a bit more to the length to make my pumpkins fatter rather than taller.
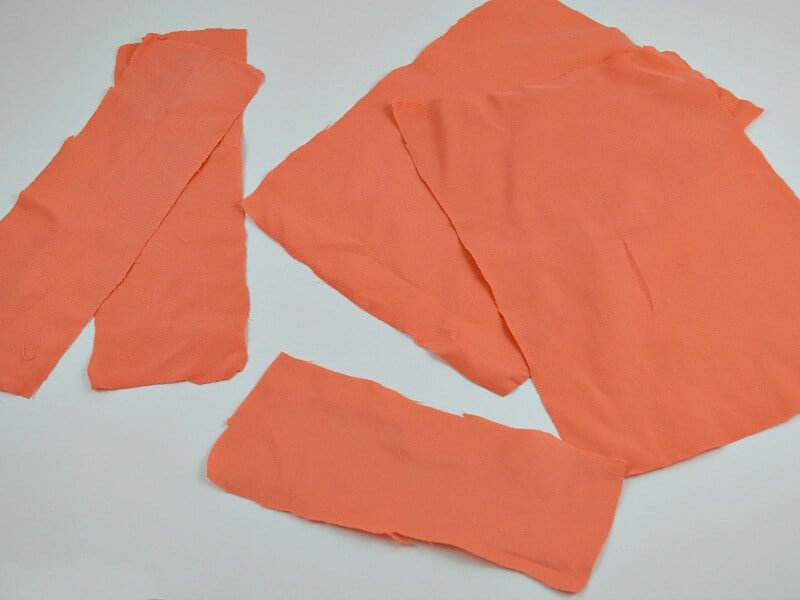
I was able to get five pieces of fabric to make pumpkins from one sheet set bag. Two of the 5″ x 11″ and three of the 3″x 7″ sizes.
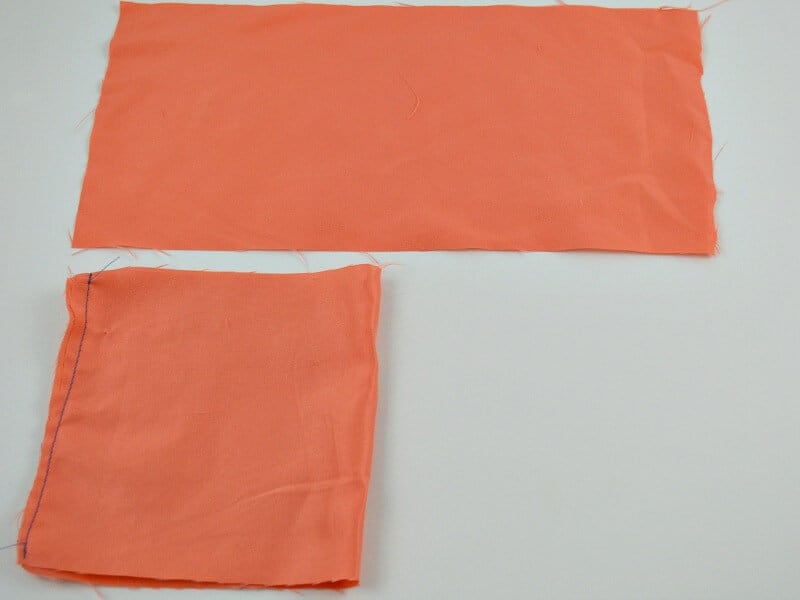
Fold the fabric in half and sew the short sides together by machine with a 1/4″ seam. You could choose to use strong fabric glue or to sew it by hand.
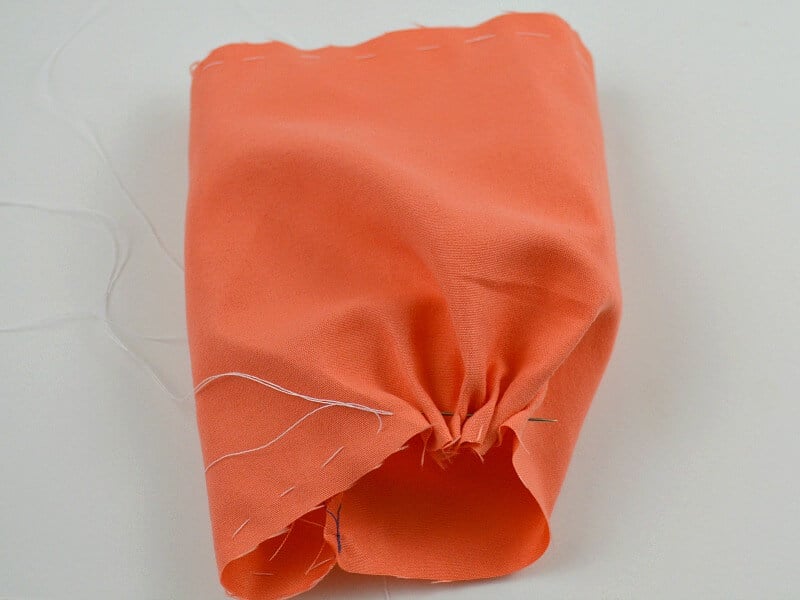
Using a running stitch, go around one end of the fabric tube. Pull the thread to draw the end of the tube closed tightly. Turn the pumpkin right-side out.
Stuff the pumpkin with fiber fill stuffing. Use a running stitch to close the second opening tightly just like with the first opening.
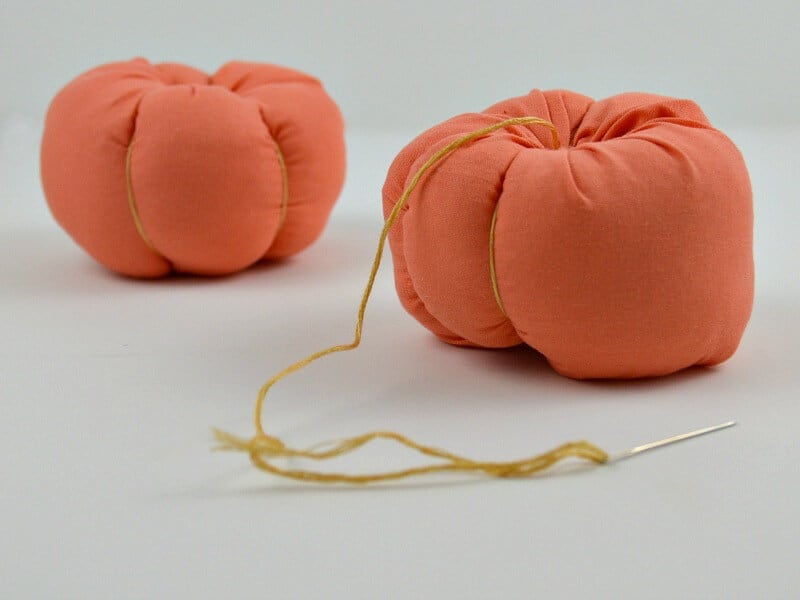
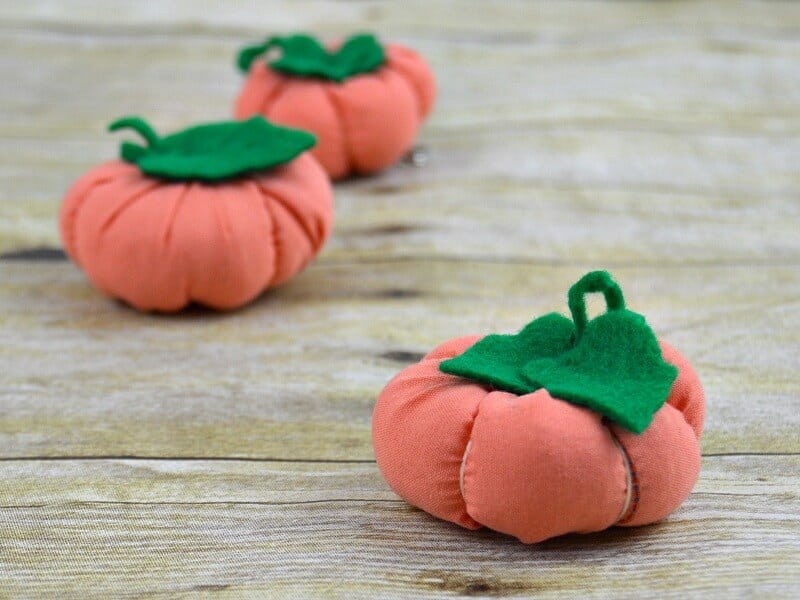
Use coordinating embroidery floss to make the pumpkin shape. Pull the floss tight to make the pumpkin sections. Since these are smaller pumpkins, I could just run the thread through the middle of the pumpkins. I divided the pumpkin into two halves with the embroidery floss and then divided each half into three sections, for a total of six sections.
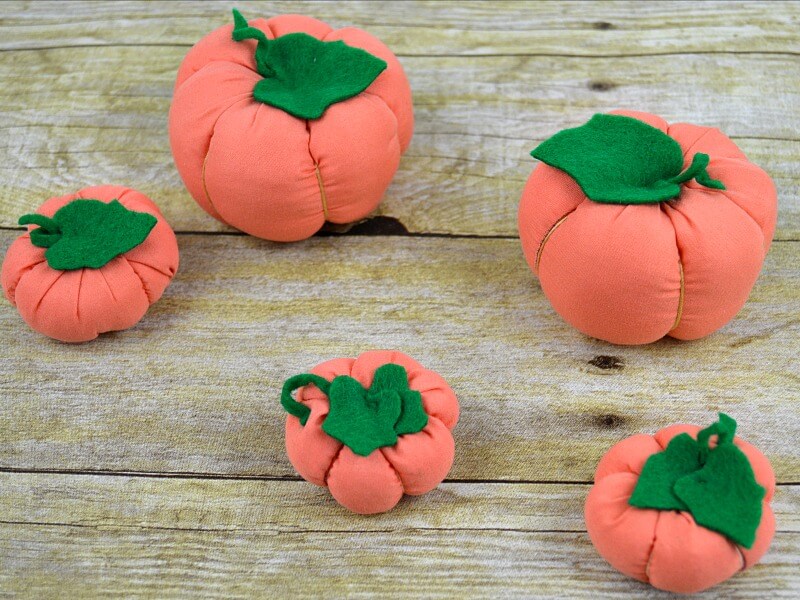
Cut leaves out of green felt. I cut them out freehand. I also cut small strips of felt to make the curly stem. I twisted the stems around a pencil and stretched the felt a bit while wrapping. Then I tacked the stem to the pumpkin to hold the twists in place. Stitch the leaves onto the pumpkin by hand.
I’m already planning on using this fabric pumpkin tutorial to make an entire pumpkin patch from upcycled fabric. Next up are 90’s grunge pumpkins. Intrigued? Stay tuned. I told you that I’m now addicted to making these easy fabric pumpkins.
More Pumpkin Tutorials
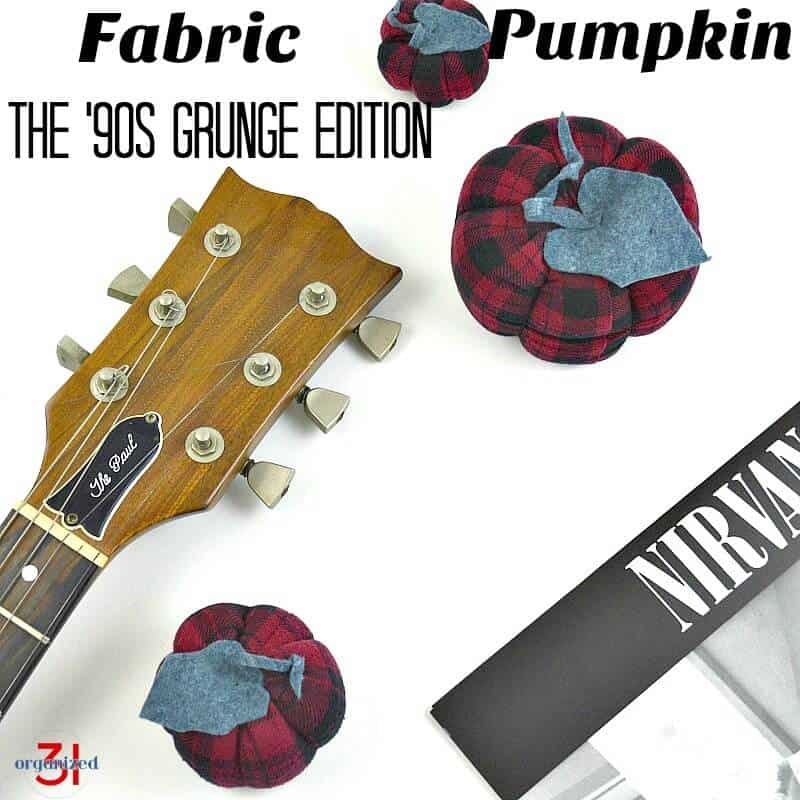
Fabric Pumpkin Tutorial – 90’s Grunge Shirt – Used this same tutorial to make flannel shirt pumpkins. These were a big hit with my teen and 20-something kids (with them actually asking me to make more!).
Soda Bottle Pumpkins – These pumpkins require no sewing skills and only an empty plastic soda bottle and some yarn. They’re a great project for school aged kids or older.

My friends, Handan and Greg at The Navatage Patch, made charming pumpkins from sisal twine. I think these cute pumpkins will be my next pumpkin crafting addiction. Their DIY Sisal Twine Pumpkins tutorial is easy to follow. An arrangement of both fabric pumpkins and twine pumpkins would be over-the-top charming autumn decor.

More Fall Crafts
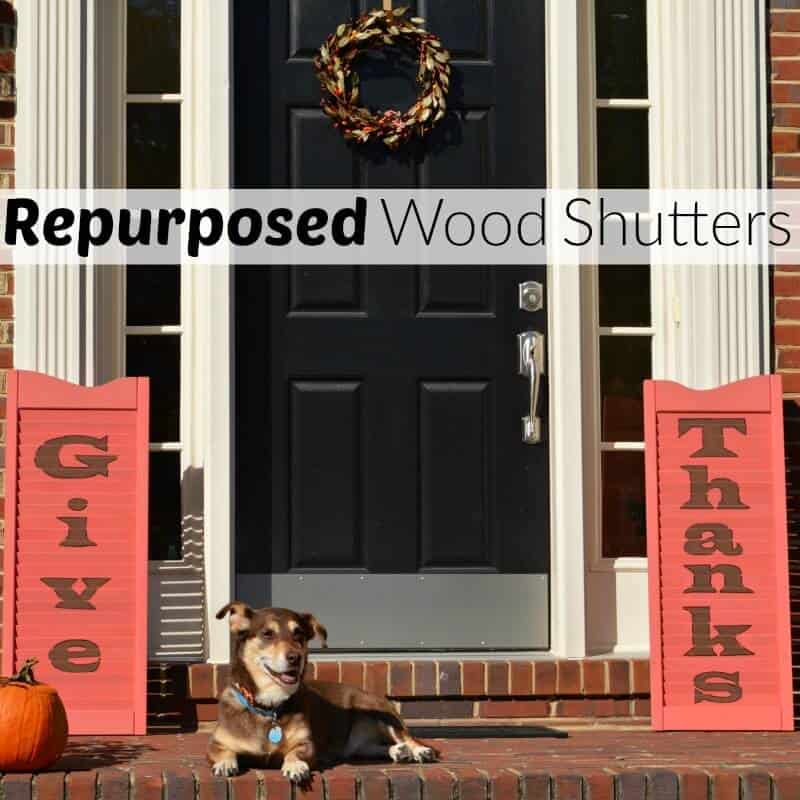
Repurposed Wood Shutters Sign for Thanksgiving – These shutters create an impactful porch decoration and require just beginner level crafting skills. I found my shutters on a freecycle group, so it’s an affordable holiday decoration
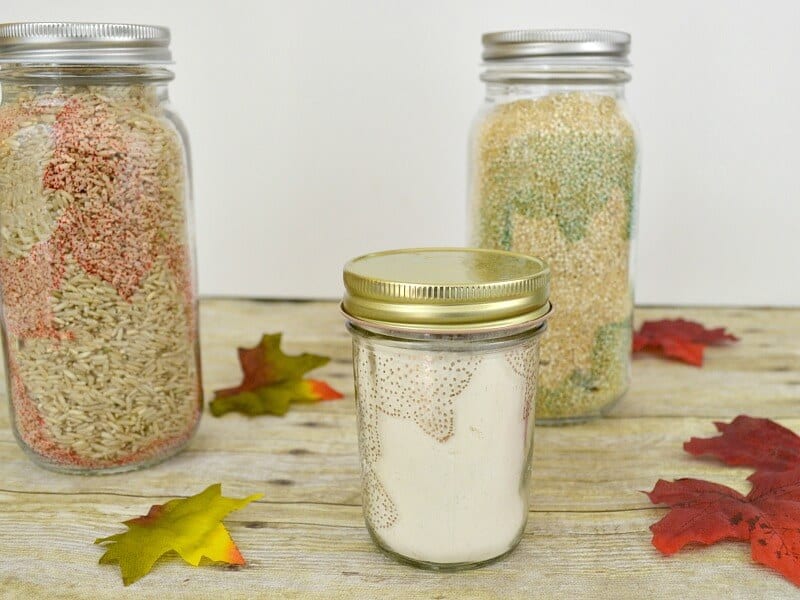
Fall Jars – A permanent marker and an empty glass jar make it so quick and easy to decorate for fall.
Be sure to pin this DIY fabric pumpkin tutorial so you can find it again when you’re ready to start crafting.
You can find all our craft projects in the table below. Simply scroll through the table, click on the topic that interests you and then click on the link in the card when it expands.

I’m a mom of 3, a veteran, military spouse. I’ve moved into 20+ homes all around the world. My passion is helping busy people make the space and time for what’s really important to them. Learn more about Organized 31 and me.

![Ink pad storage idea using a repurposed thrifted item that has made my crafting life much easier. DIY didn't I think of that sooner?! [sponsored] | Organized 31](https://organized31.com/wp-content/uploads/2016/05/Ink-Pad-Storage-Idea-sq.jpg)


So glad I found your site and thank you for repurposing fabric. It’s a passion of mine. I have an old orange shirt that will be perfect for this project. Thank you for the inspiration!
Hi, Cheryl, so nice to meet you. It’s nice to meet another fabric recycler. I’d love to see a picture of your fabric pumpkins. Have fun repurposing.
Those are adorable!! Thank you for the instructions, I’m pinning this to try. 🙂
Thank, Jamie. They’re so easy to make and very addictive, too. 🙂
love this pumpkin idea doing a family reunion each family will get one
thanks for sharing
What a fun idea, Mary. I’m glad this tutorial has helped. Enjoy the reunion!
Oh my god, these are so cute, Susan! And yes you are right – I have to make some (especially some of the plaid ones you made from a shirt) and display them together with mine 😀 They would look awesome together!
Wish we were neighbors, Handan. Imagine the crafting adventures!!