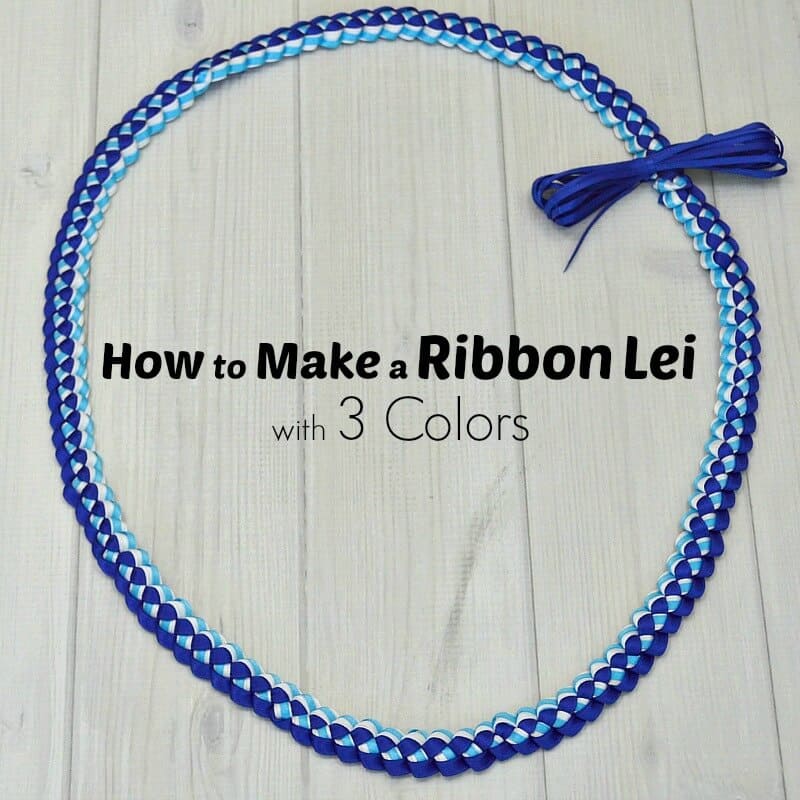
How to Make a Ribbon Lei
This post may contain affiliate links provided for your convenience. We earn commissions if you shop through the links on this page. I am also an Amazon Associate and earn from qualifying purchases Read my full disclosure policy.

This is the time of year for graduation and for a braided ribbon lei (or two or three). I grew up in Hawai’i and graduation means giving graduation leis to all the graduates you know. These step-by-step instructions makes it easy to create your own ribbon lei.
In Hawaiian culture, fresh flower leis are often given, but there are many different styles of leis that can be made and given. Since I currently live on the mainland where it’s more difficult to come across fresh flowers (at a reasonable price) to make leis, I rely on the traditional Hawaiian ribbon lei.
Traditionally you make the lei in the graduate’s school colors. This results in a lei that is also a nice graduation keepsake. Learning how to make a ribbon lei is simple and once you get the hang of it, you can make a single strand in under 30 minutes. I’ve included a ribbon lei making video, too, to make it easier to follow the tutorial.
If you grew up in Hawai’i then you have a mom, grandmom or auntie that has been making ribbon leis for years.
If you didn’t grow up in Hawai’i the best way to explain how leis are a staple of every graduation is to show you a photo after my high school graduation ceremony. I still received more leis after this photo was taken and I did not receive a lot of leis by Hawaiian graduation standards.

With my second “baby” graduating this year, I’m in full-on lei making mode. If I lived in Hawai’i now, I would talk to my aunties and neighbors to get fresh flowers from their yards. My favorite fresh plumeria source was to walk to the post office. There were several old (which means full of flowers) plumeria trees at the post office that provided us with many, many homemade leis for graduations and hula performances.
Since I live on the mainland where fresh flowers cost almost as much as a college education, I turn to the traditional ribbon graduation leis.
How to Make a Ribbon Lei
Supplies
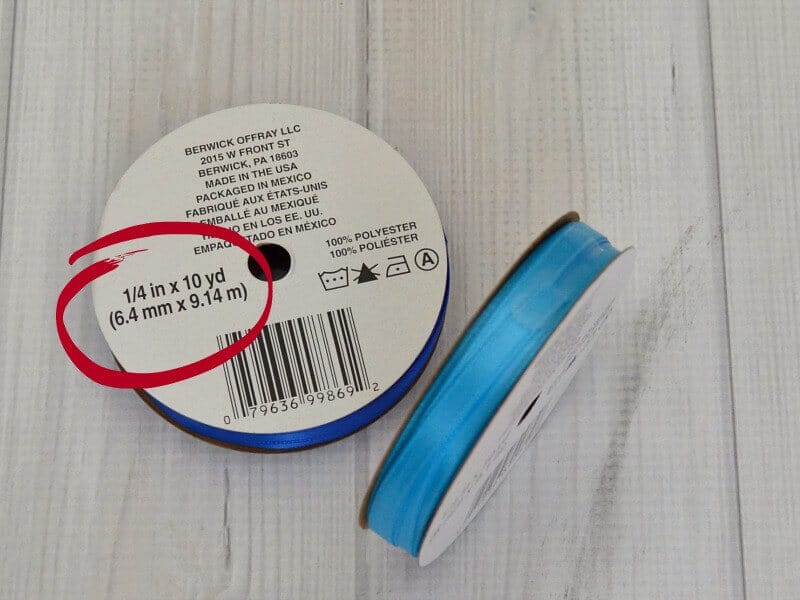
Pick up 2 spools of ribbon at your craft store. I recommend either satin ribbon or grosgrain ribbon when you are first learning to make a ribbon lei. These ribbons are readily available, relatively inexpensive and easy to work with. Later when you are more experienced, you can experiment with different types of ribbon.
These spools of 10 yards of ribbon work perfectly for a small or average size graduate. For a tall or larger graduate, you’ll want 12 yards of each color of ribbon. I prefer to use the 1/4 inch ribbon and that’s a great size to use when you’re first learning how to make a ribbon lei.
How to Start the Ribbon Lei
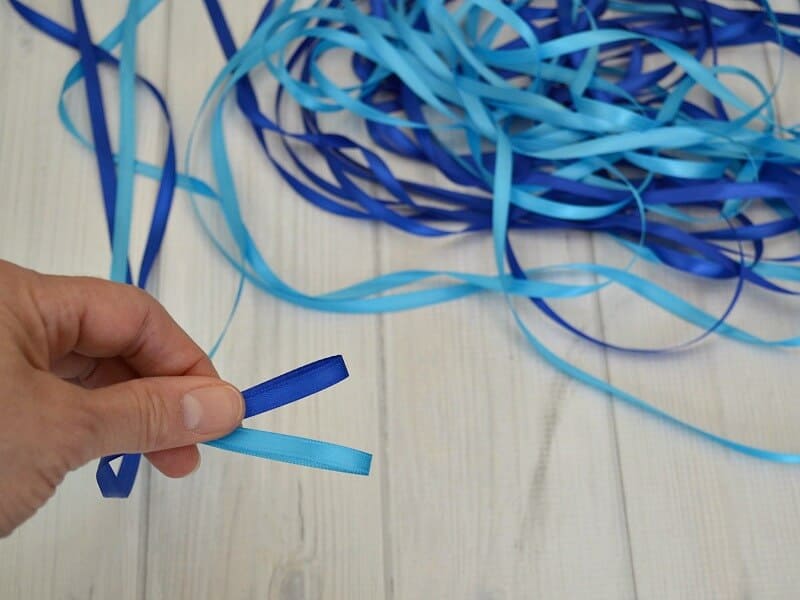
Remove the ribbon from the spools. Find the middle of each color of ribbon. Crease the ribbon at the mid-point.
I prefer the ribbon lei making method I’m sharing here, but if you’d like to make a thinner lei or want to use fewer inches of each ribbon, you can leave the ribbon on the spool. Start with the spool end of the ribbon rather than at the center of each length of ribbon.
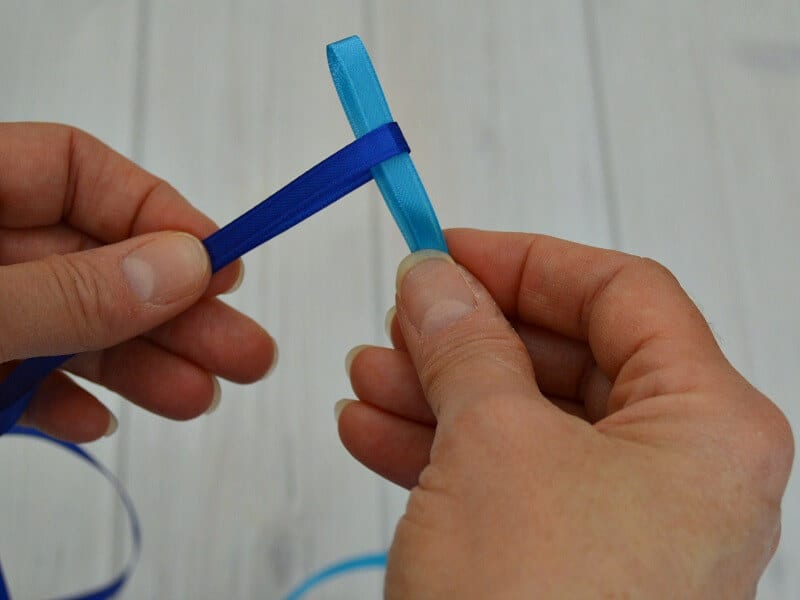
Step Two
Insert the first ribbon loop (the light blue) inside the other loop.
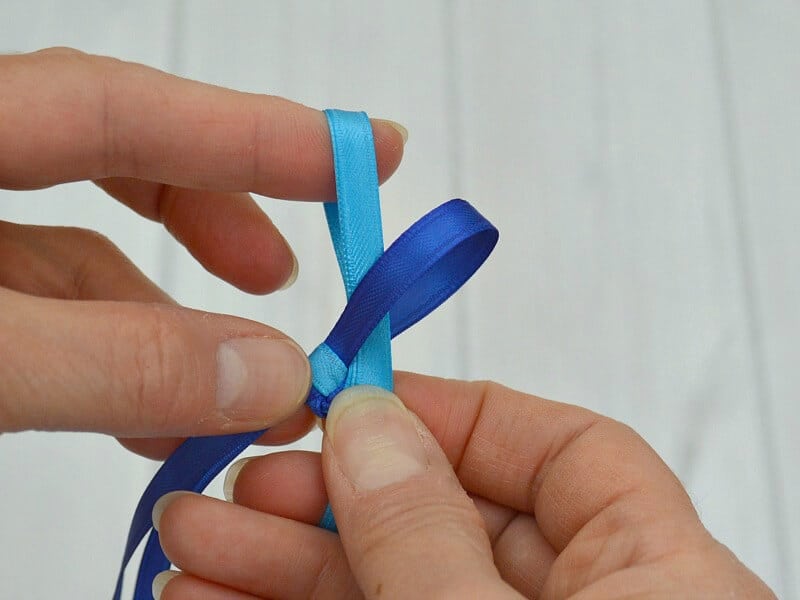
Step Three
Insert the second ribbon loop (the dark blue) inside the previous loop. Pull the previous loop (the light blue) tight. Be careful not to pull the loop so tight that the ribbon buckles. You want the loops to secure each other, but still have the ribbon lei lay flat.

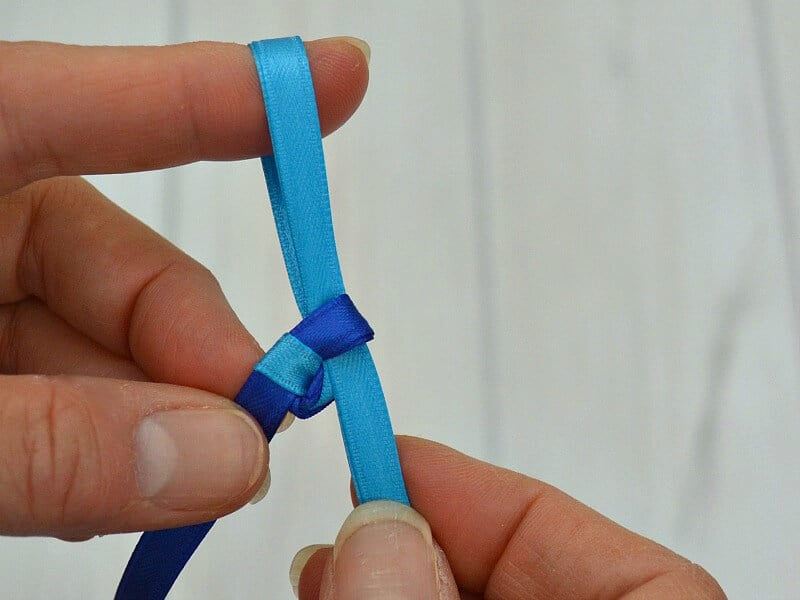
Step Four
Insert the first ribbon loop (the light blue) inside the previous loop.
Step Five
Pull the previous loop (the dark blue) tight. Be careful not to pull the loop so tight that the ribbon buckles. You want the braided ribbon to lay flat and smooth.
If one of the loops twist, take the time to straighten it out before continuing. If you don’t take the time to make the adjustments as you go, you’ll find that your pattern isn’t smooth and even later. It’s best to go slowly and make sure each loop is smooth and even now.
Step Six
As you braid the ribbon you will see the checkboard pattern develop. Continue the braiding pattern with the loops until you reach the end of the ribbons.
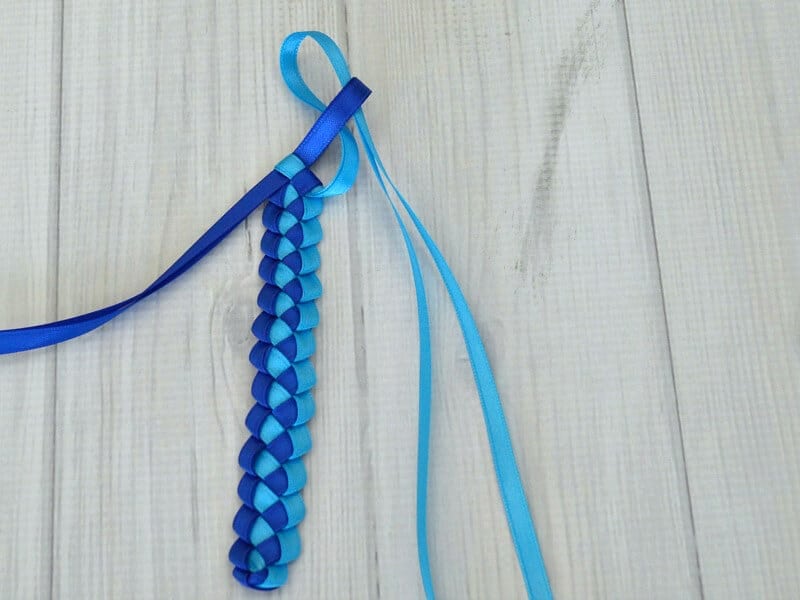
Step Seven
When the ribbon is too short to continue making loops, thread the ribbon through the final loop and pull tight.
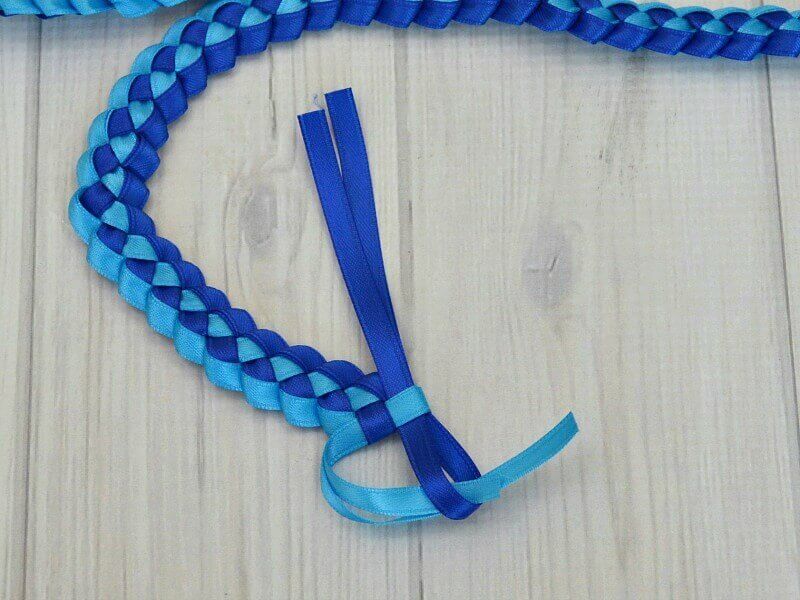
Step Eight
Tie the two colors of ribbon securely into a double knot.
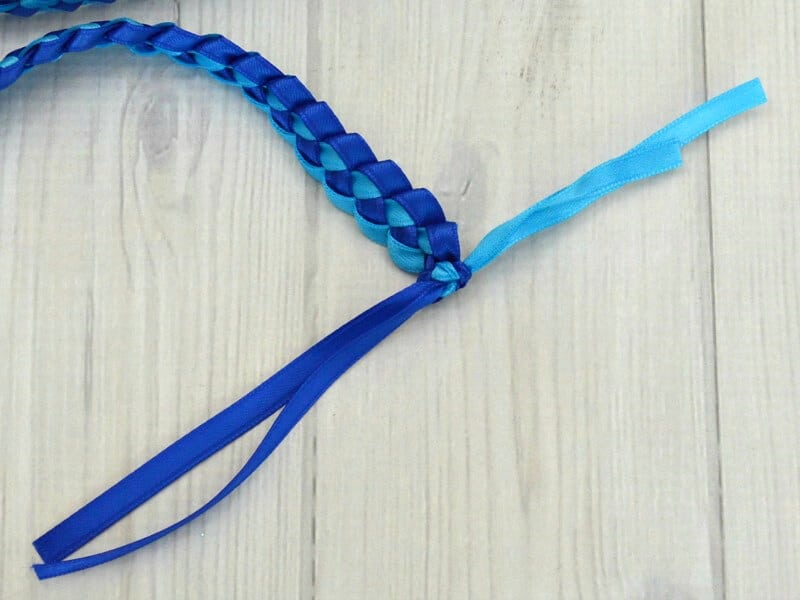
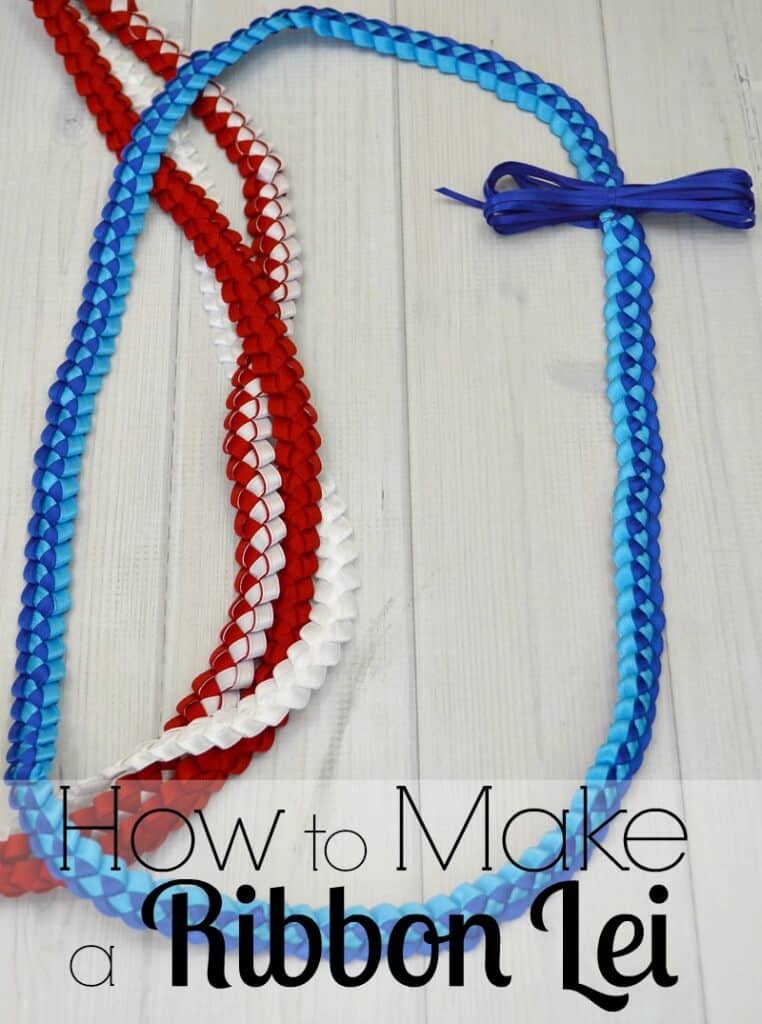
Step Nine
Secure the two ends of the lei with thread Add a coordinating bow to cover the joined ends of the ribbon lei. Add a tag wishing your graduate best wishes.
This creates a lei that is approximately 40 inches in length. You can make a longer lei for the height of your graduate by starting at the end of each ribbon spool rather than at the middle of the length of ribbon.

Print Out the Ribbon Lei Tutorial
You can print out the step-by-step instructions from the box below.

How to Make a Ribbon Lei
Supplies
- Pair of Scissors
- open table space you need a space approximately 3' by 3' or more
- 2 spools 1/4" wide satin or grosgrain ribbon in coordinating colors You'll need approximately 10 yards of each color of ribbon for a shorter or average height person and 12 yards or more for a taller or larger person.
- 1-2 yards coordinating ribbon for bow
Instructions
- Remove the ribbon from the spools. Find the middle of each color of ribbon. Crease the ribbon at the mid-point.
- Insert the first ribbon loop (the light blue) inside the other loop.
- Insert the second ribbon loop (the dark blue) inside the previous loop. Pull the previous loop (the light blue) tight. Be careful not to pull the loop so tight that the ribbon buckles. You want the loops to secure each other, but still have the ribbon lei lay flat.
- Insert the first ribbon loop (the light blue) inside the previous loop.
- Pull the previous loop (the dark blue) tight. Be careful not to pull the loop so tight that the ribbon buckles. You want the braided ribbon to lay flat and smooth.
- As you braid the ribbon you will see the checkboard pattern develop. Continue the braiding pattern with the loops until you reach the end of the ribbons.
- Tie the two colors of ribbon securely into a double knot.
- Secure the two ends of the lei with thread Add a coordinating bow to cover the joined ends of the ribbon lei. Add a tag wishing your graduate best wishes.
Ribbon Lei Frequently Asked Questions
How much ribbon do you need for a ribbon lei?
You will need 10-12 yards of ribbon depending on the height of the graduate.
How long does it take to make a ribbon lei?
It takes about 30 minutes if you follow my diy ribbon lei tutorial. The first lei may take you a bit longer as you learn the technique, but you will pick the steps up quickly so that by your second lei, you really should be able to make one in about 30 minutes.
How do you start a braided ribbon lei?
A braided ribbon lei begins with two loops of ribbon, one loop in each of the two colors of ribbon. You can follow the photos below or the step-by-step video.
How do you make a two ribbon lei?
There are many different ribbon lei instructions online, I share my easy-to-follow tutorial that includes text instructions, photos, audio and a how to video to make easy, even for a beginner to make their own ribbon lei.
How do you make a ribbon lei with 4 ribbons?
A 4 ribbon ribbon lei is just another variation on the braided ribbon lei and is commonly known as a double braided ribbon lei. You can find my double braided ribbon lei instructions to make this variation.
How do you choose the colors in a ribbon lei?
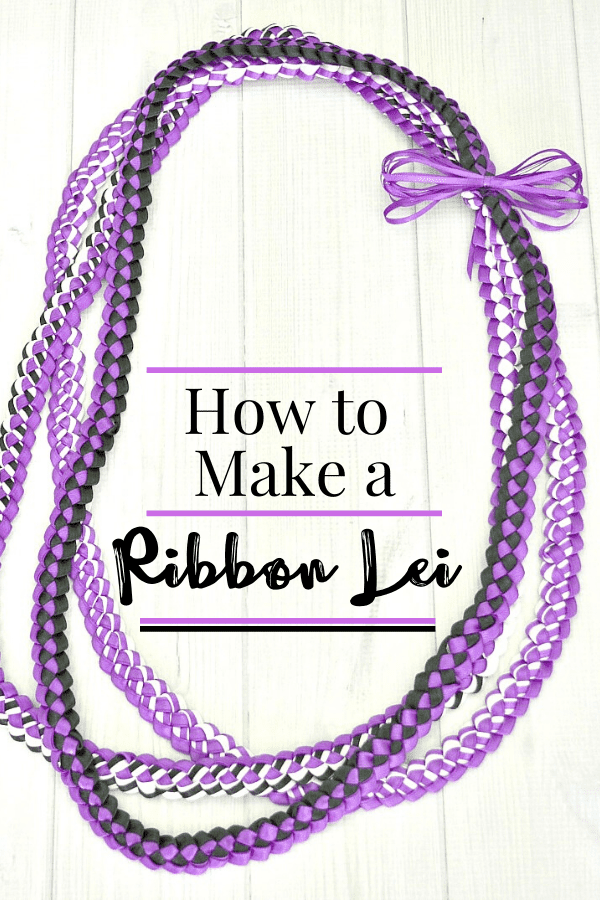
Ribbon leis are traditionally made in the graduate’s school colors. If the lei is not for graduation, you can choose other color combinations that are important to the graduate, like favorite sports team colors, or really whatever colors you want.
More Lei Tutorials
DIY Lei Tutorials and Instructions – There are many types of traditional lei making. Use these DIY lei tutorials to make any event more memorable with the thoughtful gift of a lei.
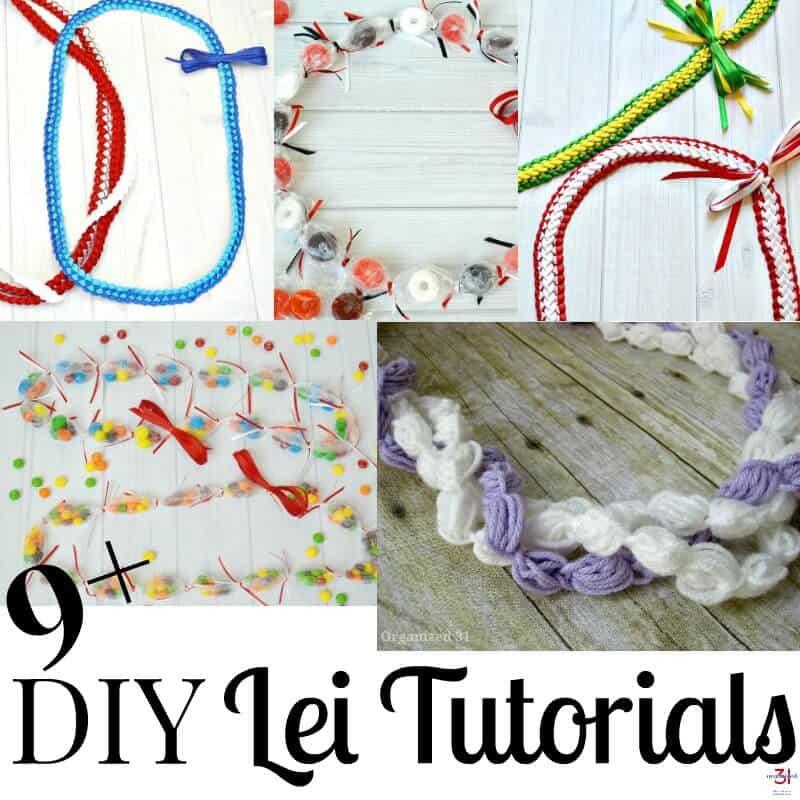
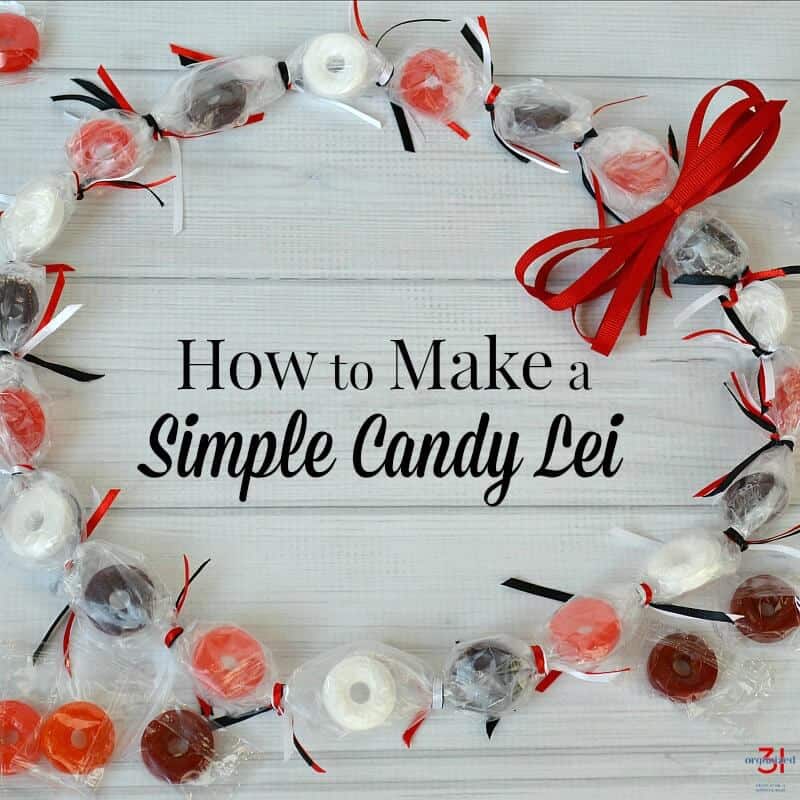
How to Make a Candy Lei – Learn how to make a candy lei with this simple tutorial. A candy lei is the perfect gift to celebrate graduation, birthday or any occasion.
How to Make a Ribbon Lei with 3 Colors – How to make a ribbon lei with 3 colors in about 30 minutes. Hawaiian ribbon leis are traditionally made for graduation in the graduate’s school colors.
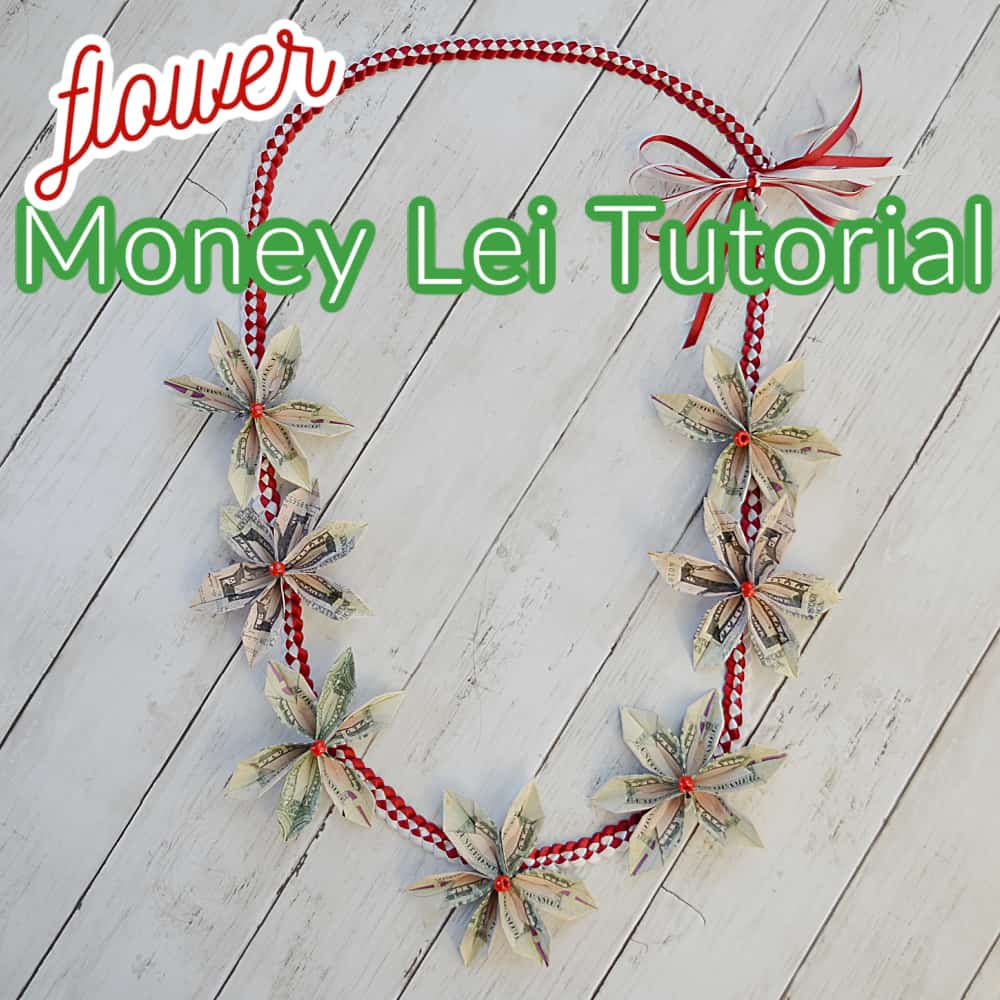
Flower Money Lei Tutorial – A graduation lei made with real money. This easy flower money lei tutorial makes a great gift for any graduate.
Books on ribbon lei making available on Amazon:


You can give a single strand ribbon lei or now that you know how to make a ribbon lei, you can give your graduate the traditional three strand lei to celebrate their big day and big accomplishment. Happy Graduation.
You can find all our best Hawaiian crafts and recipes in the table below. You can scroll though the table and look for ideas or search for specific ideas with the magnifying glass in the upper right-hand corner (on desktop). Click on the topic and then click through the specific article.

I’m a mom of 3, a veteran, military spouse. I’ve moved into 20+ homes all around the world. My passion is helping busy people make the space and time for what’s really important to them. Learn more about Organized 31 and me.

Thanks so much for including the video! The pictures make the steps pretty clear, but I don’t know that I would have caught all the little things (like tightening and straightening the loops at the beginning) without the video. I think I can make these!
Glad to know that the video helps. The leis really are easy to make once you get the hang of it (which doesn’t take very long).
What a fun tutorial! Thank you for sharing. This makes me want to visit (live in) Hawaii where flowers are plentiful 🙂
Great video! I think I could make one of these now. My neighbor has a daughter who is graduating this year, I think she would enjoy this. I love your high school photo! You were almost lost under all of those leis
Thanks, Cynthia. It’s amazing to see graduates in Hawai’i. Often you can barely see the person’s eyes there are so many leis. It’s a beautiful sight. 🙂
What a wonderful tradition. I’m off to a graduation later this month. My niece and nephews are all graduating. Yes – they are multiples. It’s such fun to mark birthdays, graduations and other milestones with three of them.
So pretty! I love that you can make these from any color – perfect to match school colors with. And I have three graduations this year – college, high school, and middle school – these will be perfect!
Wow! Three graduations? What an exciting time. Enjoy, Stacey.
That’s a great craft idea for kids to make as a graduation gift for their fave classmates. Especially because it uses 2 colors of ribbon, perfect for coordinating with school colors.
It’s a fun and easy craft to make, too, Janis (my favorite kind of craft 🙂 )
How long is the finished lei before bringing the ends together?
You want it to be approximately 36 – 40 inches long, Bertie. But honestly, I just hold it up to me and then estimate depending on how tall and big the student is. Have fun making a ribbon lei.
Aloha!
Your photo of you could be me. My high school graduation photo I was equally loaded down with all kinds of leis. My college photo included choke leis as well. The money ones were always fun! Do you recall the seed leis?! I grew up on the Big Island of Hawai’i. Now I also live on the mainland. I sure miss home and all the sweet smelling flowers to make leis from! Your tutorial is great. My daughter’s Girl Scout troop found it useful! We are making some leis for our troop leader. It’s her last year!
Mahal Nui Loa!
Aloha, Amy! Yes, I remember seed and shell leis, too! 🙂 I’m so glad that the tutorial is helping (especially your daughter’s Girl Scout troop!). I also have a tutorial for an easier-to-make money lei and a candy lei tutorial. 😉 Take care and enjoy!
Thanks, love it!
Have fun creating, Joan. Warning – making these leis can be addictive!
Thank you so much for taking the time to show HO TO recreate your fabulous talent. I can pump out Garters and Mums like no one’s business but for some reason, I have an absolute phobia about theses ribbons! LOL
And I have no idea about Garters and Mums, Kimberly! 🙂 Have fun making ribbon leis. Once you get the hang of it, you’ll be addicted!
Thank you so much for these simple instructions. I was able to make leis for my sons graduation. This was a very helpful tutorial.
I’m so glad that you found the tutorial helpful, Jennifer! Congrats, mom, on your graduate – good job!
Hi,
Thank you for your helpful tutorials! I’ll be making one for by son who is graduating from college. I’m ready to but the ribbon, but don’t know if I need the double sided or not double sided with the satin? Thank you so much!
Congrats on your son’s graduation! You want the double-sided ribbon. Have fun lei making.
I made several of these last week, and 10 yards came out to 360 inches. The dimensions were too long 🙁 and now we have a number of leis that look like sashes (cry)
I’m so sorry it didn’t work out for you. I’m guessing that you didn’t fold the ribbon in half in the middle of the 10 yards. If you’d like to email me directly, I can help you figure out what went wrong.