Double Braided Ribbon Lei Instructions
This post may contain affiliate links provided for your convenience. We earn commissions if you shop through the links on this page. I am also an Amazon Associate and earn from qualifying purchases Read my full disclosure policy.
In Hawai’i it’s tradition to give graduates leis to celebrate their accomplishment. Leis are made from many different types of materials and in many different styles. This year I’ve been expanding my lei making repertoire by making a double braided ribbon lei. Once you know the steps, they’re easy to make and quite impressive.
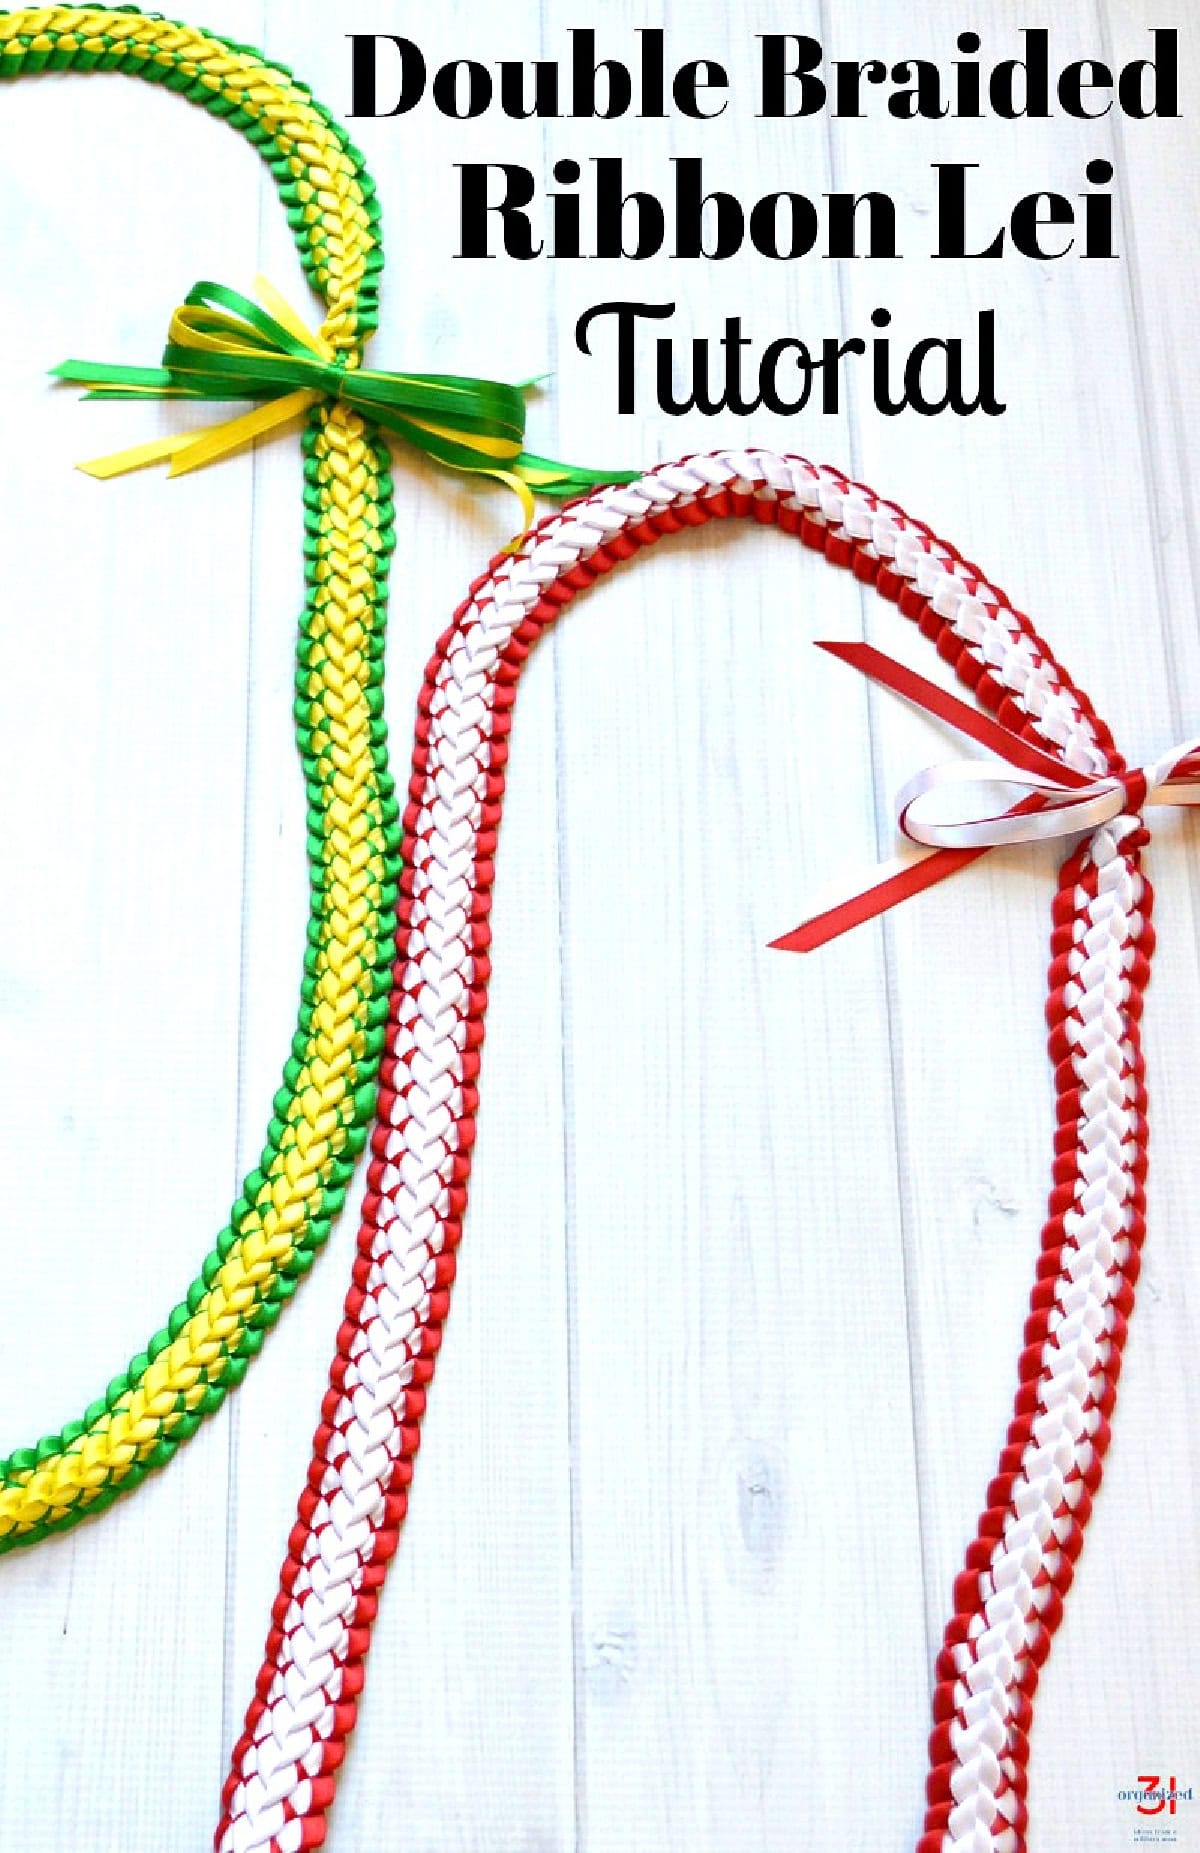
Since we’re now stationed away from Hawai’i on the mainland, I focus on giving graduates ribbon leis since I don’t have easy access to traditional Hawaiian flowers. Ribbon leis are ideal for graduations because they can be kept as a keepsake.
I grew up in Hawai’i. This is from my high school graduation just last year ???? with about half the total number of leis I received. If you’re not familiar with Hawaiian graduations, I received fewer leis than many of my classmates that had large extended families.
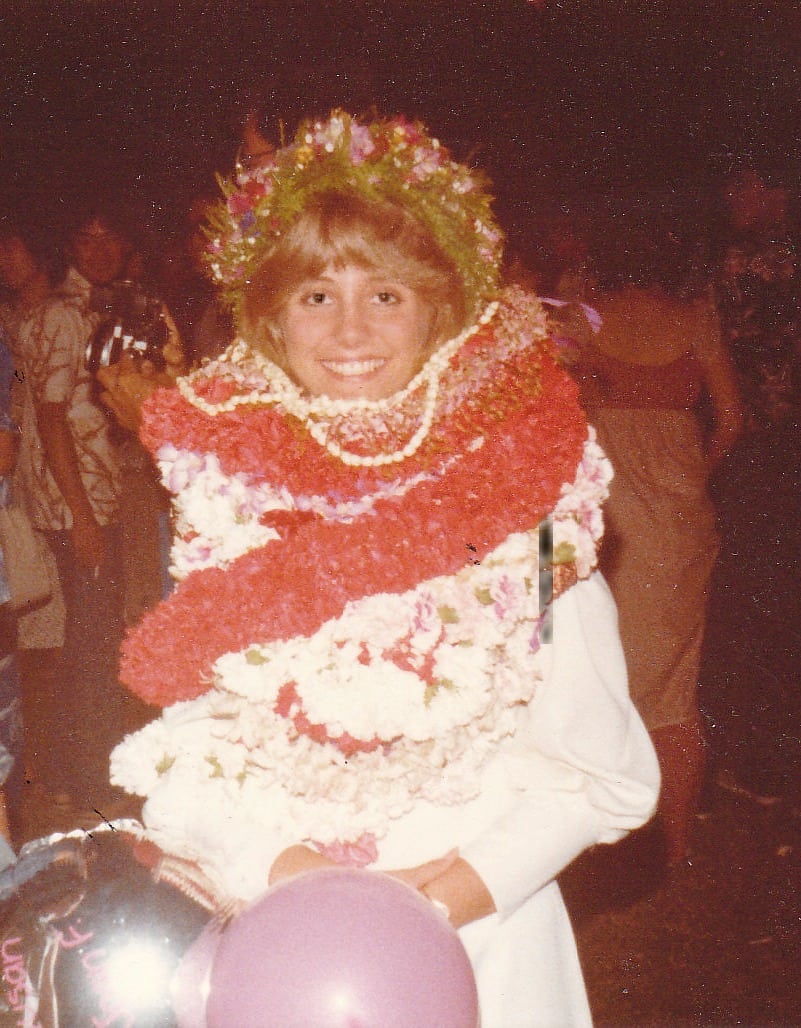
Somewhere in that beautiful mass of leis around my neck are several ribbon leis. While everyone loves fresh flower leis, a ribbon lei is special when it’s made personally just for you. I held onto my ribbon leis for years as treasured keepsakes and memories of a very special day.
Double Braided Ribbon Lei Instructions
While ribbon leis play an important role in Hawaiian graduations, there are many occasions that are perfect for a lei.
- High School Graduation
- College Graduation
- Birthday
- Anniversary
- Lei Day (May 1st)
- Promotion
- Last Day of Work
- Secretary’s Day
- Boss’s Day
- Teacher Appreciation
- Coach Appreciation
Ribbon Leis are traditionally made in the graduate’s school colors. If you’re not sure of the school colors, you can usually find them on the school’s website.
DIY Ribbon Lei Tutorial
Ribbon Lei Supplies
- Satin Craft Ribbon 1/4 inches wide – You’ll need 8-10 yards of 4 lengths of ribbon. Two colors are used make the traditional double braided ribbon lei, but you can use three or four colors if you choose.
- Scissors
- Clothes Pins, Chip Clips or Large Paperclips – Used to hold lengths of ribbon neatly bound while you braid.
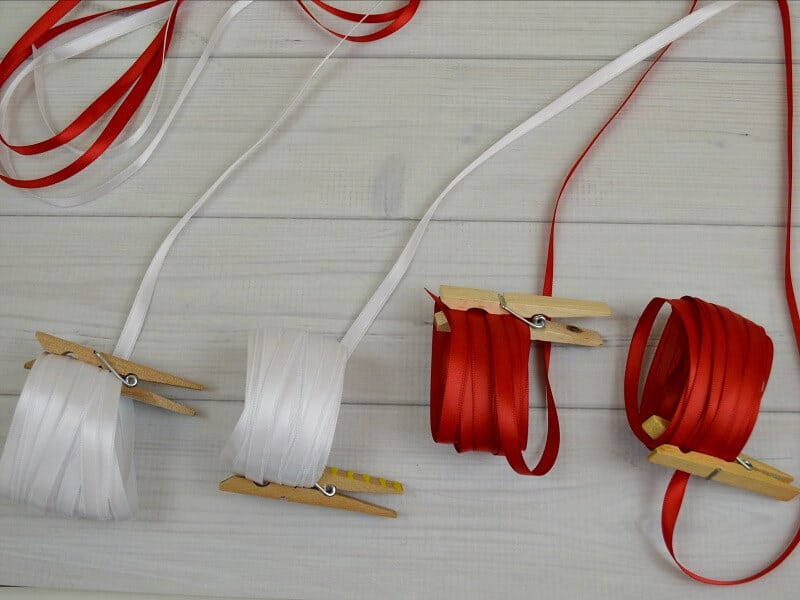
The double braided ribbon lei is made with 4 separate strands of ribbon. To keep the ribbon from getting tangled (and yourself from becoming confused), you’ll want to use clips (or paper clips for the technique shown in the video below) to keep each strand of ribbon neatly organized. Be sure to take the time to set your ribbon bundles up neatly before you start braiding.
Step One
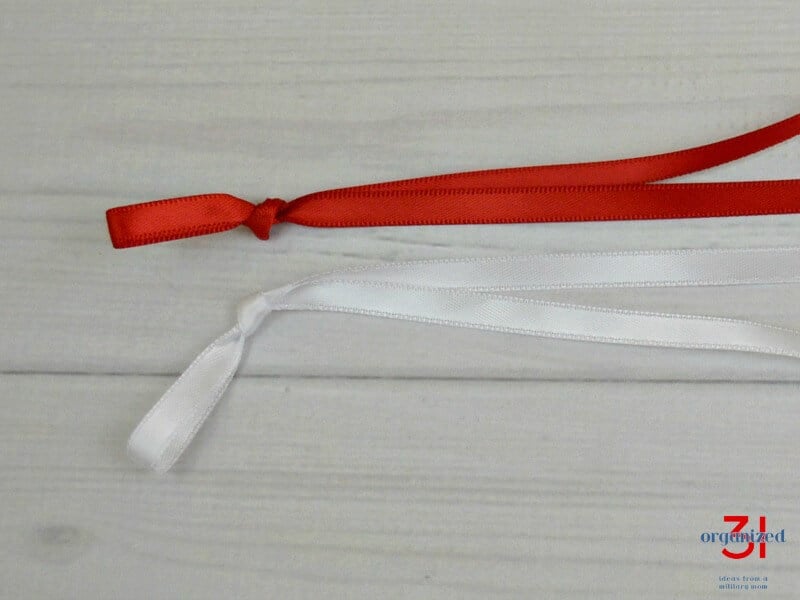
Make a loop with a knot in one red and one white ribbon (use my directions for red and white ribbons to match the colors you choose). Leave approximately 4-6 inches of a ribbon tail when you make your knot.
Step Two
Fold the contrasting color ribbon to form a loop and thread through the loop of each knotted ribbon. Leave a ribbon tail of about 4-6 inches on each folded ribbon.
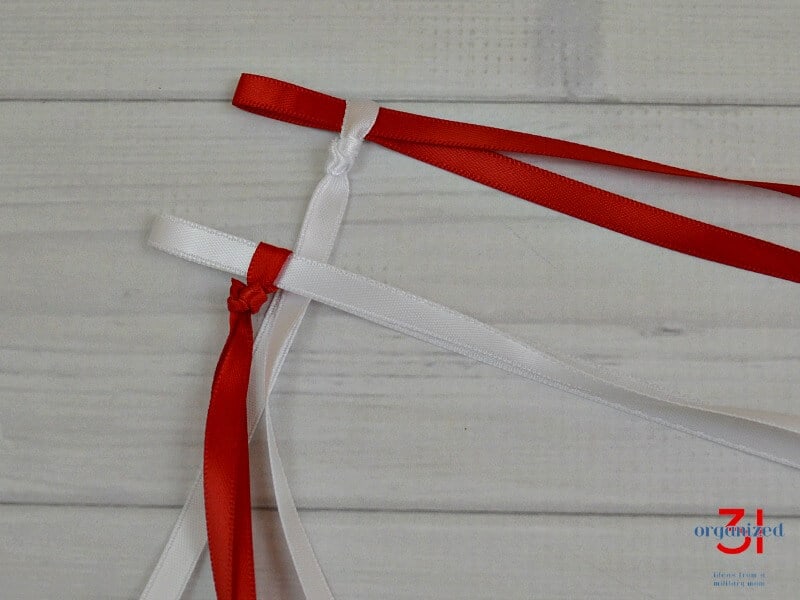
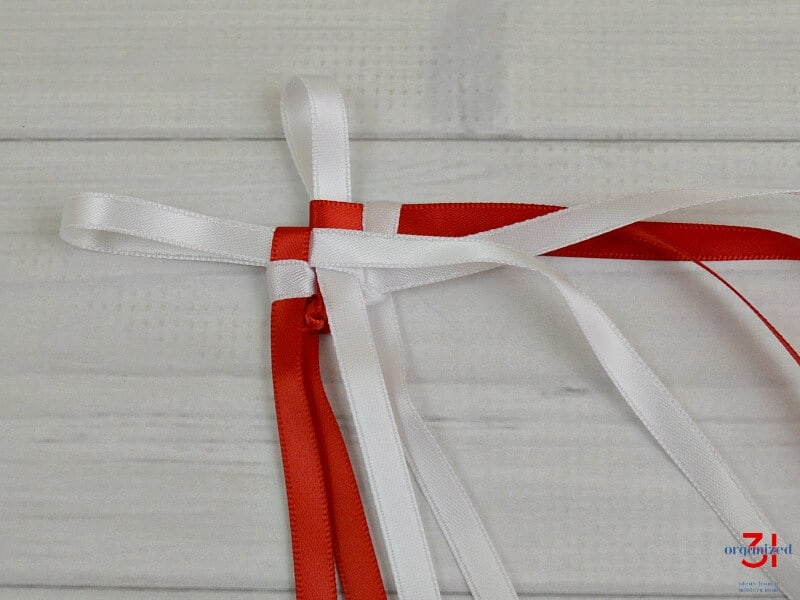
Step Three
Set your ribbon pairs up like the photo below. This step is critical, so take your time to get the set up correct. The color ribbon you want to be the outside color of your double braided ribbon lei should be in the position of the red ribbons below. In the photo below, the red ribbon will be on the outside edge of the 4 ribbon lei and the white ribbon will be on the inside of the lei.
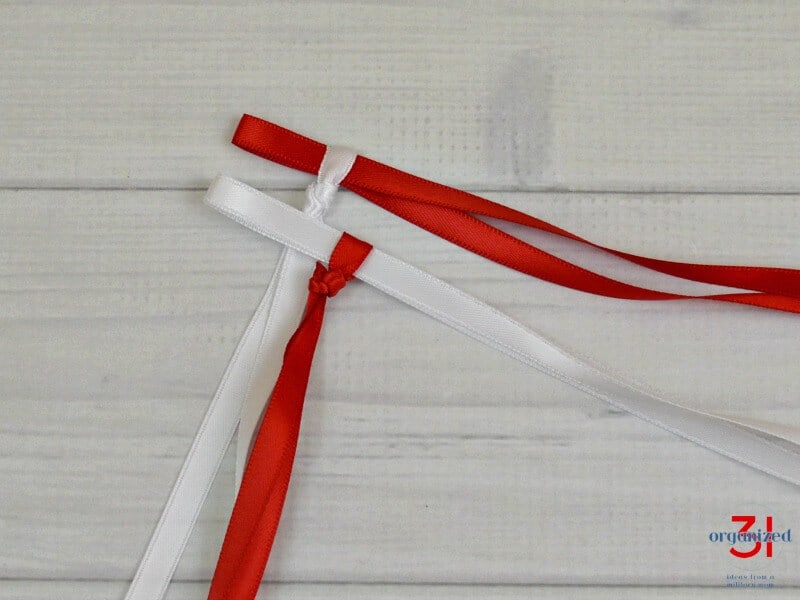
Step Four
Starting with the red ribbon on the top or outside of the lei (see above), take the corresponding white ribbon, make a loop and slip it through the red loop. Pull the red ribbon until it snugs up on the white ribbon you just threaded through it.
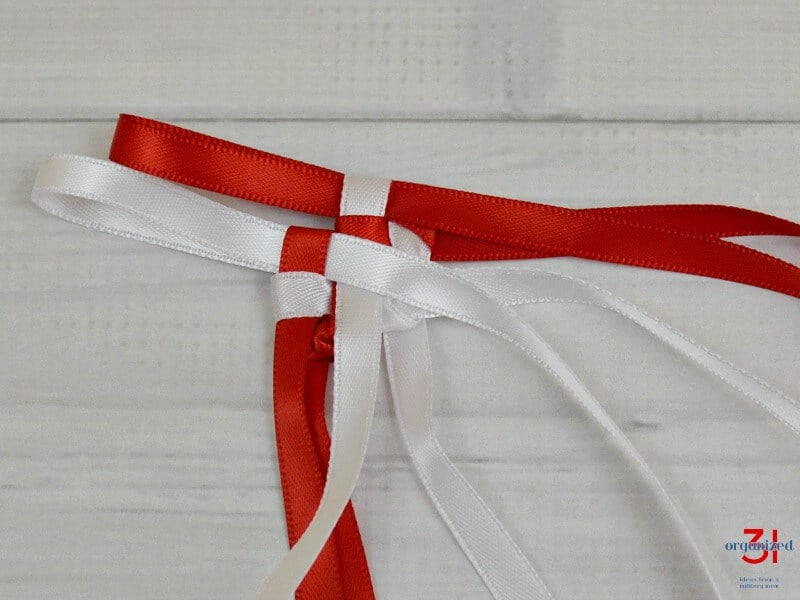
Then do the same with the white loop you originally created and its corresponding red ribbon.
Take your time keeping the ribbons straight and snugged down tightly, without wrinkling. The weaving process is most difficult at this starting stage One you’ve woven about three inches of lei, the weaving process become easier.
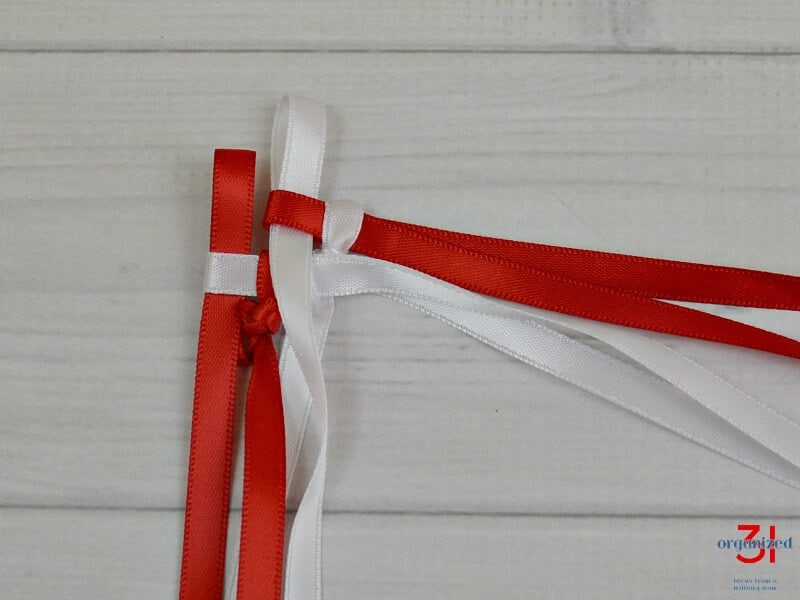
Step Five
Now work through the top or outside red loop with its corresponding white ribbon.
Complete this step by working through the lower white loop with its corresponding red ribbon.
Be sure to stop after each pair of loops to straighten the ribbons and snug up the loops.
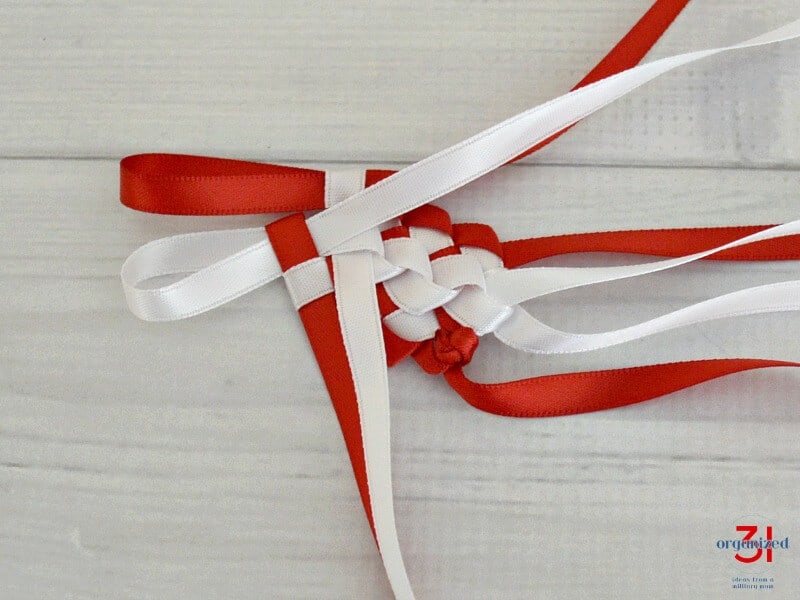
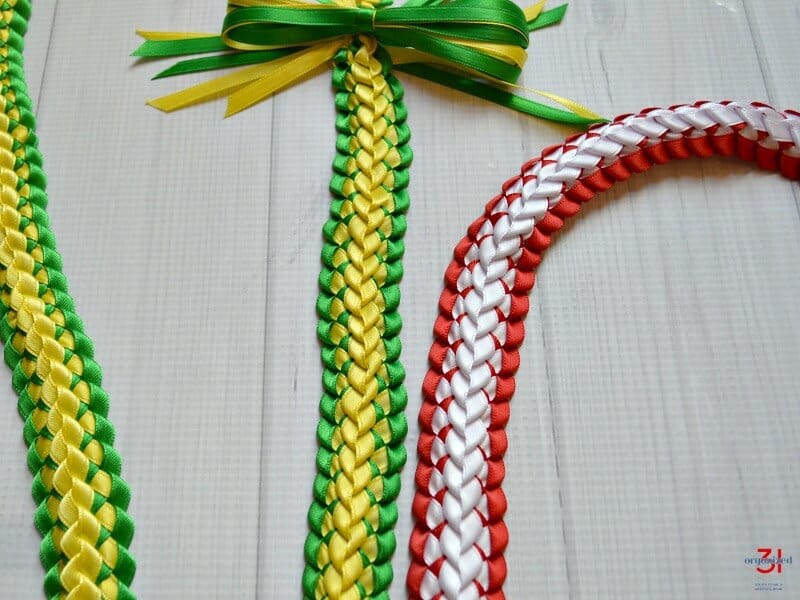
You’ll notice that each white (or inner lei color) crosses over the previous white ribbon. This is what creates the braided look in the middle of the double braided ribbon lei.
Continue braiding until the lei measures 40 to 45 inches long.
Step Six
Once your lei reaches your desired length, slip the ends of the ribbon through the loops and pull tight. Knot or sew the ends of the ribbon together to create the lei. Create a bow to tie onto the joined portion of the lei.
You can see the braiding process in action in this video.
It takes about an hour to an hour and a half to complete a double braided ribbon lei and costs about $4 – $5. The project is a great portable craft that you can take with you to appointments or sports practices. It’s also easy to work on while watching your favorite show.
Print Out the Double Braided Ribbon Lei Tutorial
You can print out the steps of this tutorial in the box below.
Tutorial to Make a Double Braided Ribbon Lei
Supplies
- Pair of Scissors
- 4 Clothes Pins you can also use chip clips or large paperclips
- 4 lengths 1/4 inch satin craft ribbon You’ll need 8-10 yards of 4 lengths of ribbon. Two colors are used make the traditional double braided ribbon lei, but you can use three or four colors if you choose.
- 3-4 yards coordinating ribbon for the bow
Instructions
- To keep the 4 strands of ribbon from tangling, use clothes pins to keep each ribbon strand neatly wrapped.
- Make a loop with a knot in one red and one white ribbon (my tutorial uses red and white ribbon, use the colors you choose for your lei), with about 4-6 inches of a ribbon tail remaining.
- Fold the contrasting color ribbon to form a loop and slip through the loop of each knotted ribbon, leaving a ribbon tail of about 4-6 inches.
- Set your ribbon pairs up like the photo in the online tutorial. The color ribbon you want to be the outside color of your double braided ribbon lei should be in the position of the red ribbons in the photo.
- Starting with ribbon on the top or outside of the lei, take the corresponding partner ribbon, make a loop and slip it through the outside loop. Pull the outside ribbon until it snugs up on the corresponding ribbon you just threaded through it. Then do the same with the other ribbon pair.
- Continue working each ribbon loops pairs by inserting one into the other until you reach the length of lei that you want.
- When you reach your desired length, slip the loose ends of the ribbon through the loops and pull tight. Knot the ends of the ribbon together to create the lei.
- Create a bow to tie onto the joined portion of the lei.
Notes
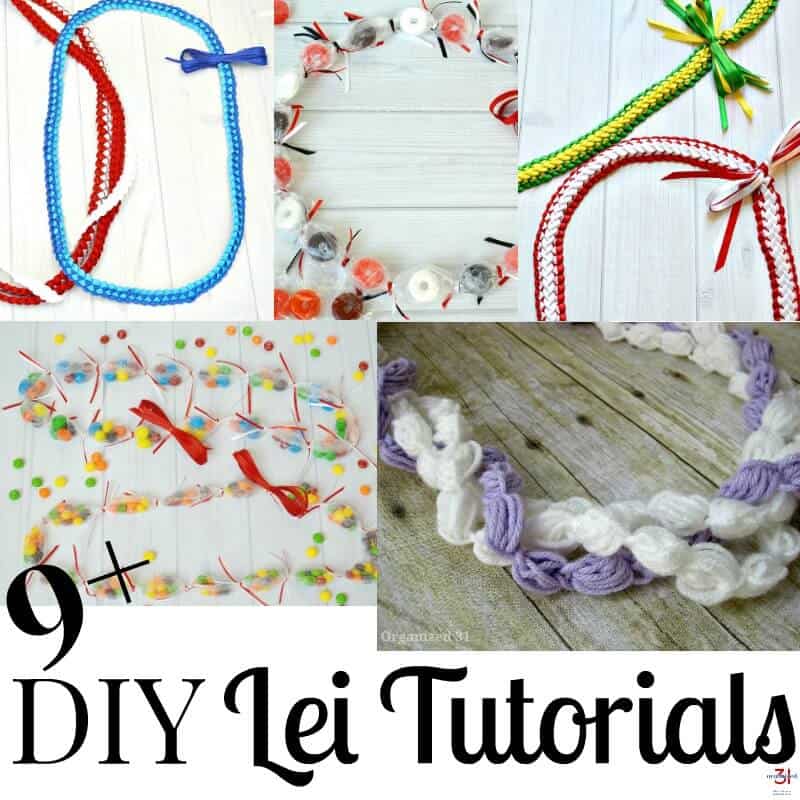
More Lei Tutorials
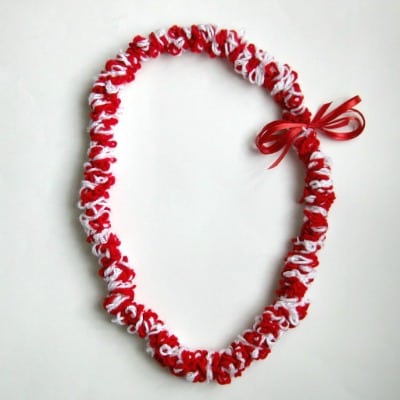
DIY Lei Tutorials and Instructions – There are many types of traditional lei making. Use these DIY lei tutorials to make any event more memorable with the thoughtful gift of a lei.
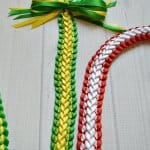
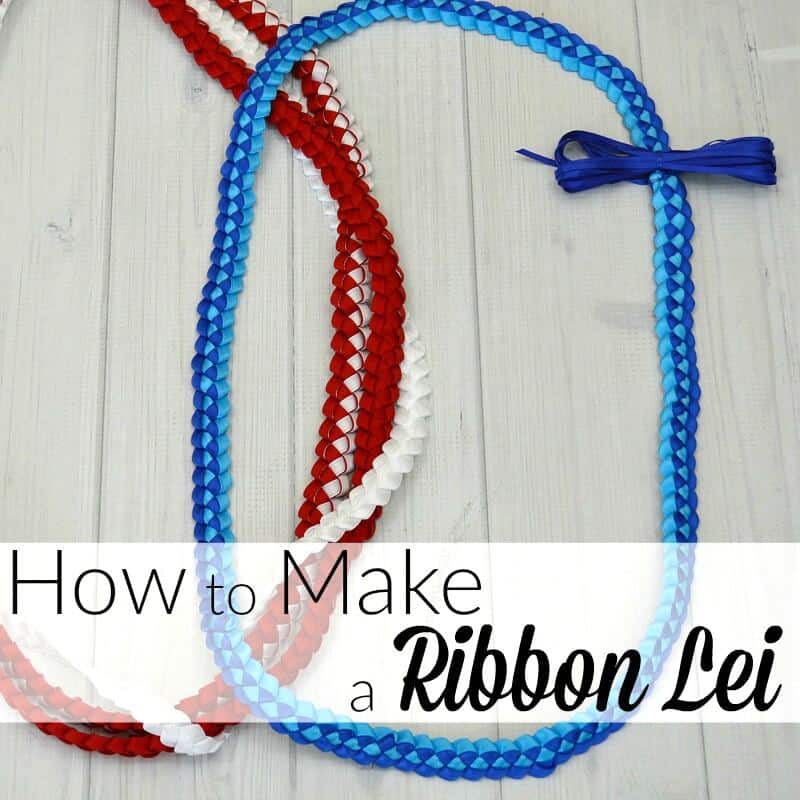
How to Make a Ribbon Lei – Discover how to weave a tri-color ribbon lei, a Hawaiian tradition for graduation ceremonies, in roughly 30 minutes.
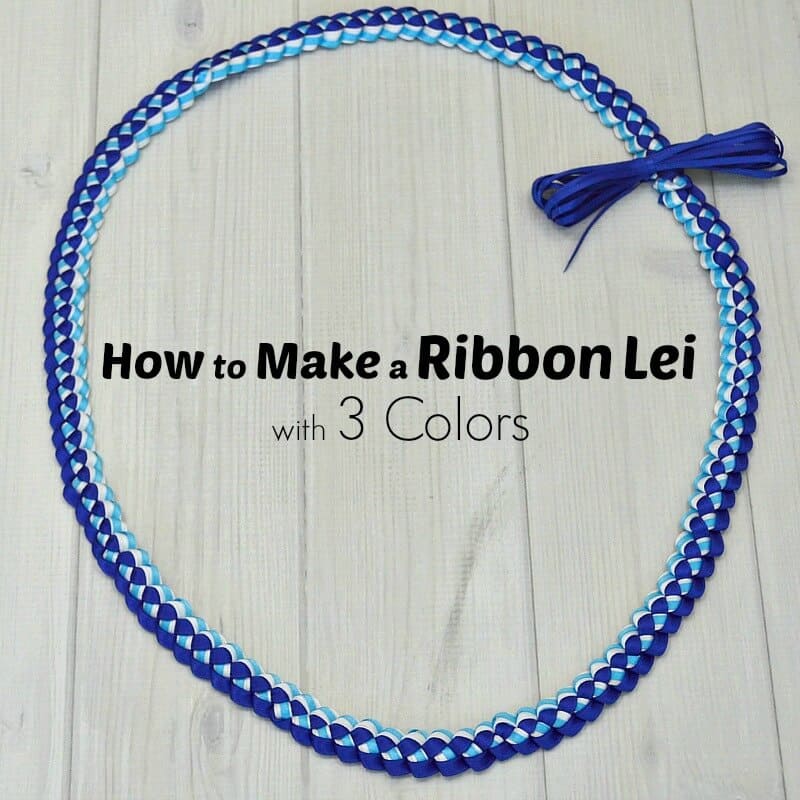
How to Make a Ribbon Lei with 3 Colors – How to make a ribbon lei with 3 colors in about 30 minutes. Hawaiian ribbon leis are traditionally made for graduation in the graduate’s school colors.
Books about ribbon lei making available on Amazon.


You can find affordable ribbon at Walmart, craft stores, Amazon and on Etsy. Just be sure to always check the product descriptions.
I like to use double sided satin ribbon because I can find it inexpensively in a large variety of colors and it makes a flexible lei that is more comfortable when a graduate will be receiving many leis. Grosgrain ribbon can also be used and can be a good choice if the recipient will only be receiving a few leis since the lei will be more crisp looking.
You need 4 different strands of ribbon for each lei strand you want to make. A simple ribbon lei uses 2 strands of ribbon and so the double braided ribbon lei uses twice as many.
You can make this ribbon lei for any occasion, but you will see it most commonly given at high school and college graduations.
Who do you know that would love to receive a double braided ribbon lei? Grab those 4 strands of ribbon and get to making a memorable gift that will be treasured.
More Graduation Ideas
You can find all our best Graduation ideas in the table below. You can scroll though the table and look for ideas or search for specific ideas with the magnifying glass in the upper right-hand corner (on desktop). Click on the topic and then click through the specific article.

I’m a mom of 3, a veteran, military spouse. I’ve moved into 20+ homes all around the world. My passion is helping busy people make the space and time for what’s really important to them. Learn more about Organized 31 and me.


Oh wow, this lei is amazing! I like that it’s done in the school colors. Your step-by-step instructions with the corresponding pictures are very helpful. That is amazing that you received so many leis at your graduation! You look so happy in that picture.
Thanks, Brenda. I love making leis for graduation. And yes, it was a very happy time (of course, just being in Hawai’i makes me happy 🙂 )
Hi Susan! I’ve been searching the Internet for a way to make a FIVE color ribbon lei (to do a rainbow) have you ever done this???? Would I be able to modify your four color instructions to make it work?
I think could do it with this tutorial and incorporate my 3 color ribbon lei technique (I have a tutorial for that here on the blog) to bring in the 5th color. You’ve got me curious now. I feel a new ribbon lei tutorial coming on. 🙂
Thank you for the demo. Where is the craft discount store that you buy 50 cent 10 yard ribbon rolls ?
Walmart. Be sure to check the length of ribbon on the rolls there to make sure they’re long enough for the length of lei you want to make.
Sorry for the dumb question, but is it 10 yards of each color x 4 since it’s four strands, i.e. 10 of blue x 2 ad 10 of white x 2 = 40 yards???
No “dumb questions” 🙂 Yes 10 yards of each.
How wide will the lie be if I use 1/4 ribbons and can I use a wider ribbons for this Lei?
You can use wider ribbon, Abby. With the 1/4 inch ribbon, the lei will be approximately 1/2 to 3/4 inches wide.
I was wondering, if you use a satin
ribbon, is the ribbon single face or/&
double face? Thank you very much
You need double-face ribbon since both sides of the ribbon will show in the completed lei. Have fun creating, Beverly!
How do you make a lei with a printed ribbon so it’s in the center of the lei?
You can place it in the position of the shite ribbon in these photos and it should result in your printed ribbon being in the center of the lei.