This post may contain affiliate links provided for your convenience. We earn commissions if you shop through the links on this page. I am also an Amazon Associate and earn from qualifying purchases Read my full disclosure policy.
I’m a huge fan of repurposing and upcycling. In other words, I hate to throw anything away and I’m a bit of a tree hugger. I love to look at food packaging that would otherwise be recycled and figure out a way to repurpose it.
I shared this project a couple of weeks ago when I guest posted over at my friend Dianna’s blog Craft A Spell.
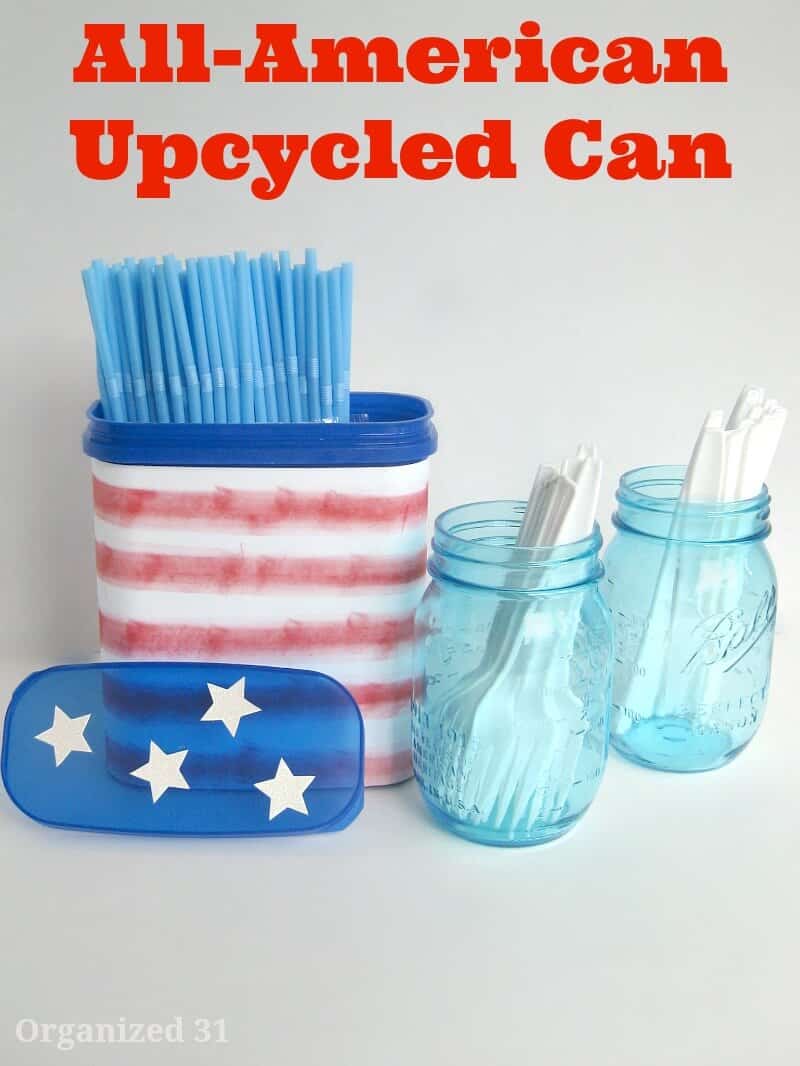
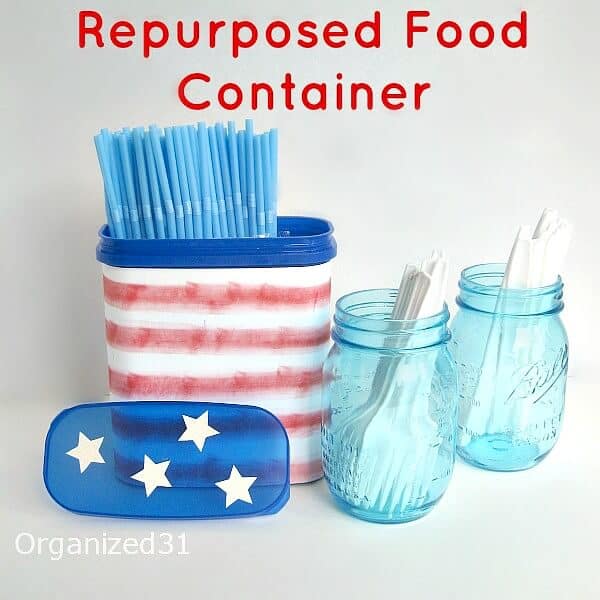
Repurposed Plastic Container for a Patriotic DIY
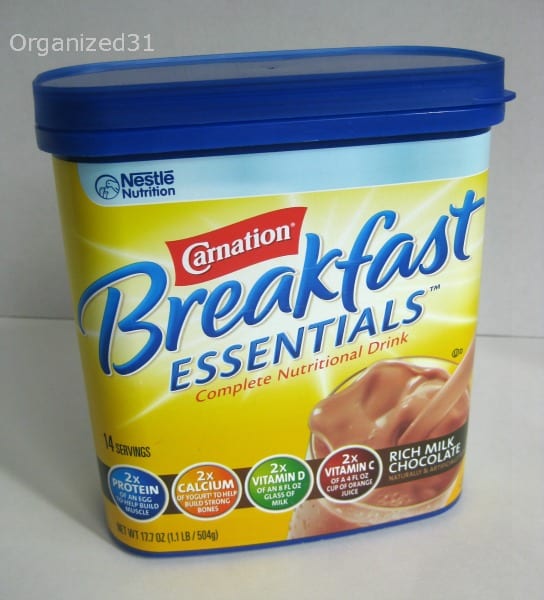
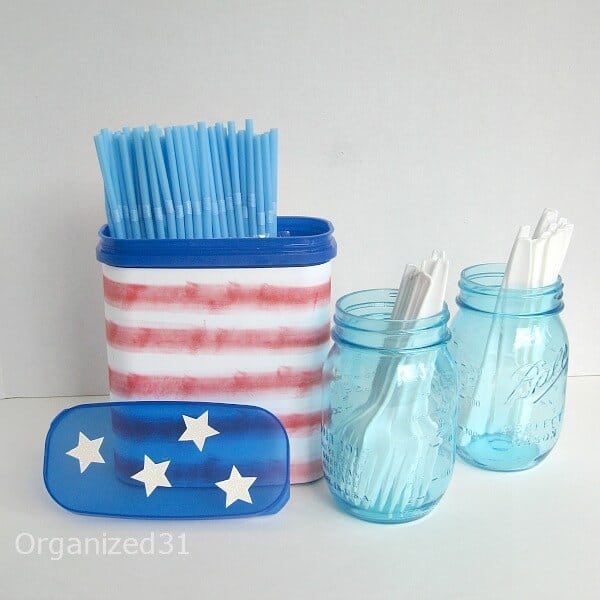
Today’s victim inspiration is a Carnation Breakfast Essentials Box a friend gave me. I already repurposed one {here}, but this one has been waiting a couple of months for its transformation. I really like using this container because the blue is so pretty, the can is a large size and the lid is perfectly flat with no logo I have to hide.
This repurposing project took about 30 minutes and 20 of that was waiting for the Mod Podge to dry.
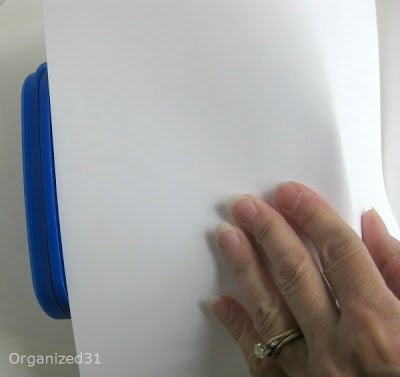
I started by measuring my card stock. I’m an impatient crafter so I just eyeball measurements. I folded the card stock down at the bottom of the can to give me a mark for cutting. I used my paper-cutter to trim the paper just short of the fold line. It covered the can perfectly.
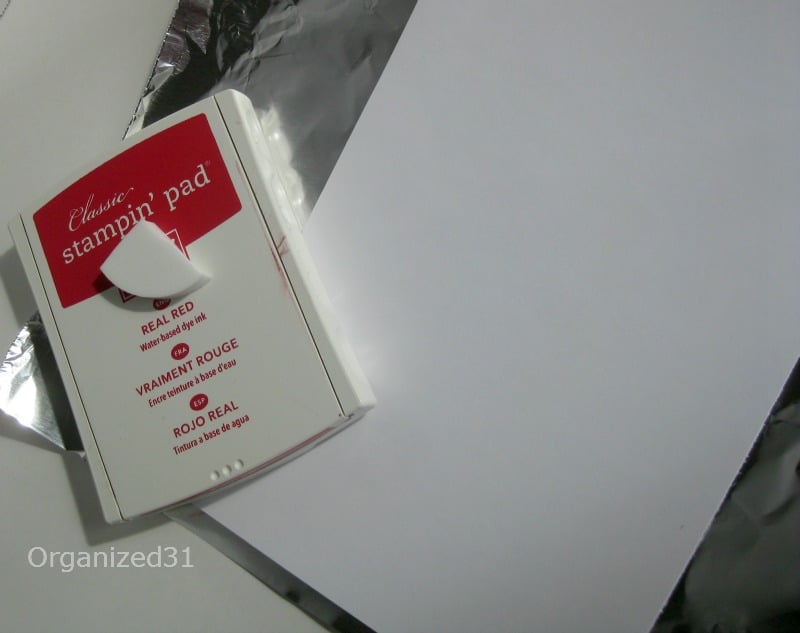
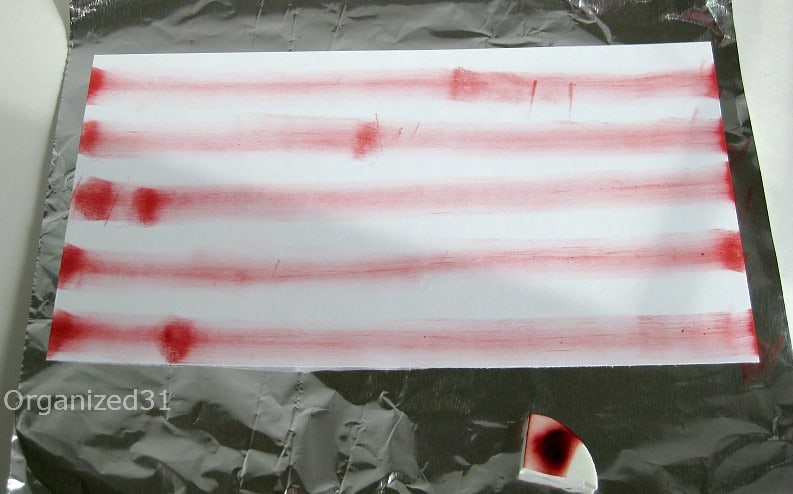
I grabbed an ink pad, a make-up sponge (but you could use any type of sponge) and a piece of tin foil to protect my table.
Just dab your sponge on the ink pad and then drag it across the paper to make stripes. You can see that it makes darker areas where you first start dragging the sponge. You can either start off the paper to minimize the dark spots. Or because I wanted more variation in color, I just kept dragging the ink over the stripes until the entire stripe was darker. That way the dark spots weren’t as noticeable but the stripes had depth and variation to them.
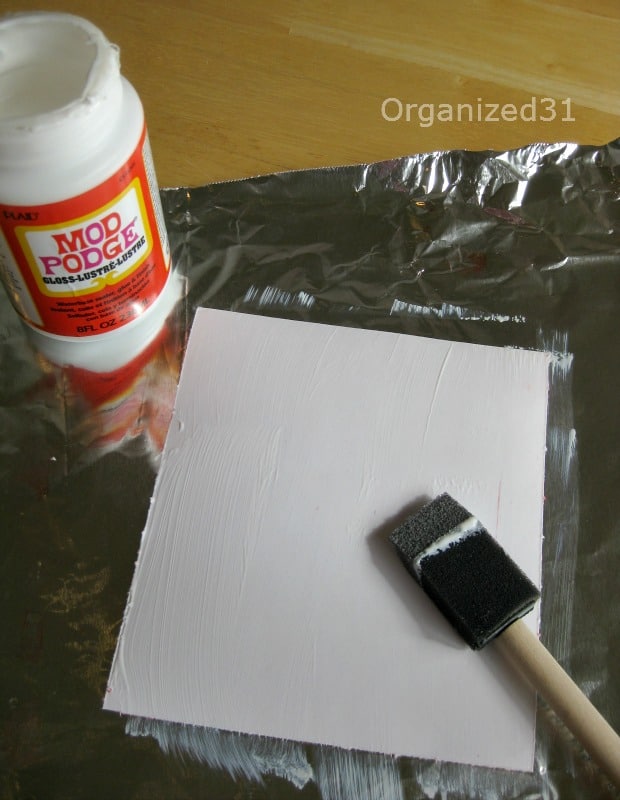
I was impatient and immediately added the Mod Podge to the back of the paper. I’d recommend you let the ink dry thoroughly on the paper or the combination of Mod Podge and ink will smear. (I was very careful.)
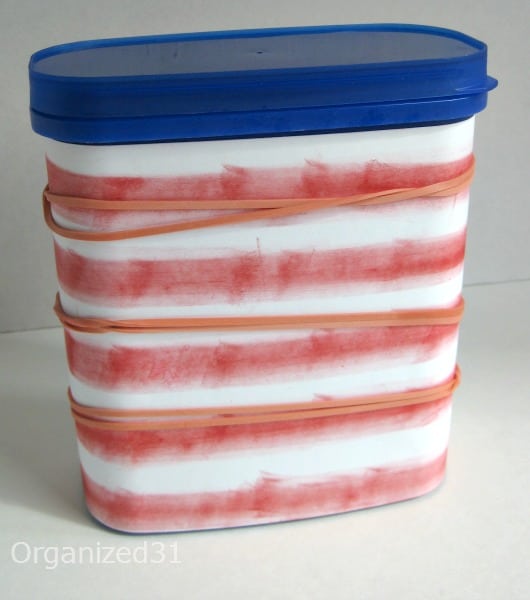
Because the can is curved, I secured the Mod Podged (it is a verb, you know) paper with rubber bands to dry.
20 minutes later I added star stickers that I already had to the lid. You could use a star punch and make your own from card stock or use a paint pen to draw them on.
I’m planning to use this container to hold utensils at a summer party.
But I can think of many other uses, too. The beauty of this All-American repurposed Can is that it’s quick, easy and versatile.
I’m a mom of 3, a veteran, military spouse. I’ve moved into 20+ homes all around the world. My passion is helping busy people make the space and time for what’s really important to them. Learn more about Organized 31 and me.
Make these easy 4th of July Treats for Kids (and everyone) in minutes. They’re cute candy firecracker treats that are perfect for a patriotic party or celebration.
How to organize your kitchen for free using repurposed items that were headed to the trash or recycling bin. Frugal and earth-friendly tips for organizing.
The ongoing cookie challenge between Corinne from Wondermom Wannabe and myself has evolved into a brownie challenge. You may remember that the challenge started with my Oreo Surprise cookie and most recently included Corinne’s Pistachio White Chocolate Chip Cookies. Corinne shared that her children are singing my praises ala Bill Cosby (“Susan is great, she gets…
Now is the time to build a family tradition and give happiness with a homeless care package. Our family puts together homeless care kits on Thanksgiving to donate to the homeless in our community. Making this whimsical version of a give happiness homeless care package shares a smile along with the practical items.
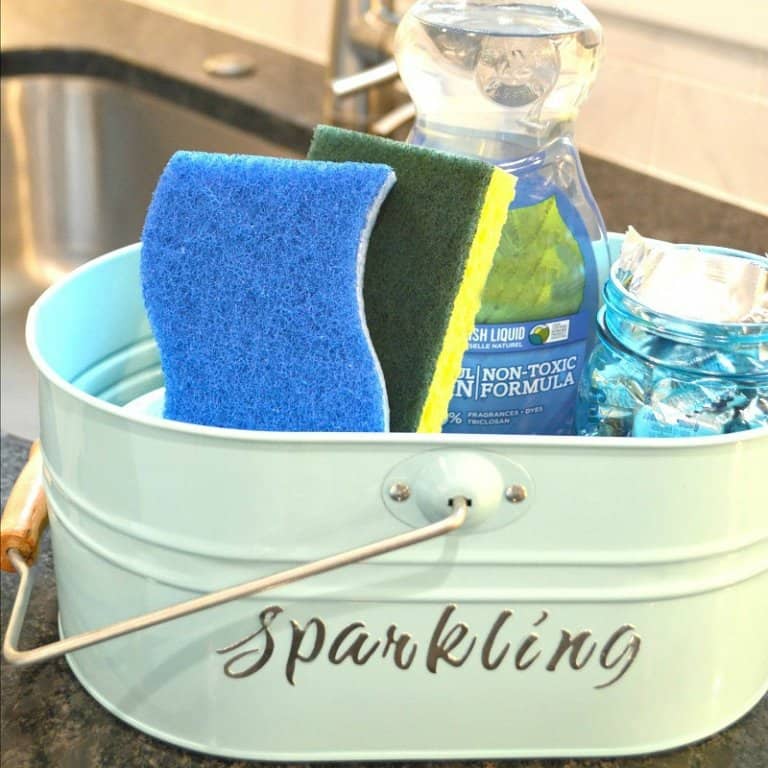
Organizing your kitchen sink with a dish cleaning caddy tote makes kitchen chores much easier. Here are 3 easy ways to make your tote match your decor.
13 Comments
Hi Susan, Love this idea! I have a Viactiv canister that is just waiting for some love. Not sure what I want to do with it yet. But it won’t be tossed. Too many cute options. Hugs, Holly
Hi Susan!I’m stopping by today from the Brag About It blog hop – I’m loving this cute idea! What a perfect way to organize things for a 4th of July cookout!Hope you enjoy the holiday!- Ang
Susan- love it – easy to put together and looks terrific.Thanks for sharing on the BRAG ABOUT IT. We’d love it if you link back to BeBetsy. -xo Happy 4th of July and have a fun cookout!Sharon and Denise Fashion | Food | Beauty | Out & About | Morning Coffee


Hi Susan, Love this idea! I have a Viactiv canister that is just waiting for some love. Not sure what I want to do with it yet. But it won’t be tossed. Too many cute options. Hugs, Holly
what a neat and fun idea.
What a great way to upcycle containers. Great idea.Have a wonderful weekend,Bev
This is a very clever idea…Found you through Sew Many Ways.
Hi Susan!I’m stopping by today from the Brag About It blog hop – I’m loving this cute idea! What a perfect way to organize things for a 4th of July cookout!Hope you enjoy the holiday!- Ang
Susan- love it – easy to put together and looks terrific.Thanks for sharing on the BRAG ABOUT IT. We’d love it if you link back to BeBetsy. -xo Happy 4th of July and have a fun cookout!Sharon and Denise Fashion | Food | Beauty | Out & About | Morning Coffee
This is great. I love re-purposing things when I can. Thanks for sharing & linking up @ DearCreatives.com & Happy 4th!
I just love this and wish I would have seen this idea before my 4th of July picnic! I think I would have been like you and been impatient!
Thanks for linking to the In and Out of the Kitchen Link Party. I am featuring this in the Top 10 Favorites post that will go live on Monday morning!
Cynthia
I use these for various organization. I have so many I want to give away.