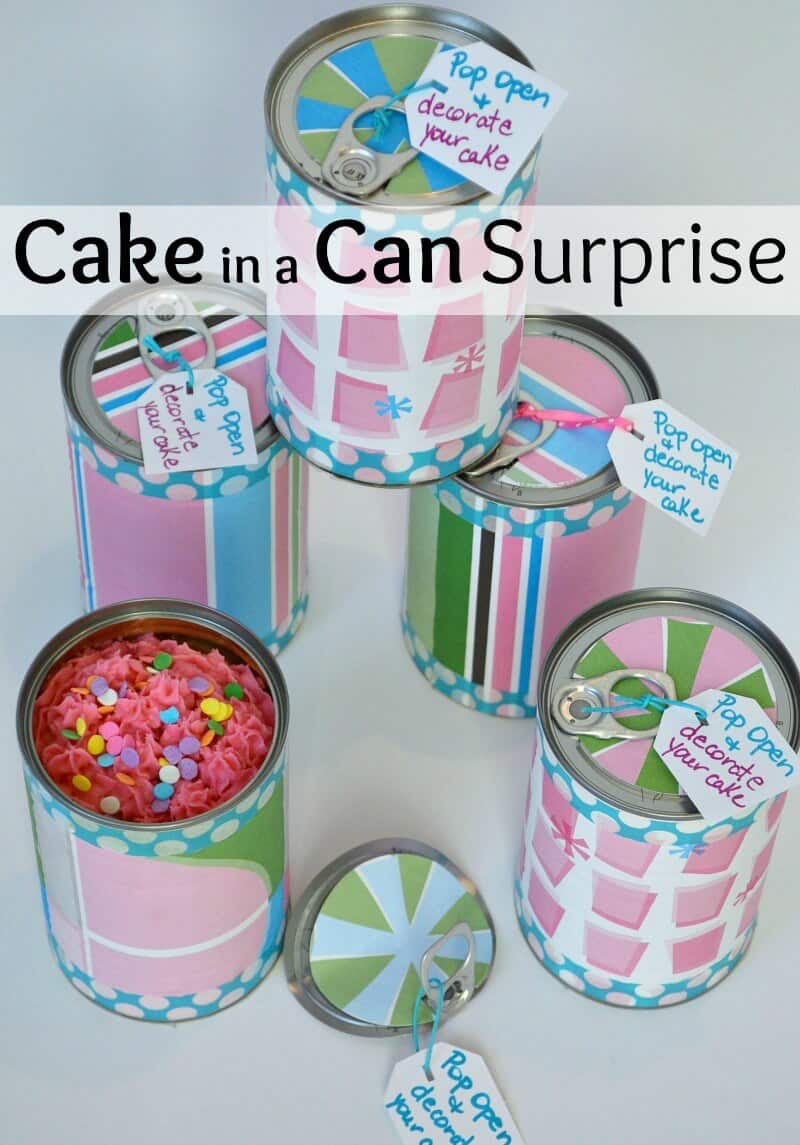
Cake in a Can Surprise
This post may contain affiliate links provided for your convenience. We earn commissions if you shop through the links on this page. I am also an Amazon Associate and earn from qualifying purchases Read my full disclosure policy.

My mother-in-law has made coffee can cake (a coffee cake baked in a coffee can) for years. She’s known for that cake. With my oldest baby away at college over her birthday, I’ve been brainstorming ideas to send her a special treat. I couldn’t figure out how to mail her a homemade birthday cake, then I had a lightbulb moment and decided to send her a birthday cake in a can surprise. I know she’ll find it fun and hope it makes her birthday special (even if her mama isn’t there to celebrate with her).
I’ve always made homemade and decorated birthday cakes for my family. I’m not a cake decorator (and I have the embarrassing photos to prove it), I’m a mom that shows her love through homemade baked goods. It’s just what I do.
Last year I was able to visit my baby at college the weekend before her birthday. I planned ahead to surprise her with a homemade treat. I made delicious family-favorite and complicated three-step brownies. I packaged them carefully and placed them in the freezer so that they’d stay fresh for the trip. Then I proceeded to forget them. Whan whah.
Cake in a Can Surprise
This year I knew I wouldn’t be able to take a trip to visit my baby so I began planning how I could mail a birthday cake treat to her. I wanted to send my baby a treat that she could share with her roommates. Making individual cake in a can surprise treats were the perfect answer.
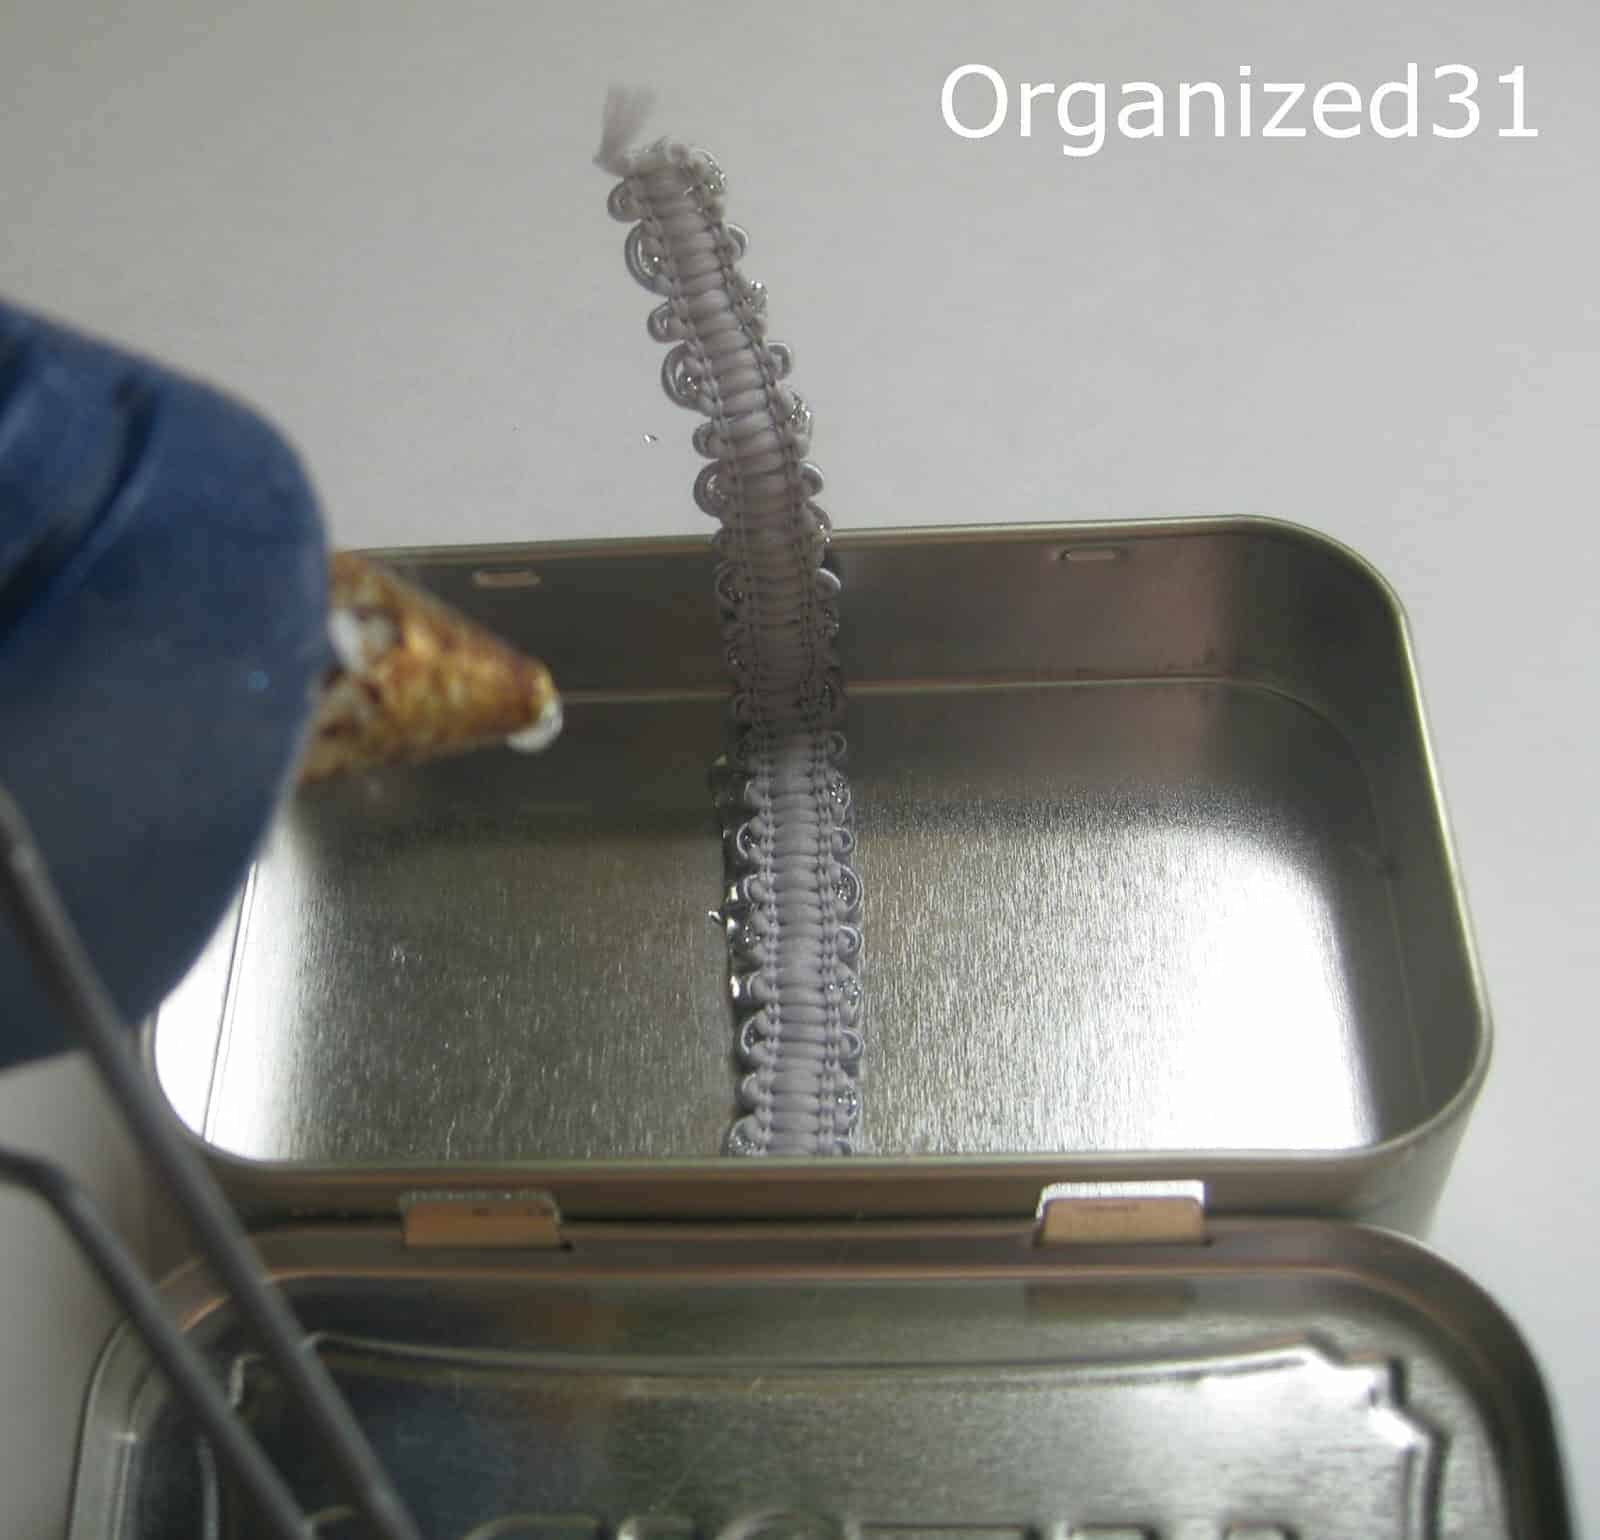
The trick to making these cake in a can treats is to find food safe metal cans that have a pop top. You can find this type of can filled with soup and fruit. The second part to the trick is that you need a can opener that opens the can from the side so that you don’t have sharp edges. Open the cans up from the bottom to remove the contents and then wash the can and bottom lid well. Dry them well and set aside.
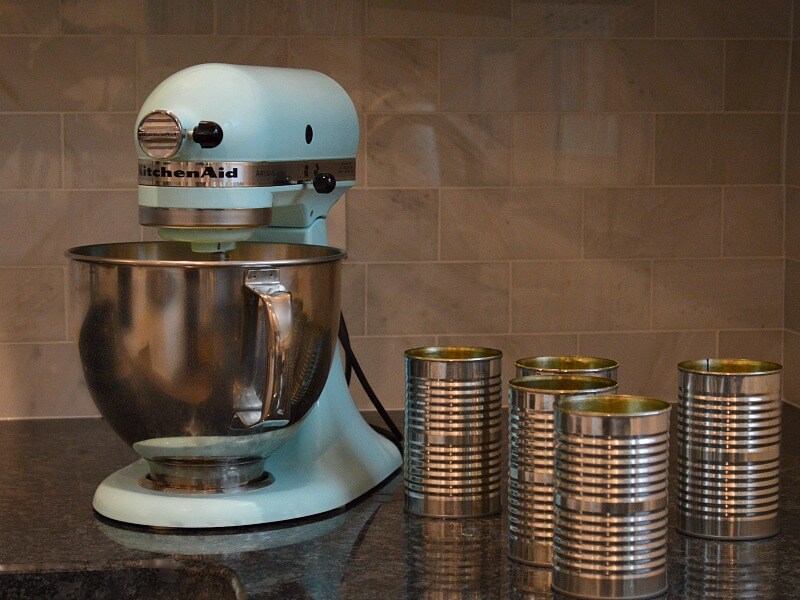
Make your favorite cake from scratch or from a mix. Grease the inside of the cans well.
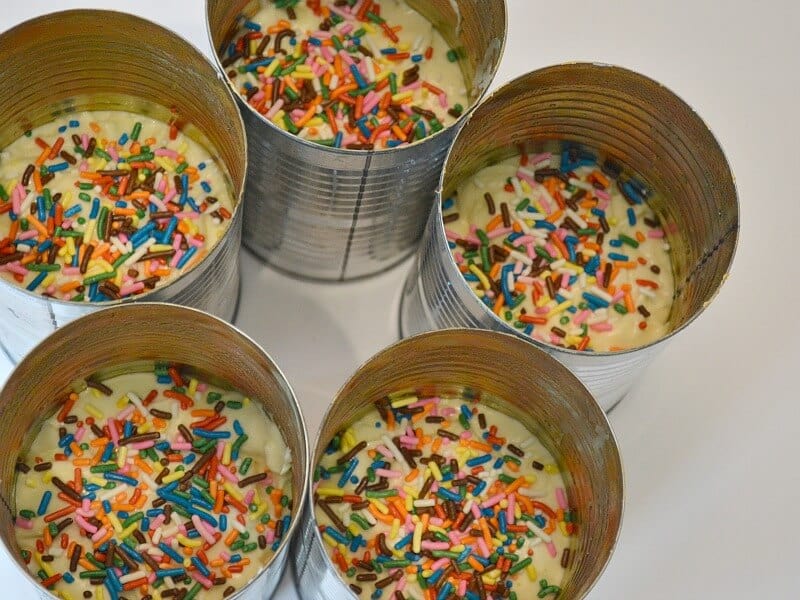
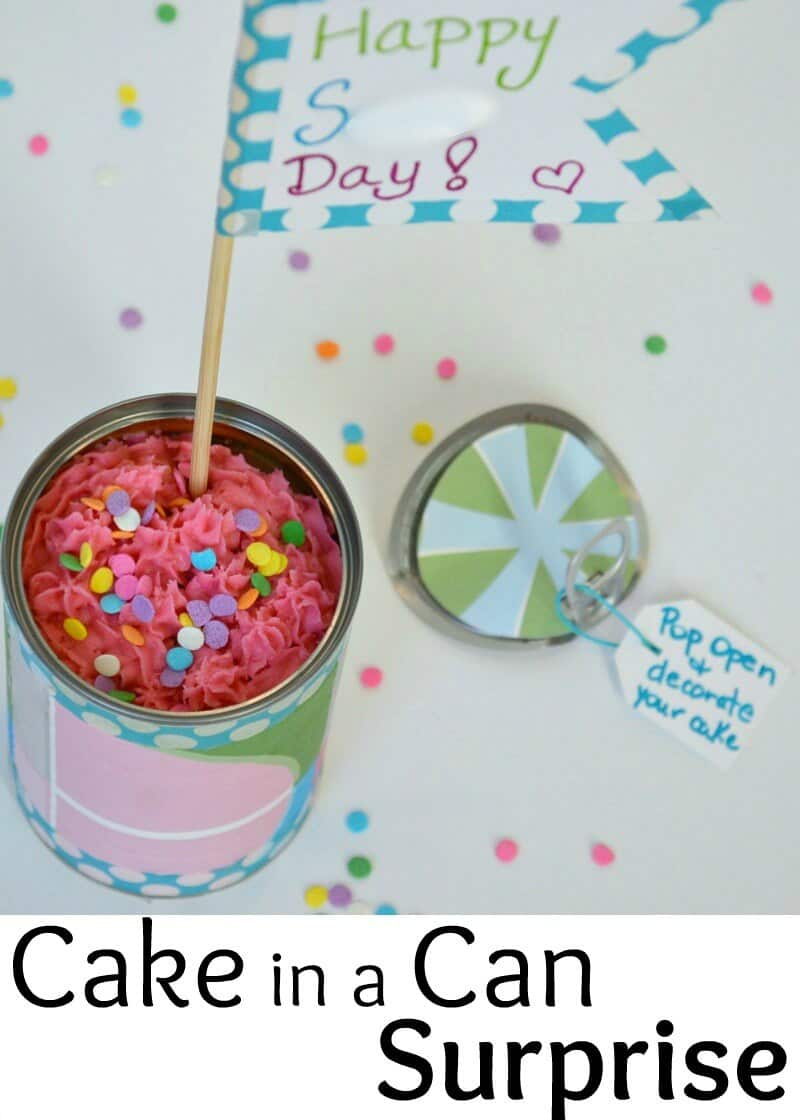
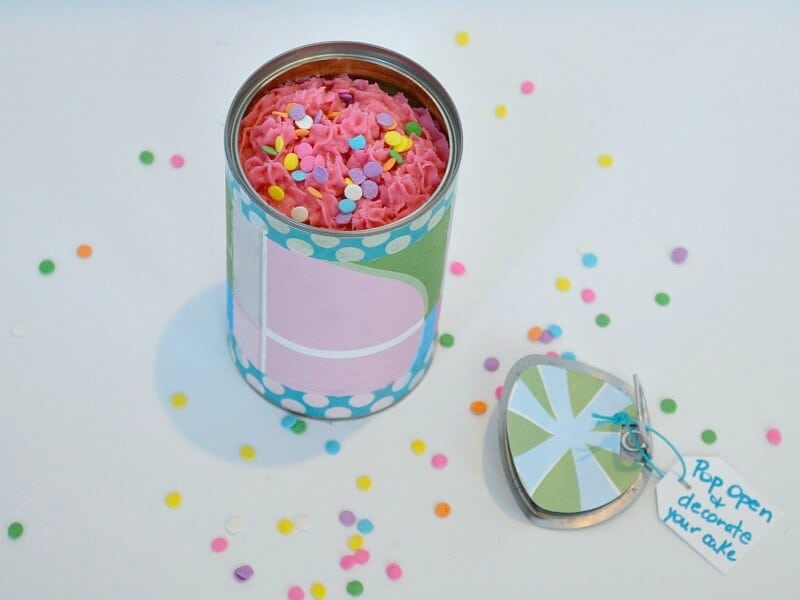
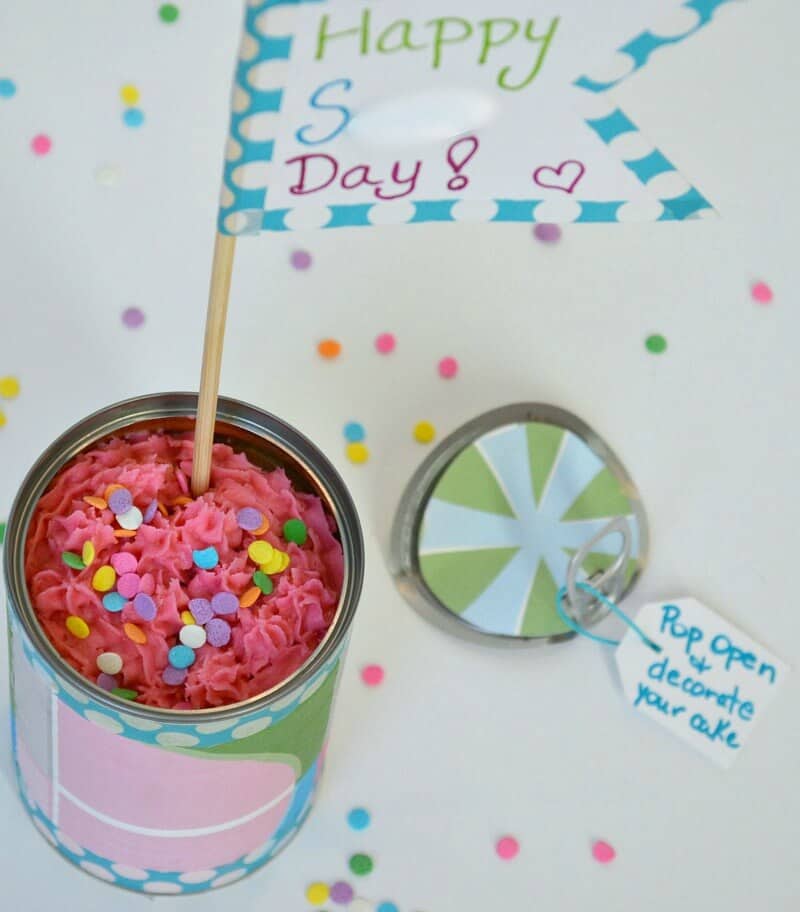
Spoon the cake mix into the cans. I found that I was able to fill five cans about two-thirds full. Don’t fill them too full because you need room for the cake to rise (you’ll need space so that you can seal the lid onto the can later). I added sprinkles to the top of the batter so that the cake will be more festive when my baby first opens the can to add the frosting and decorations.
I baked these cakes for 27 minutes. I recommend you cook them for the upper end of the cooking time for cupcakes. Test the middle of the cakes and then add more time depending on how done (or not) the cakes are.
While the cakes are baking, you can begin cutting the paper and tags to decorate the cans. I had an extra can so that I could use it for measurements.
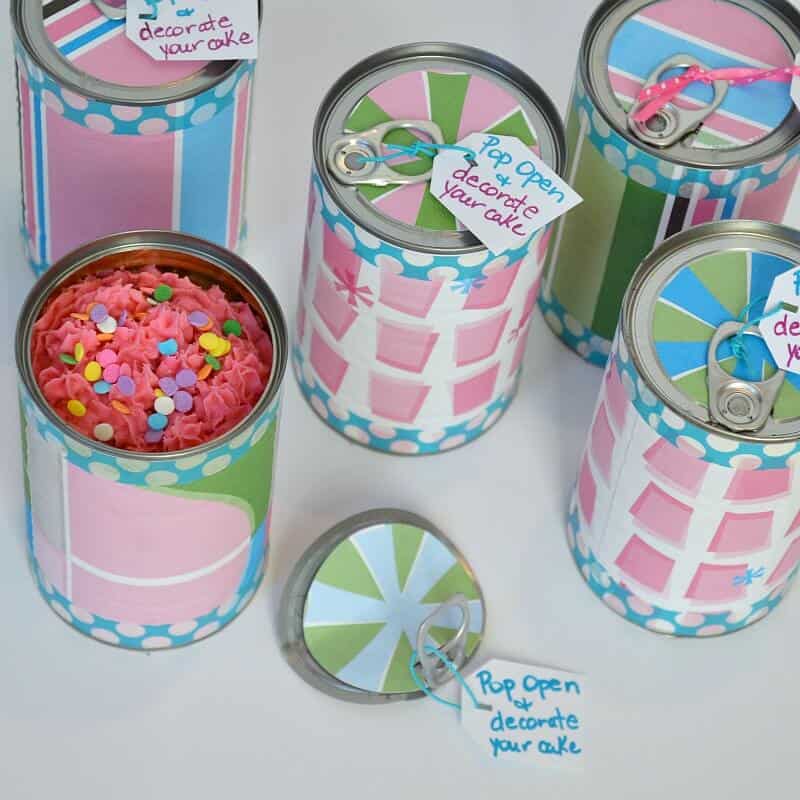
Cut decorative paper to wrap around the can and a circle to cover the top of the can.
Once the cakes are done, let them cool in the can 20 – 30 minutes. Use a knife to carefully loosen the cake from the sides of the can. Remove the cake and let them cool entirely on a wire rack. Wash the cans and dry them very well.
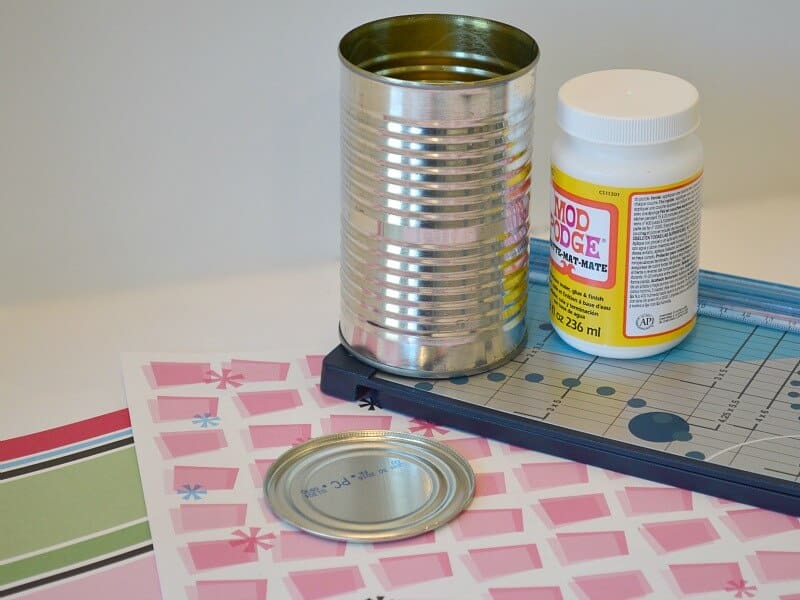
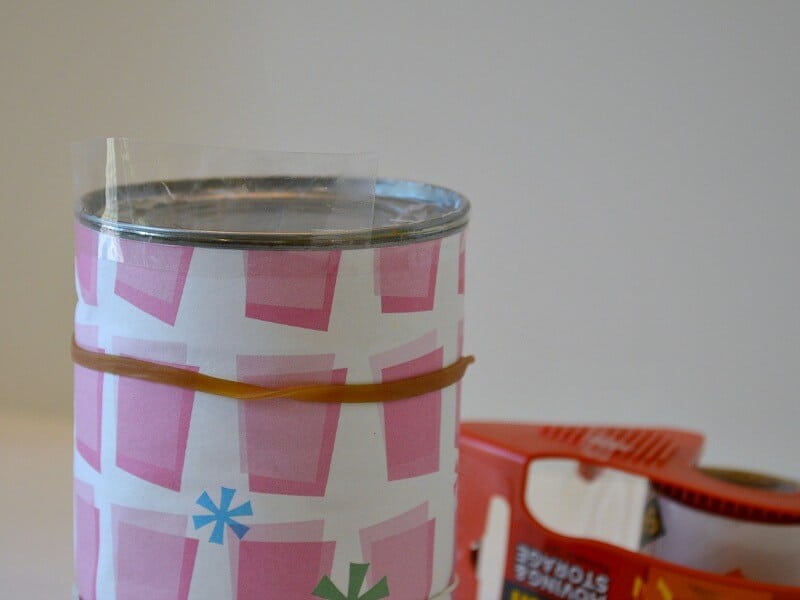
I prefer to use Mod Podge to adhere the decorative paper to the can. I used rubber bands to hold the paper in place on the curved surface while the decoupage glue dried. You could use lots of double-stick tape if you’d prefer.
I recommend you do what I say and not what I did. I was so excited to decorate the cans that I forgot to tape the the bottom of the lid down before I adhered my decorative paper.
Here’s what I should have done:
- Bake cakes in cans.
- Remove cakes from cans after they’ve cooled in the cans about 20 – 30 minutes.
- Wash and dry the cans well.
- Place cake back into can with top of cake with sprinkles going into the can first.
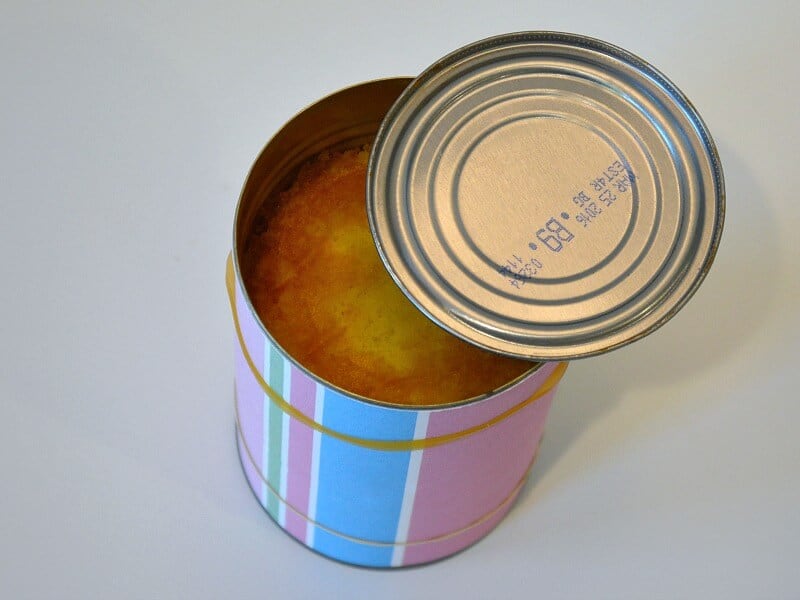
Putting the cake in the can in this way is important so that when the top of the can is opened with the pop top, you’ll see the top of the cake.
Tape the bottom lid of the can onto the can with packing tape. I cut the packing tape in half so that it was about an inch wide.
Add decorative paper to the can so that it covers the edge of the packing tape.
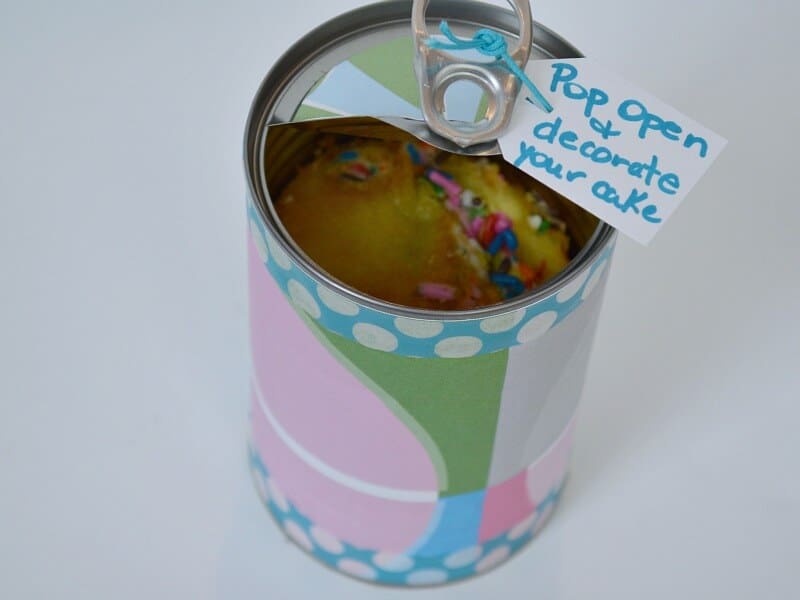
Add a tag to the pop-top ring to let your recipient know what to do with the can.
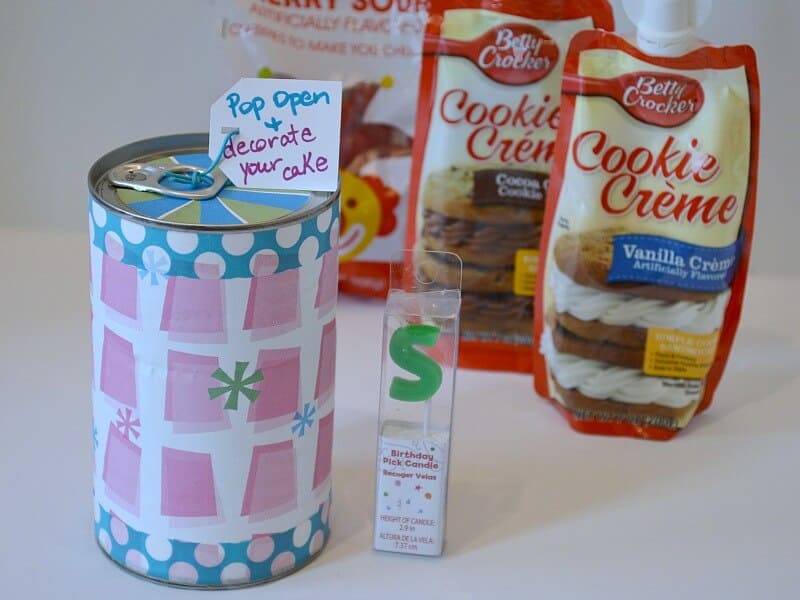
The cakes will make the 2 day trip much better without frosting. I included squeeze frosting, my baby’s favorite candy and a candle to decorate the cakes. This way my baby and her roommates can decorate their own can cakes when they’re ready to eat.
A cake in a can – what a fun surprise.
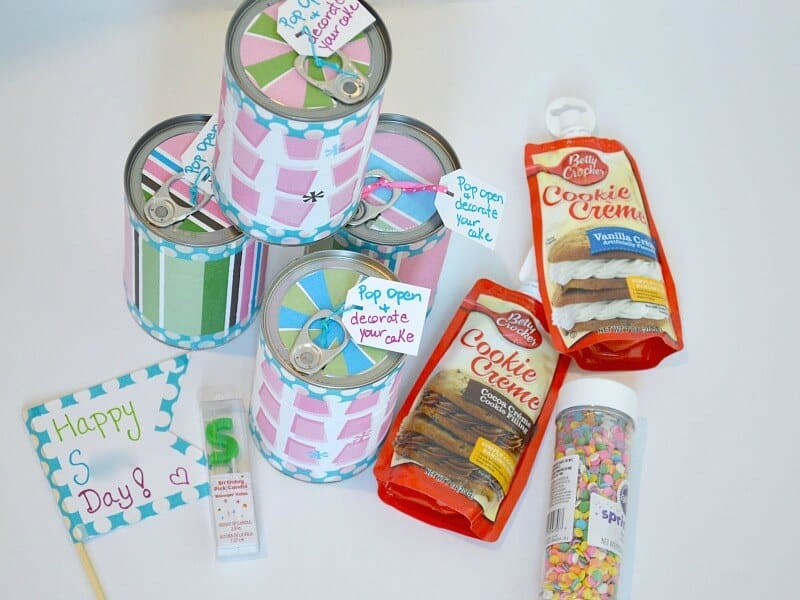
These cake in a can surprise treats are an easy way to send a celebration cake through the mail by simply including the frosting and toppings separately.
It would also be a fun treat for a party with a cake toppings bar so the guests could create their own cake treats.
Add a fast DIY birthday cake banner to really make a celebration. What special occasion do you have coming up that would be perfect for a cake in a can surprise treat?
More treats for mailing:
- How to Package Brownies for Shipping
- Rolo Pretzel Surprise Cookies
- The Best Oatmeal Raspberry Bars
- Oreo and Chocolate Chip Cookies
- Best Oatmeal Fudge Bars Ever

I’m a mom of 3, a veteran, military spouse. I’ve moved into 20+ homes all around the world. My passion is helping busy people make the space and time for what’s really important to them. Learn more about Organized 31 and me.


![9 Tips for staying in touch with your college student. #JustACallAway [Ad]](https://organized31.com/wp-content/uploads/2015/08/Tips-for-Staying-in-Touch-with-Your-College-Student-sq.jpg)

Hi Susan, what a wonderful surprise for your daughter. Thanks for the step by step instructions. I wondered how it was done. I am definitely pinning this one.
Best Wishes, Darlee
She seemed to really enjoy it, Darlene. Even though my “baby” is an adult now, I still want to celebrate her birthday and include some fun and whimsy.
This is adorable and such a fun project for th girls. You come up with the best projects to keep us busy!
Thanks, Monica. I know you’ll have fun making these for your girls.
I love this idea that recycles old cans into something wonderful & tasty! These would be so cute to wrap with Christmas wrap to give to teachers and others you want to thank for the holidays. They’d be really cute as kids birthday party favors, too.
This is the smartest idea ever, Susan. I will have to give it a try. My Mother live far and I am not always able to be with her on her birthday. I know she would love this and feel so special.
Susan – this is absolutely AWESOME !!
I’ve never seen such an idea, and I LOVE it
Definitely unique and a wonderful surprise.
Thanks, Winnie. Can’t wait to see your gorgeous version! 🙂
I wish I had read this sooner! My college girl’s birthday was yesterday!!! I’m going to pin this idea and save it for next year. SO creative!
Happy belated birthday, Seana. I think we should celebrate moms on birthdays! 🙂
How do you attach the tab to the lid?
Hi, Keri. You use a can opener to remove the bottom of the can and leave the tab and top of the can intact. You need the kind of can opener that cuts the can from the side so that the entire cap of the can comes off, not the kind that just cuts out the center of the can.
I like it ,I go to try .
Have fun! 🙂
I love this idea! Thank you so much for posting! How do you get the bottom to stay on securely with such a small edge? I would love to see your mil’s recipe also.
I’m so glad you like it, Kathleen! It was a big hit with my daughter and her roommates. I used clear tape to tape the bottom to the can and then covered the tape with the decorative paper. My mother-in-law will be excited that you asked about her recipe. I’ll have to share that recipe soon. 🙂