Free Pillow Sham Pattern
This post may contain affiliate links provided for your convenience. We earn commissions if you shop through the links on this page. I am also an Amazon Associate and earn from qualifying purchases Read my full disclosure policy.

This simple tutorial, plus free pillow sham pattern will having you sewing your own pillow sham today, even if you have beginning levels sewing skills. This is a fun way make a personalized gift or refresh your home décor.
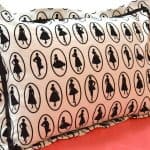
I’ve blinked and suddenly it’s time to send my seconddaughter off to college already. I’m not sure how it happened so quickly. But here we are. Mydaughter found a comforter that she liked but couldn’t find a sham cover to coordinate with the comforter. No problem. I told her I’d make a one for her. She and I went shopping together so that she could find a fabric that she loved. I created a this free sewing pattern that’s truly easy to make with just beginner sewing skills.
Free Pillow Sham Pattern
Trust me when I tell you I am not a seamstress. For those of you who are, please forgive my elementary explanations. But if I’m able to create this gorgeous pillow sham with my limited sewing skills, then anyone can, no matter what your sewing skills are. Really.
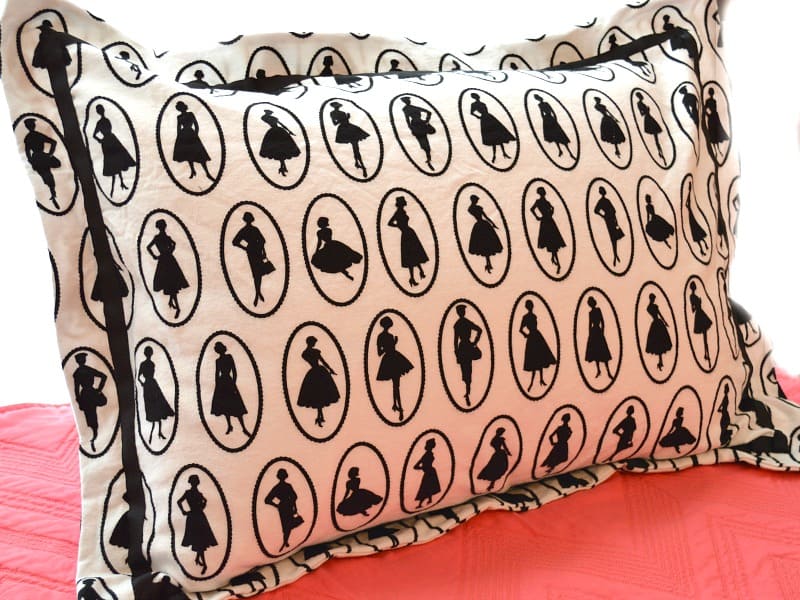
I started with a pillow and fabric that my daughter fell in love with at first sight. She enjoys fashion and retro fashion at that, so this fabric is perfect for her. I had to reverse engineer the pattern, so I made it easier than using 3 pieces of fabric for the sewing pattern. I chose to use just one piece of fabric, so making the pillow cover isn’t complicated,
Flanged Pillow Sham Tutorial
Supplies
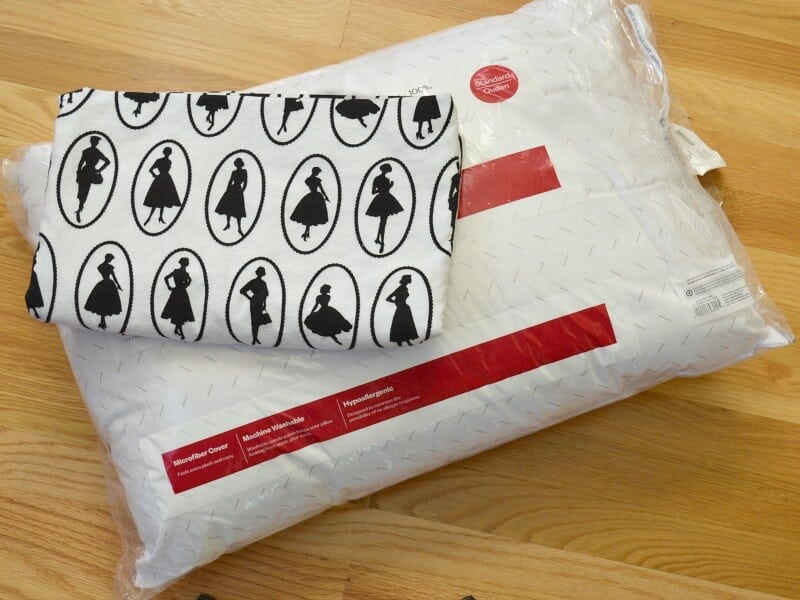
- Standard Size Pillow
- Washable Fabric measuring at least 24 inches by 65 1/2 inches – If you purchase fabric with a pattern that needs to be lined up and has a right-side-up (on our fabric, the women need to be upright), then plan for that and purchase enough fabric to accommodate the pattern.
- Coordinating Thread
- Sewing Machine
- Scissors
- Fabric Pins
- Pillow Sham Pattern – You can get your free copy of my pattern for your personal use by signing up for my free newsletter below.
- Pillow Sham you already have – if you have a pillow sham, it is helpful to use it as a guide and to help you follow the tutorial steps.
Make a Pillow Sham Steps
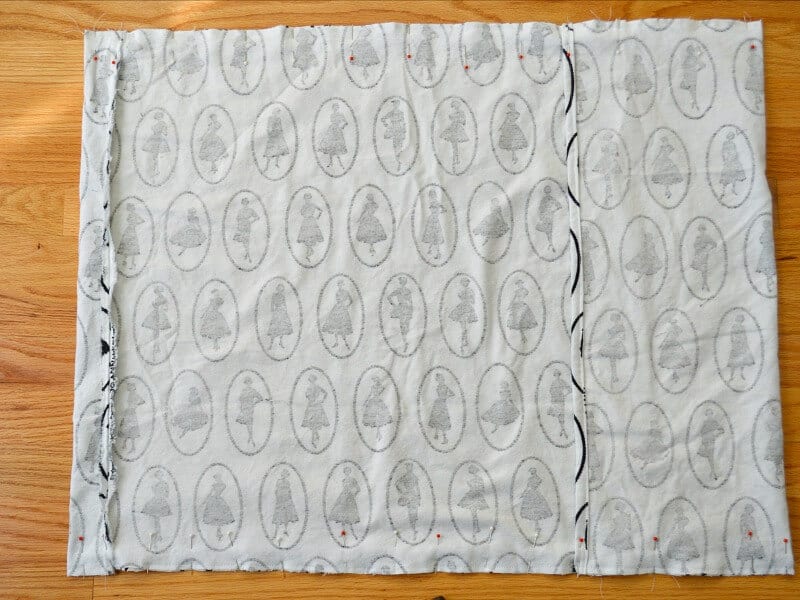
Cut your fabric so that you have one piece that is 24 inches tall and 65 1/2 inches long. You will use this single fabric piece to create the front and back panels. You do not need to cut any additional fabric pieces.
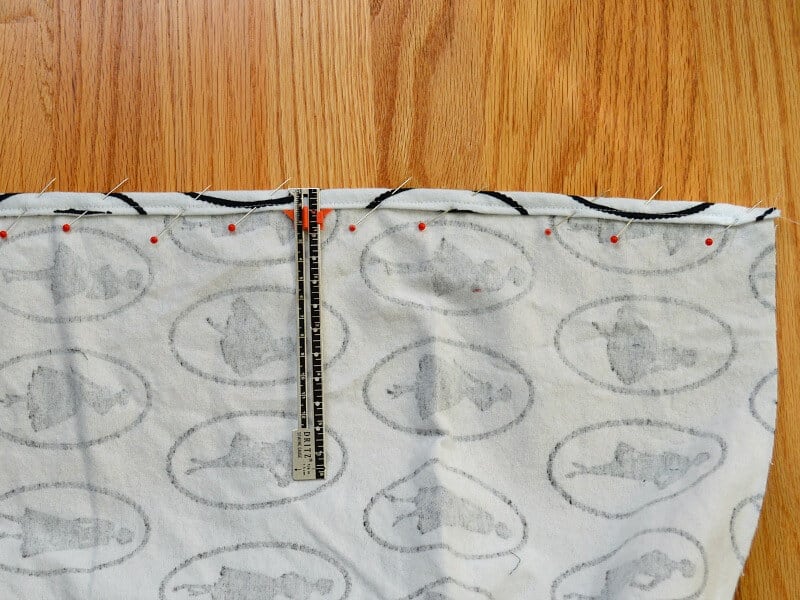
Start by sewing a seam on the two short sides of the fabric. Turn the raw edges 1/2 inch under and then fold it over again. Sew this seam down.
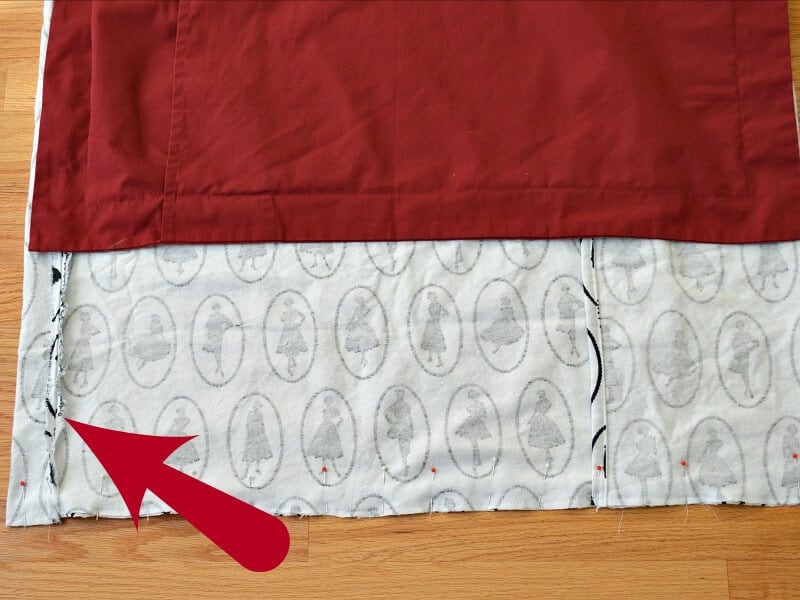
Fold the fabric over with the right sides of the fabric together. You will need to leave an envelope opening on the the back of the sham to insert the pillow. This means that you will overlap the edges of the sides with the hemmed edges. You can fold the fabric so the opening is in the back center of the pillow sham, but I chose to offset the opening towards one side of the pillow. The short side of the two back pieces should be 8 3/4 inches long. The entire pillow sham should be 31 inches wide.

You can adjust the size of the back panel pieces by shifting where you place the overlap for the opening. This allows you to customize the pattern to your preferences.
Because of the pattern on my fabric I had to sew two smaller pieces of fabric together to create the one 24″ by 65 1/2″ starting fabric, so I had a seam that I had to plan to accommodate. I used a pillow sham that I already have as a guide, so I laid it out to plan for my seam to be on the back of the pillow sham.
Pin the edges of the sham together and sew the long sides together with a 1/4 inch seam allowance.
Clip the corners. Turn the pillow sham right side out. Poke out the corners so that they’re neat and smooth. Straighten all the seams and pin around the edges. Pay attention to pinning the ends that will overlap to keep the fabric in place so they don’t move while you sew the next step.
Sew a seam 1 3/4 inches from the edge to create the pillow flange. You can adjust the size of your flange depending on how full the pillow form you’ll be inserting is. Sew around the entire edge of the pillow sham cover.
Pin and then sew the long sides together with a 1/4 inch seam.
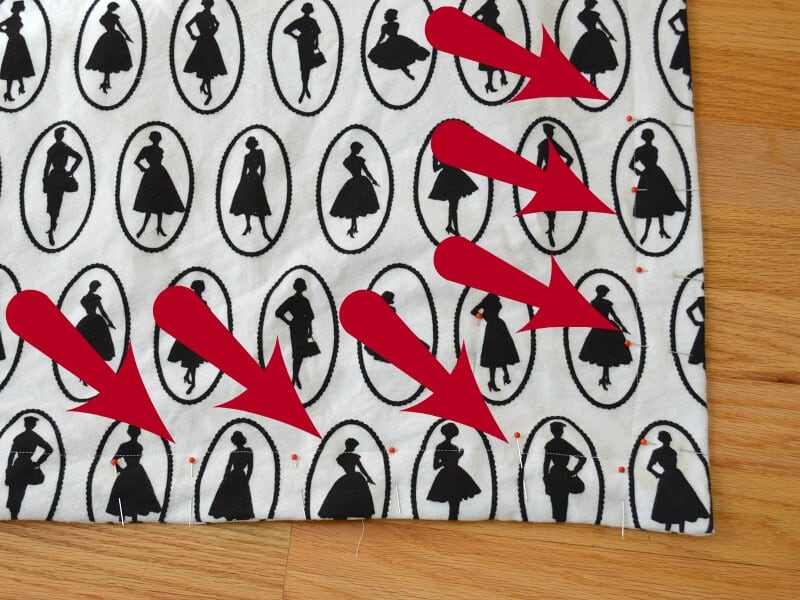
Turn the pillow sham right side out. Straighten all the seams and pin around the edges. Sew a seam 1 3/4 inches from the edge to create the pillow flange.
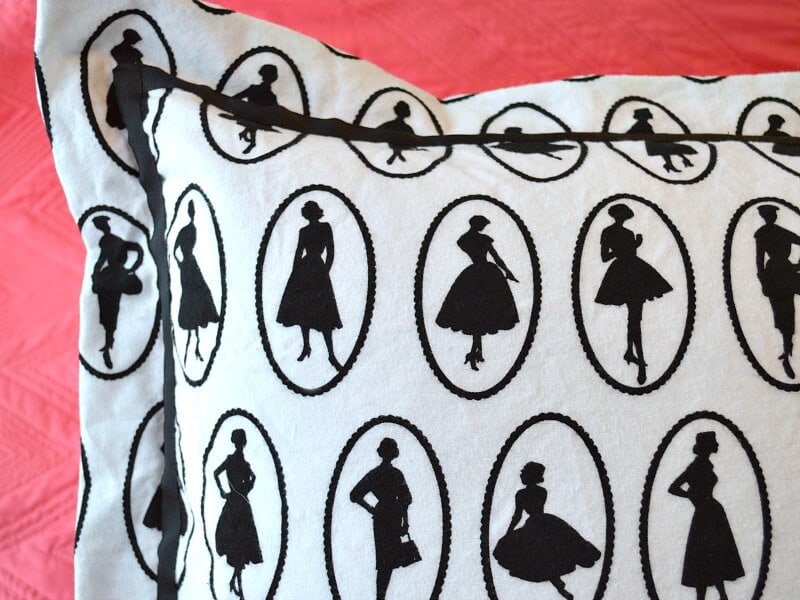
Upon seeing the almost finished flanged pillow sham, my daughter immediately realized it needed a bit more embellishment. We added a black ribbon. I hand-sewed the ribbon onto the pillow sham.
Adding the ribbon embellishment really took this fashionable pillow sham to a classy level, don’t you agree?
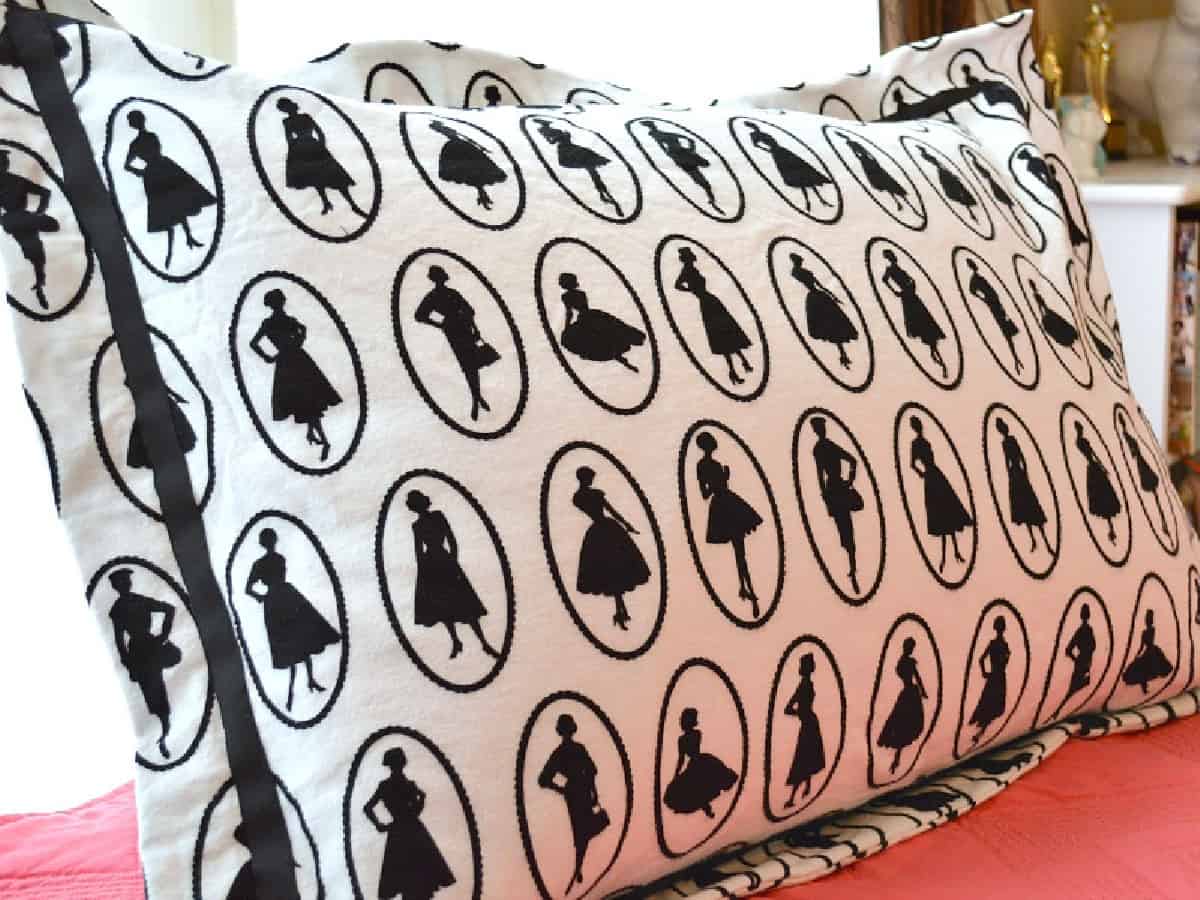
Now each night when my daughter is away at college and heads to bed, she’ll see a concrete reminder of how much I love her and miss her. Who do you know that would appreciate a personalized pillow sham that you can make from this free pillow sham pattern?
Printable Tutorial
Use the box below to print out the steps of the tutorial so you can have them with you while sewing.
Free Pillow Sham Pattern and Tutorial
Supplies
- 1 sewing machine you could use washable fabric glue if you don't have a sewing machine
- 1 Pair of Scissors
- 1 set of fabric pins
- 1 standard size bed pillow
- 1 piece Washable Fabric measuring at least 24 inches by 65 1/2 inches If you purchase fabric with a pattern that needs to be lined up and has a right-side-up (on our fabric, the women need to be upright), then plan for that and purchase enough fabric to accommodate the pattern.
- 1 spool Coordinating Thread
- 1 Pillow Sham Pattern You can get your free copy of my pattern for your personal use.
Instructions
- Cut your fabric so that you have one piece that is 24 inches tall and 65 1/2 inches long. You will use this single fabric piece to create the front and back panels. You do not need to cut any additional fabric pieces.
- Start by sewing a seam on the two short sides of the fabric. Turn the raw edges 1/2 inch under and then fold it over again. Sew this seam down.
- Fold the fabric over with the right sides of the fabric together. You will need to leave an envelope opening on the the back of the sham to insert the pillow. This means that you will overlap the edges of the sides with the hemmed edges. You can fold the fabric so the opening is in the back center of the pillow sham, but I chose to offset the opening towards one side of the pillow. The short side of the two back pieces should be 8 3/4 inches long. The entire pillow sham should be 31 inches wide.
- Pin the edges of the sham together and sew the long sides together with a 1/4 inch seam allowance.
- Clip the corners. Turn the pillow sham right side out. Poke out the corners so that they’re neat and smooth. Straighten all the seams and pin around the edges. Pay attention to pinning the ends that will overlap to keep the fabric in place so they don’t move while you sew the next step.
- Sew a seam 1 3/4 inches from the edge to create the pillow flange. You can adjust the size of your flange depending on how full the pillow form you’ll be inserting is. Sew around the entire edge of the pillow sham cover.
- Pin and then sew the long sides together with a 1/4 inch seam.
- Turn the pillow sham right side out. Straighten all the seams and pin around the edges. Sew a seam 1 3/4 inches from the edge to create the pillow flange.
More Simple Sewing Tutorials that Only Require Basic Sewing Skills
Easy to Make Flannel Blanket – This easy-to-make flannel blanket tutorial helps you make the perfect gift. You can personalize it for your friends’ & family’s interests.

DIY Rice Heating Pads – Make DIY Rice Heating Pads to warm cold feet, your bed in the winter & treat aches and pains. Microwave rice heating packs are easy to make for less than $2.
You can find all our best craft tutorials and ideas in the table below. You can scroll though the table and look for ideas or search for specific ideas with the magnifying glass in the upper right-hand corner (on desktop). Click on the topic and then click through the specific article.

I’m a mom of 3, a veteran, military spouse. I’ve moved into 20+ homes all around the world. My passion is helping busy people make the space and time for what’s really important to them. Learn more about Organized 31 and me.


How fun is that! What a great way to personalize her dorm room. She will think of you every time she sees that pillow…and everything else you have made for her. She is one lucky “baby” to have you!!!!
Awww, Monica, you’re sweet. 🙂
I love this pillow sham. I am so in love with the fabric. I bet this sham reminds your baby of you overtime she sees it. Such great instructions too.
I have actually been needing to make a sham for a pillow in my son’s room – adding this to this week’s to-do list. Thanks so much for the free pattern!
Hang on! I did it, too. Then I blinked again. And now he’s 43 years old, married, and raising a teenager!
Thanks for the tutorial. I’m making shams for my new quilt my sister-in-law made me.
It goes by so inexplicably fast, doesn’t it, Barbara?! Enjoy your new quilt and pillow shams!
ur flanged pillow is lovely..Thanks for sharing.Ishall try.
Thank you, Amita! Have fun making your own. But warning – making them becomes addictive.
Could I sew the decorative trim on by machine. I hate hand sewing.
Yes, I think so, Barbara. We added it after we’d finished the sham and felt like it was too plain. If you plan ahead, you should just be able to machine sew it before you assemble the front and back of the sham. I’d love to see a photo of your finished one!!!