How to Add an Image to a Candle – Easy Tutorial
This post may contain affiliate links provided for your convenience. We earn commissions if you shop through the links on this page. I am also an Amazon Associate and earn from qualifying purchases Read my full disclosure policy.
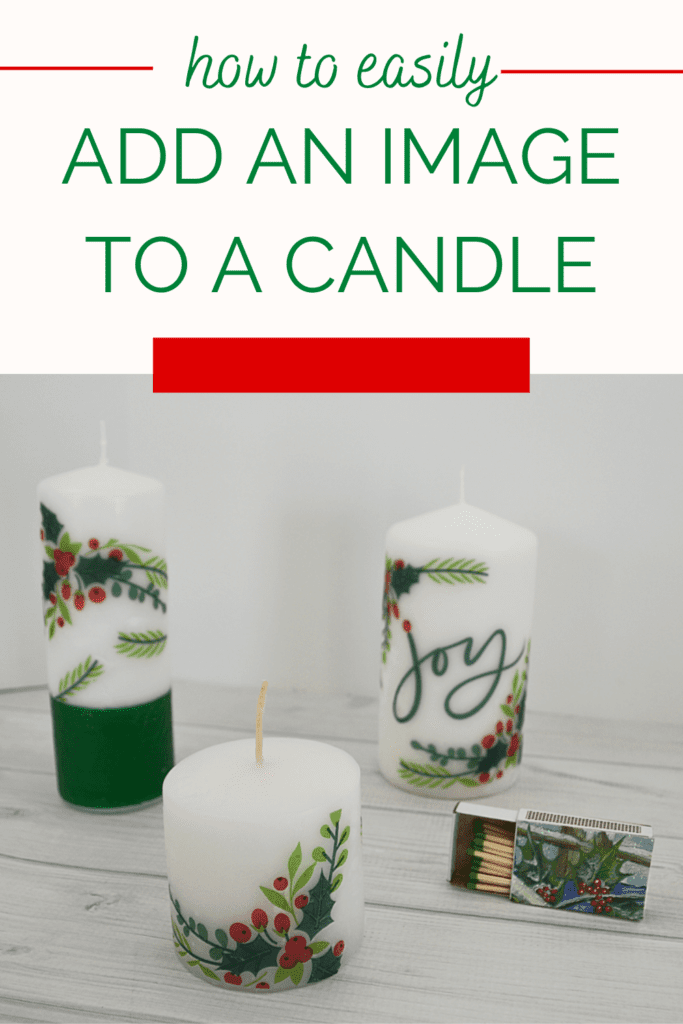
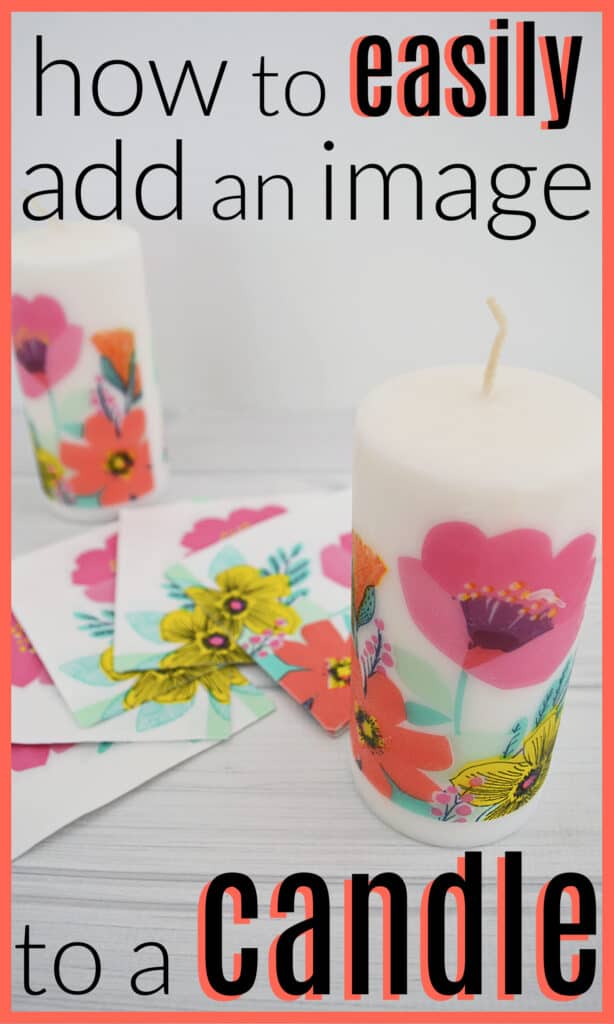
If you’re looking for a fun craft or DIY beautiful gifts, this tutorial on how to add an image to a candle is for you. It’s an easy craft for beginners and budget friendly (while looking high end), too. Plus, I love that the customization possibilities are endless.
I’m always looking for fun crafts that are easy to make, but still look nice enough to give as a special gift. A friend of mine told me about this technique years ago, but I just tried it recently. I was so impressed with how lovely the candles turned out that this is my new go-to craft. I’m excited because it makes great gifts that are so easy to personalize.
I prefer this transfer technique for candles over other options, because you can burn the candle and the image will burn as the candle does. Of course, always be sure to closely monitor burning these custom candles.
The brilliance of this simple craft is that you can tailor it to so many different situations:
- Personalized gift
- Mother’s Day present
- Housewarming gift
- The perfect gift when you don’t know what to give
- To sell on Etsy, craft fairs or in an upscale boutique
- Wedding décor or gifts
- Party decoration
- Halloween candle
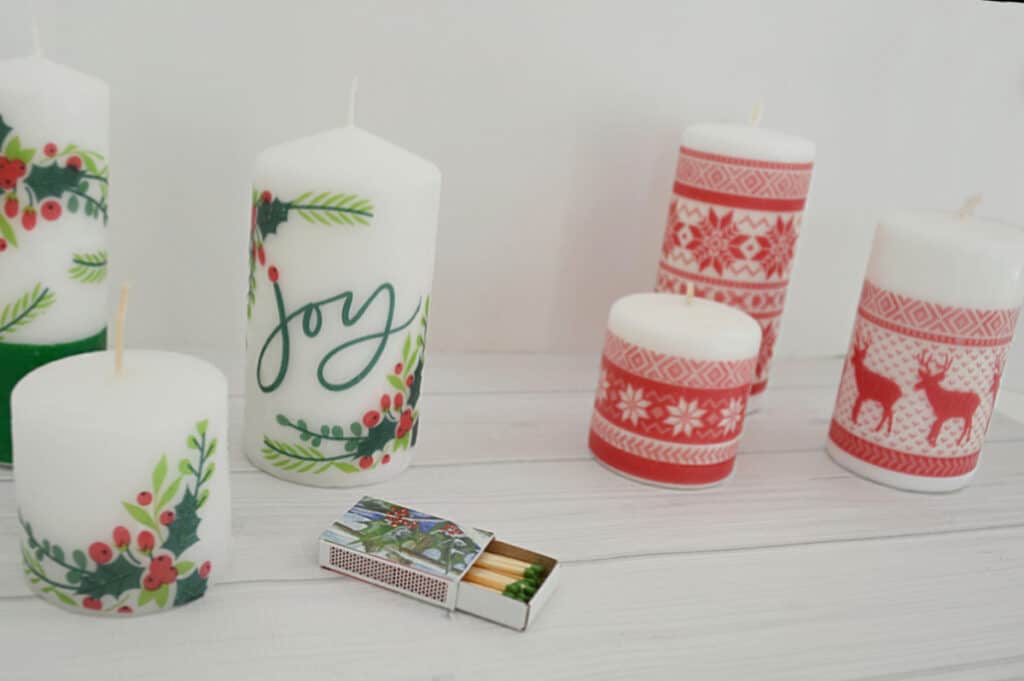
- Christmas candle
- Add a DIY Decorative Matchbox for custom Christmas gifts.
- Memorial candles
- Home décor for anytime of year
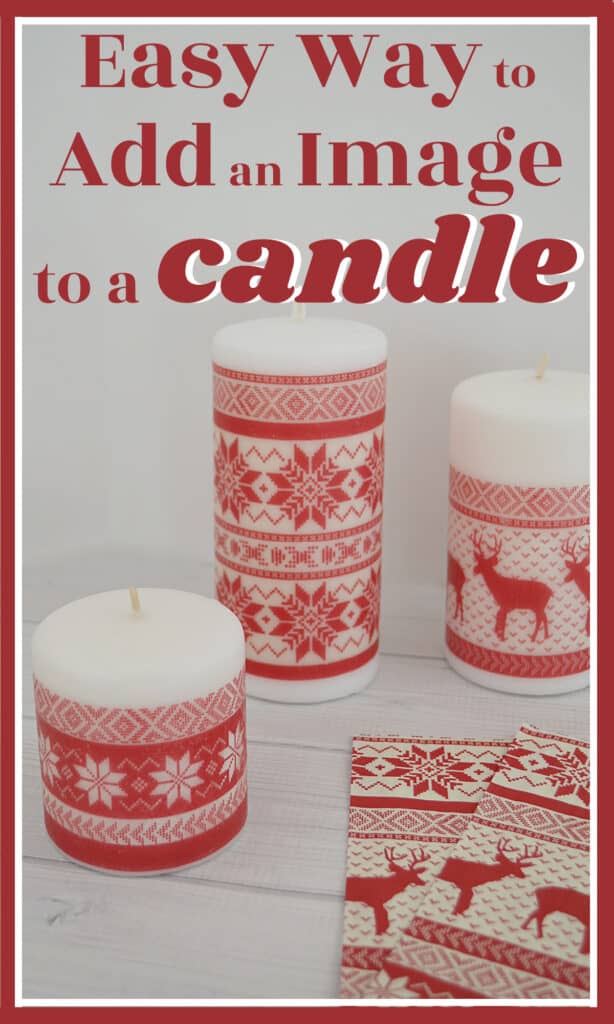
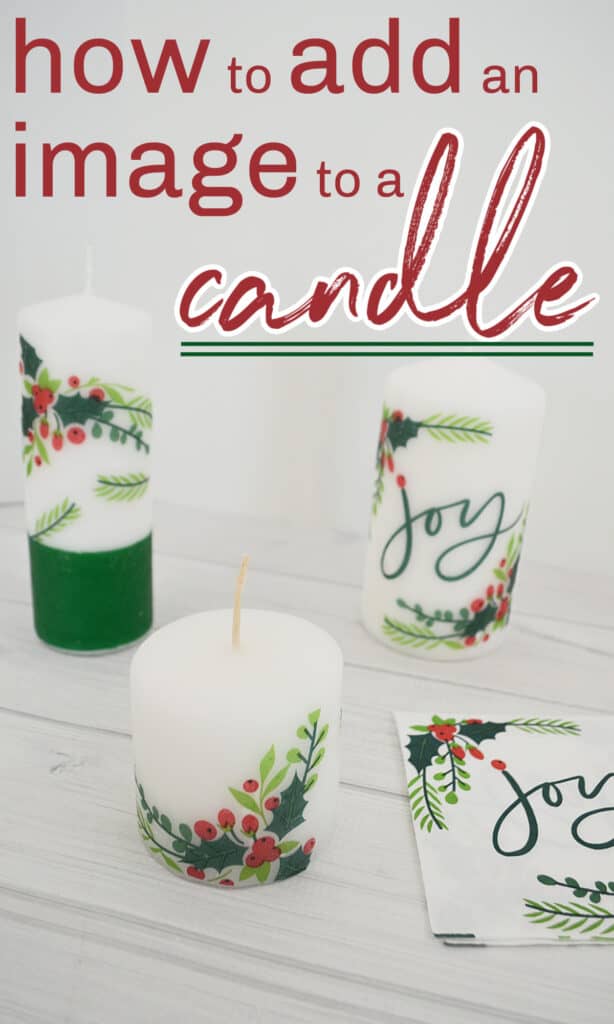
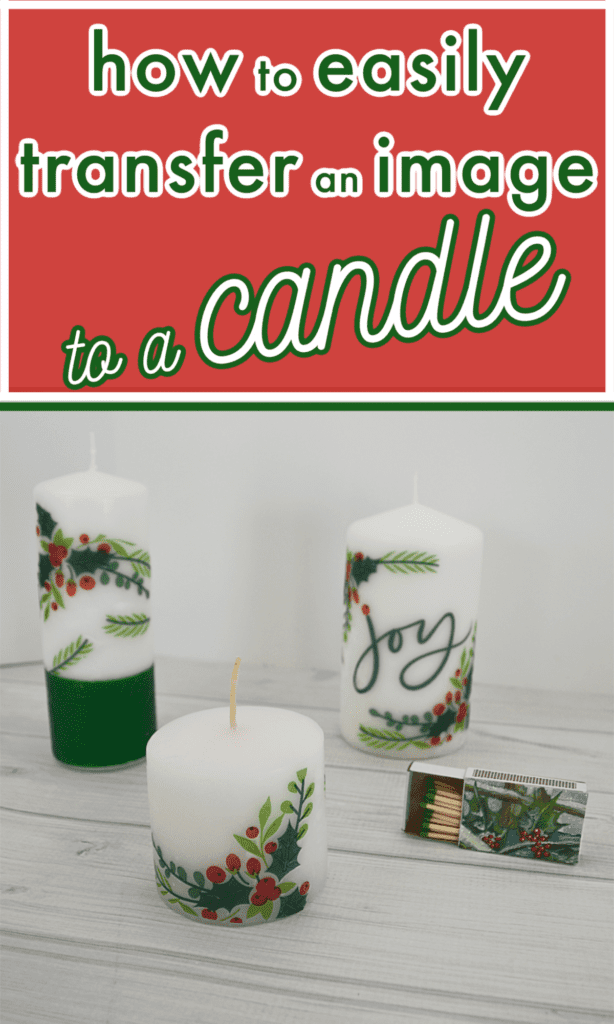
This is an easy image transfer process that requires no unusual tools. You can create photo candles, candles with a message or decorative candles with images.
How to Add an Image to a Candle
While this is an easy craft appropriate for beginning crafters, make sure that children are closely supervised. Due to using focused heat from an embossing gun or hair dryer, always take care to protect your fingers and hands.
I love the endless image possibilities when you use decorative napkins, hand towels or even tissues.
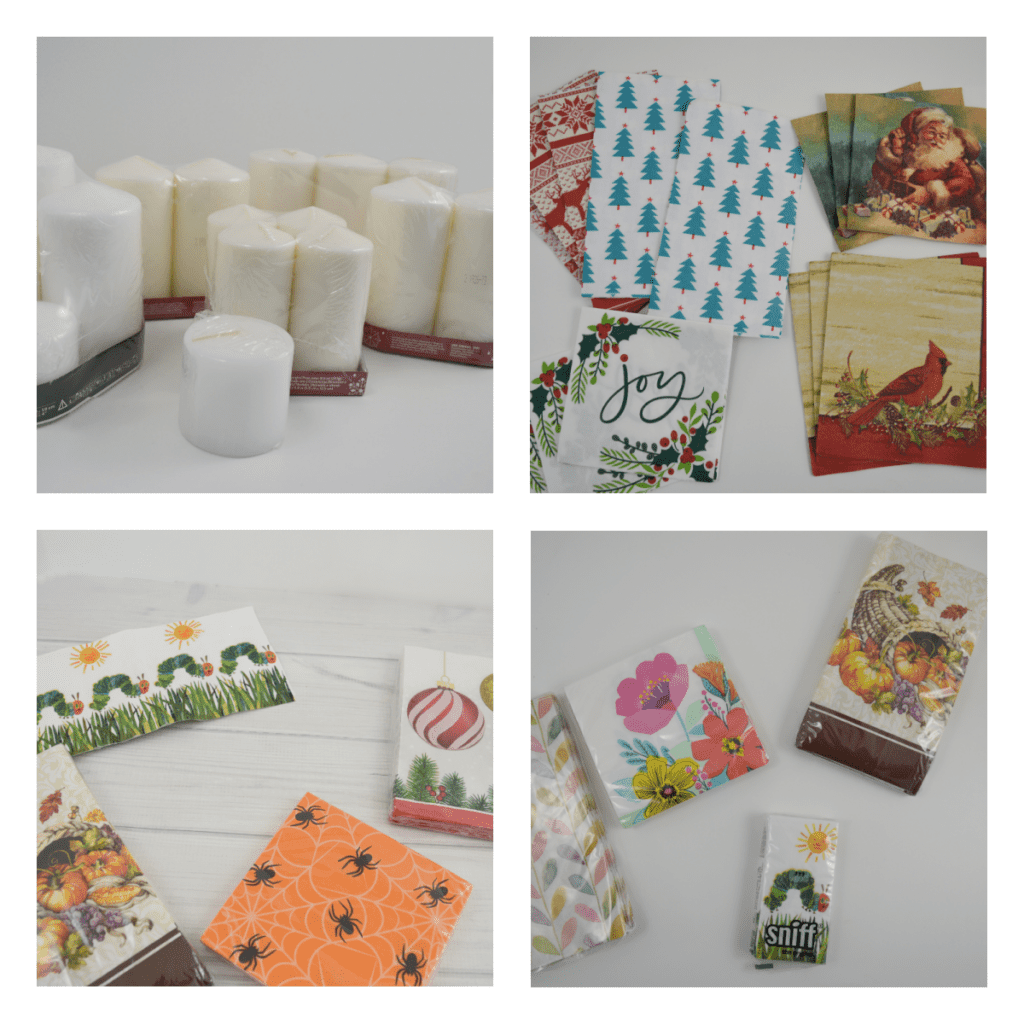
What you need to make beautiful candles
Candles
- Wax candle
- White or light colored candle
- Plain candle or one with a design that allows you enough blank space to place your own image
- You can use flameless candles if they have a wax exterior
Image
- Print your own image on a piece of plain tissue paper using a laser printer or inkjet printer, per the directions below.
- You can use clip art, a favorite photo, or treasured family photos.
- Use a thin decorative paper napkin or hand towel. If your choice is thicker, carefully separate the top layer with the design from the back layer and only use this layer.
Scissors
Sheet of wax paper
Craft heating tool – a tool that concentrates the heat so you can direct it where you want
- Heat embossing gun or craft heat gun
- Hair dryer or blow dryer
How to add printed images to a candle
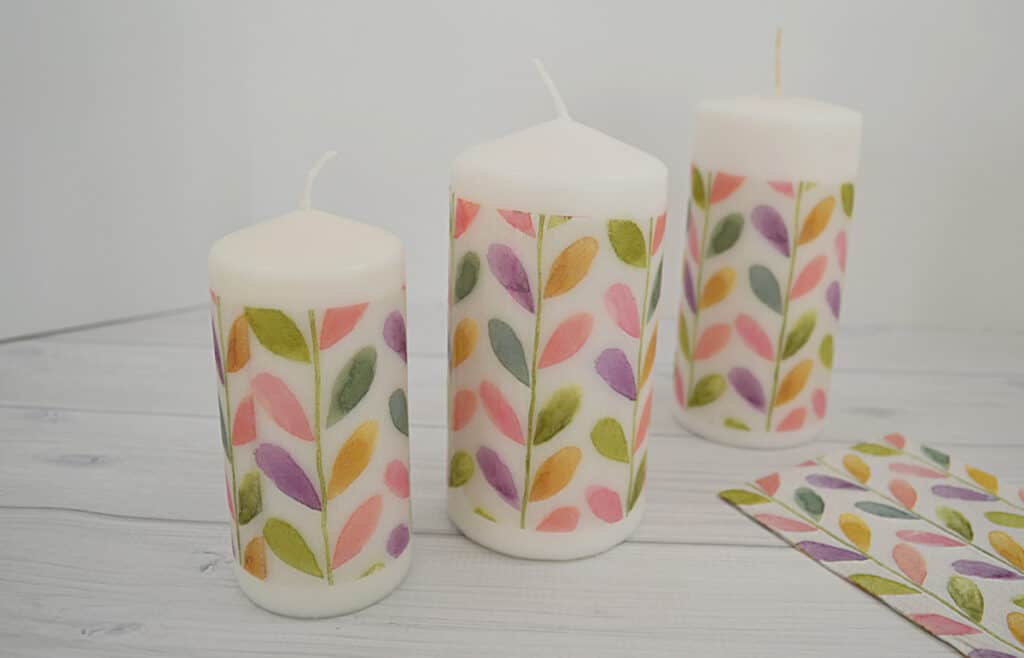
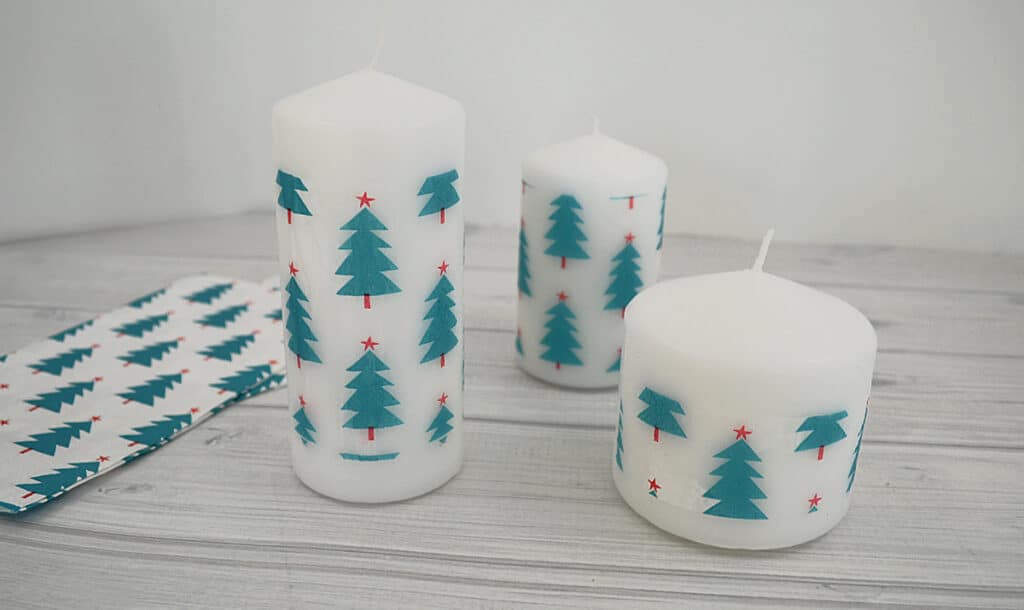
Step 1 – Select your image and cut away excess tissue paper or paper napkin so it will fit onto your candle. You can use a piece of tissue paper or napkin that can wrap around your candle or cut out the tissue paper design into individual pieces.
If you are using a strip that will wrap around your candle, cut the edges carefully so they line up as closely as possible to prevent a gap between the edges on the finished candle.
Step 2 – Carefully place your image onto the candle and hold it in place. Wrap a piece of wax paper around the candle tightly so it holds the tissue paper in place. If your wax paper has different textures, place the waxy side of the wax paper next to the image and candle.
If you are using multiple smaller images, place one image and secure it with the wax paper. Place the candle on the table with that image on the table and carefully peel one piece of wax paper back to add the next image. Add the remaining images one at a time while holding the previous images in place.
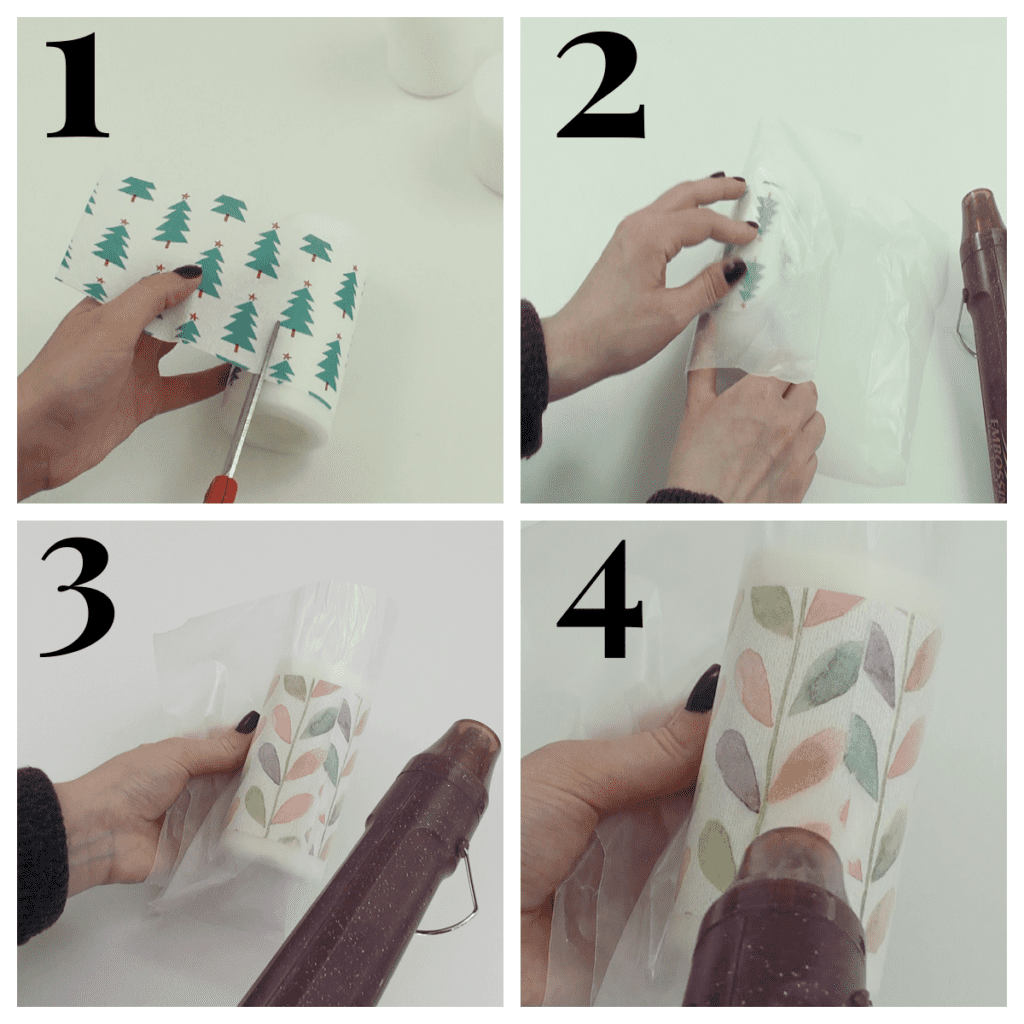
Step 3 – Pull the wax paper tight so that you can hold the candle up by the extra wax paper. You may have to adjust the paper a few times to find a secure and comfortable way to hold it.
Step 4 – Direct the heat at an angle onto the wax paper and keep it moving. Watch closely and you will be able to see when the wax starts to melt and cover the image.
Be careful to keep your hands and fingers away from the heat.
Start with the embossing gun or hair dryer at an angle about 6 inches away from the candle. Slowly move it closer to the surface of the wax paper, while moving the tool constantly back and forth.
For best results, as you see the wax melt and cover the image, move onto another part of the image. Pay particular attention to apply enough heat to the edges of the design to make sure they are securely adhered.
Readjust the wax paper as needed to be able to hold the candle safely while you use the tool until the wax melts and the entire image is adhered.
Tips for adding images to candles with a heat tool
It’s easiest to use white tissue paper and white inexpensive candles for your first time trying this craft technique.
If you’re using paper napkins or hand towels, look for thin paper options or separate the layers and only use the top layer with the design.
It’s easier to add one or two large images, especially when you’re first learning this technique. I recommend you master the technique before trying to add multiple small images.
If you want to add multiple small images, add them one or two at a time, remove the wax paper, add the next images and then reapply the wax paper. Check the wax coating on the wax paper and use new wax paper, if needed.
- You can use any size candle depending on the image you choose:
- Pillar candle
- Taper candle
- Different sizes from a small candle to a short one to almost any size you want
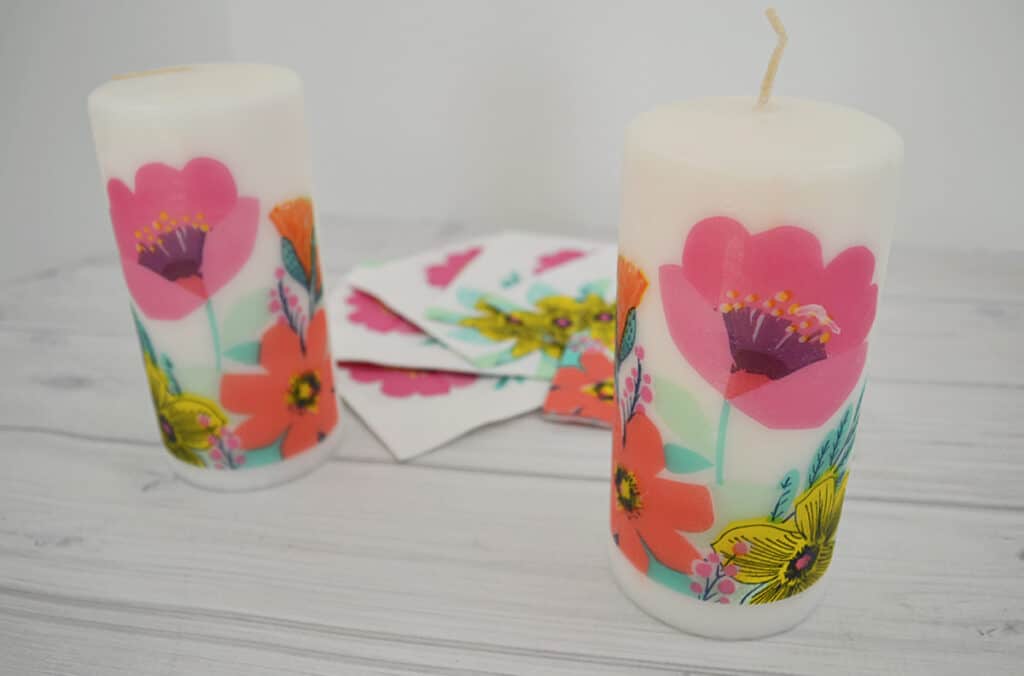
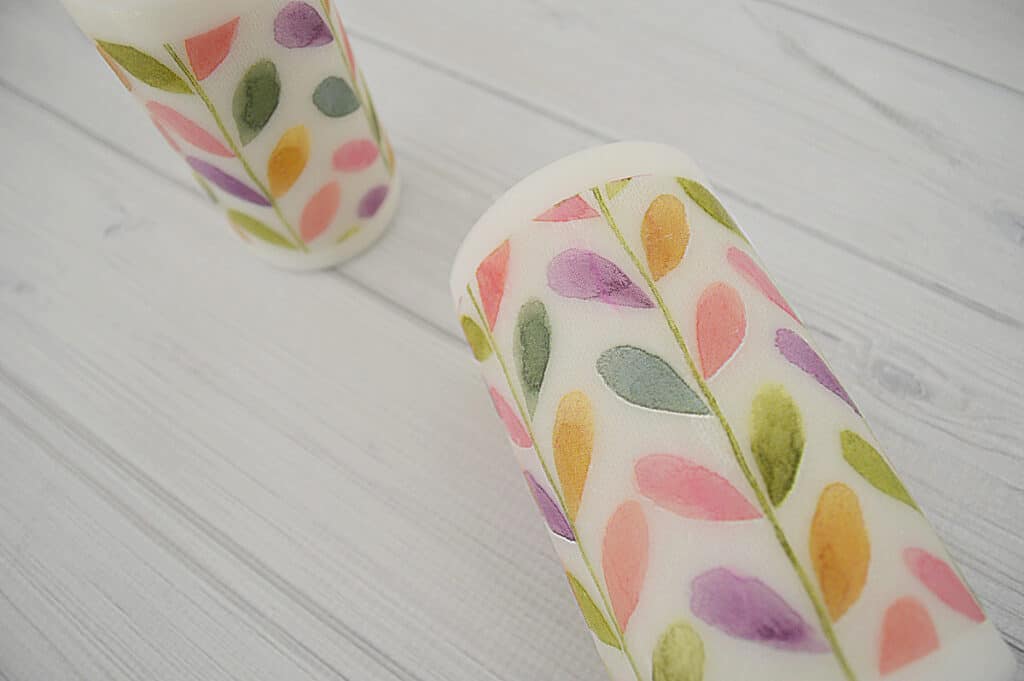
- While I recommend using white candles, you can use dark candles if you use an image with a dark background and trim the excess tissue paper and leave only the thinnest edge of paper around the printed image.
A set of different size candles decorated with complimentary designs makes a unique gift.
Cut the piece of wax paper large enough to leave long edges to make it easier to hold the candle and protect your hands.
You may want to use an oven mitt to protect your fingers.
Check the image when you remove the wax paper. If you find areas that are not covered by the wax, place a new piece of wax paper on the candle and direct the heat tool to that area.
FAQ about how to add an image to a candle
How do you transfer tissue paper to candles?
- Use small pieces of tape to secure white tissue paper to a piece of printer paper.
- Print the image from your computer onto the tissue paper (be careful that the paper is smooth so it doesn’t jam in the inkjet printer). You can also use a thin decorative paper napkin or hand towel.
- Remove the tissue paper and trim around the image with scissors.
- Position the image on the candle. A white or very light colored candle works best.
- Cover the image with a piece of wax paper large enough to wrap tightly around the candle, leaving enough to hold the candle tightly.
- Direct the hot air from the heat tool on an angle towards the image under the wax paper. Keep the heat moving until you see the wax melt and cover the image. Be careful not to burn yourself during the process.
- Continue melting the tissue paper image into the was until the entire image is adhered.
- Carefully peel the wax paper away. The image will remain on the candle, under a thin layer of wax.
How do I put a picture on a candle?
- Do not use printed images on heavy paper. Thin paper works best for this technique.
- Tape white tissue paper securely to a piece of printer paper. Make sure the tissue paper is smooth and secure so that it doesn’t cause your printer to jam.
- Print the photo from your computer onto the tissue paper.
- Remove the tissue paper from the copy paper and trim the extra tissue paper away from the image with scissors.
- Place the photo image on the candle.
- Cover the image with a piece of wax paper large enough to wrap tightly around the candle, leaving enough wax paper to hold the candle tightly.
- Direct the hot air from the heat tool on an angle towards the image under the wax paper. Keep the heat moving until you see the wax melt and cover the image. Be careful not to burn yourself during the process.
- Continue melting the tissue paper image until the entire image is adhered.
- Carefully peel the wax paper away. The image will remain on the candle, under a thin layer of wax.
More ideas for gifting this unique idea for a gift:
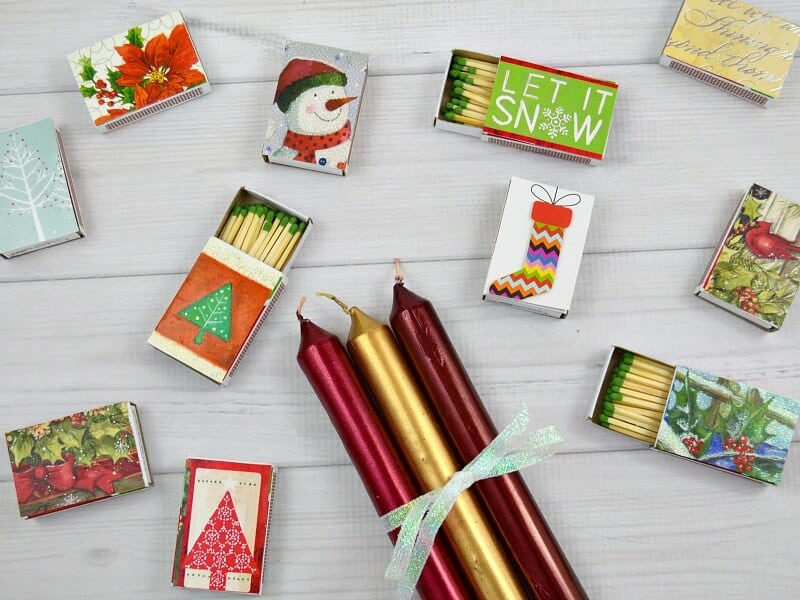
- DIY Decorative Matchbox from Recycled Christmas Cards Make decorative matchboxes to give as gifts and for holiday décor. This is a frugal and easy craft that uses recycled Christmas cards.
- Repurposed Pants Made into an Upcycled Gift Bag – Make this simple and creative gift bag for your decorated candle.
Other DIY gift ideas you might have missed
- 80+ Easy DIY Gift Ideas – Giving handmade gifts is a special way to show you care. Handmade gifts are unique ad often one-of-a-kind.
- DIY Gift Card Holders – Make your own DIY gift card holders from recycled Christmas cards. They’re easy to make, frugal, earth-friendly and adorable.
- Creative Gift Wrap Ideas – Make a cozy, warm creative gift wrap idea for a reusable, earth-friendly gift bag that makes gifts an extra special surprise.
Be sure to pin this easy tutorial on how to add an image to a candle so you can find it every time you want to make a personalized candle.
You can find all our best craft ideas ideas in the table below. You can scroll though the table and look for ideas or search for specific ideas with the magnifying glass in the upper right-hand corner (on desktop). Click on the topic and then click through the specific article.

I’m a mom of 3, a veteran, military spouse. I’ve moved into 20+ homes all around the world. My passion is helping busy people make the space and time for what’s really important to them. Learn more about Organized 31 and me.