Kool-Aid Dyed Yarn DIY Plant Pot
This post may contain affiliate links provided for your convenience. We earn commissions if you shop through the links on this page. I am also an Amazon Associate and earn from qualifying purchases Read my full disclosure policy.

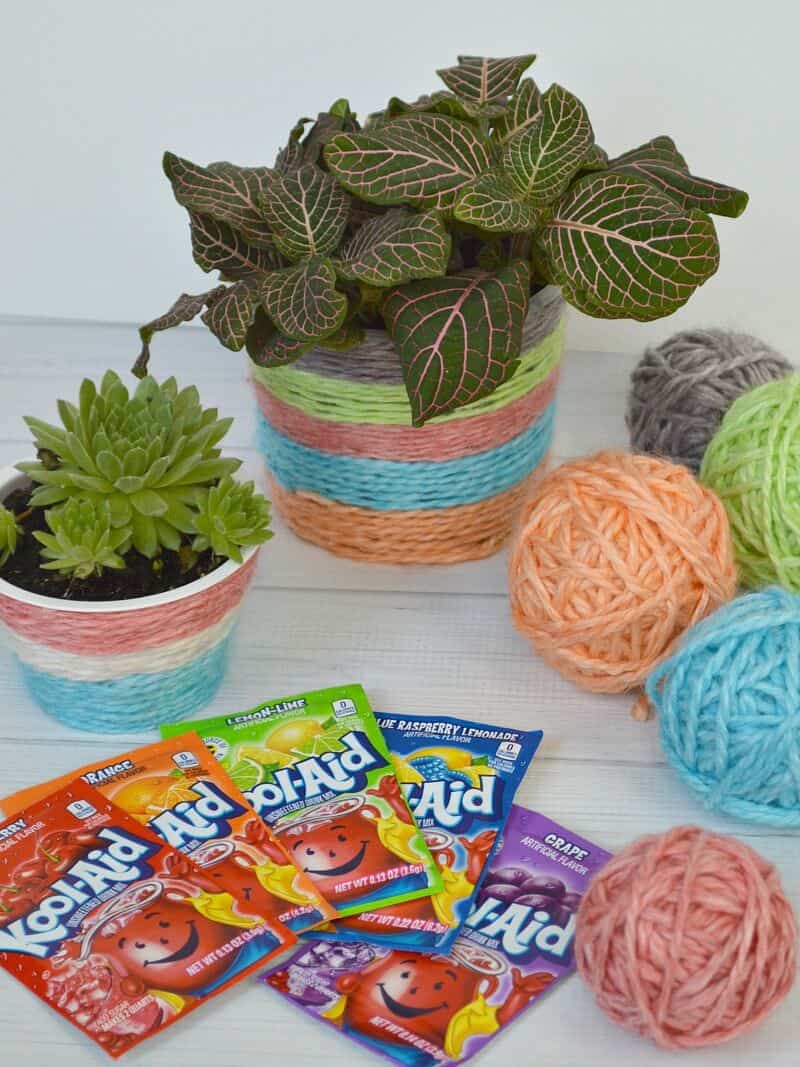
With warm weather here and summer vacation looming ahead, I’ve been planning fun summer DIY projects that I can make with my kiddos. I decided to to design a 2-step craft project (that way I could spend more crafting time with my children) and create a Kool-Aid Dyed Yarn DIY Plant Pot.
Did you know that you can dye yarn with Kool-Aid? How cool (pun intended) is that?! Just think of all the bright, happy summer colors of Kool-Aid and imagine the dyed yarn you can create.
Step 1 – Kool-Aid Dyed Yarn
Supplies
Yarn – you need to use wool or alpaca yarn for the yarn to take the dye well

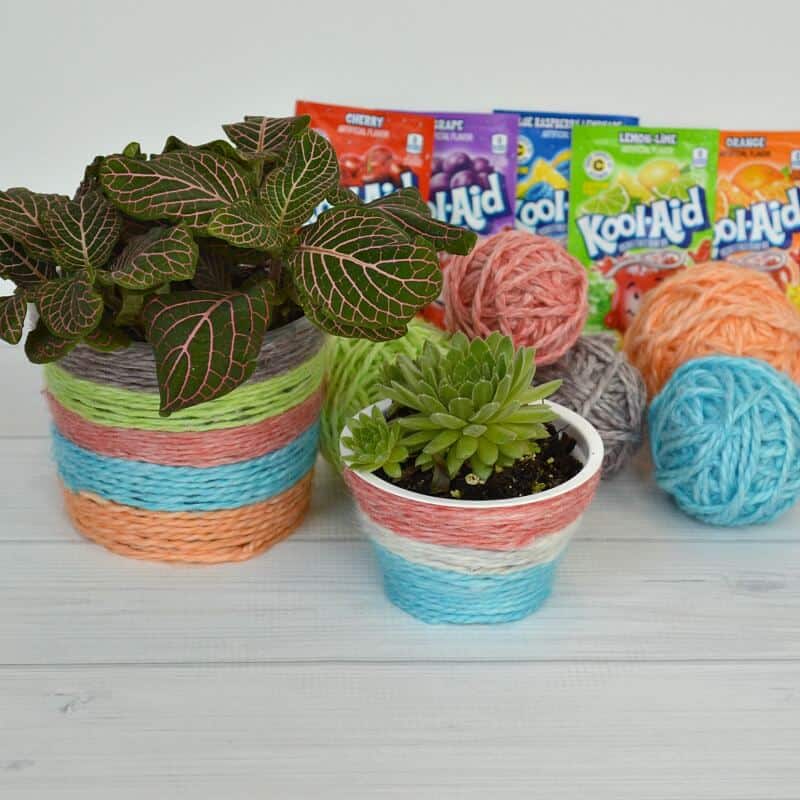
Kool-Aid – purchase the Kool-Aid without sugar (you want the packets that tell you to add sugar when you mix it). Be sure to look at the color of the pitcher that the Kool-Aid Man is holding to know what color your dye will be (sometimes the packet color is not the same as the actual Kool-Aid color). You’ll want 1-2 packets for each ounce of yarn. Depending on the color and the amount of yarn you’re dying, you’ll want to use 2 packets for a more vivid color.
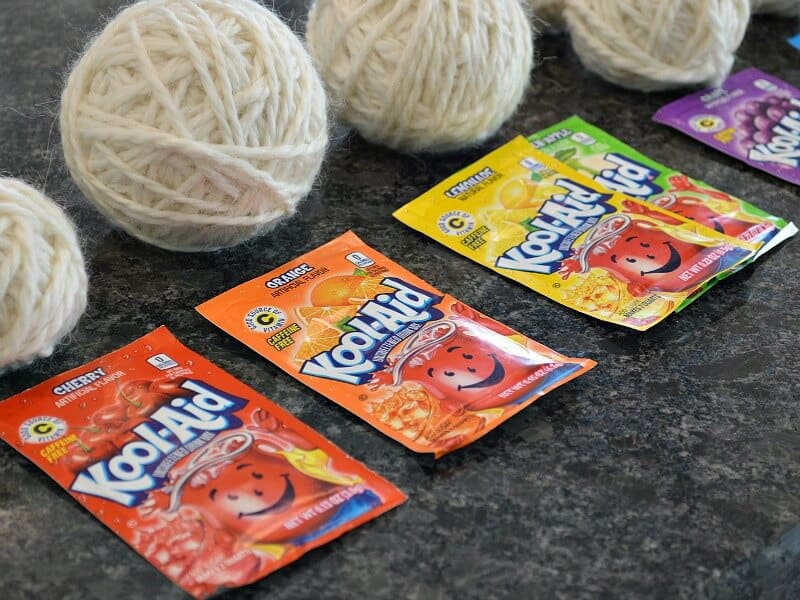
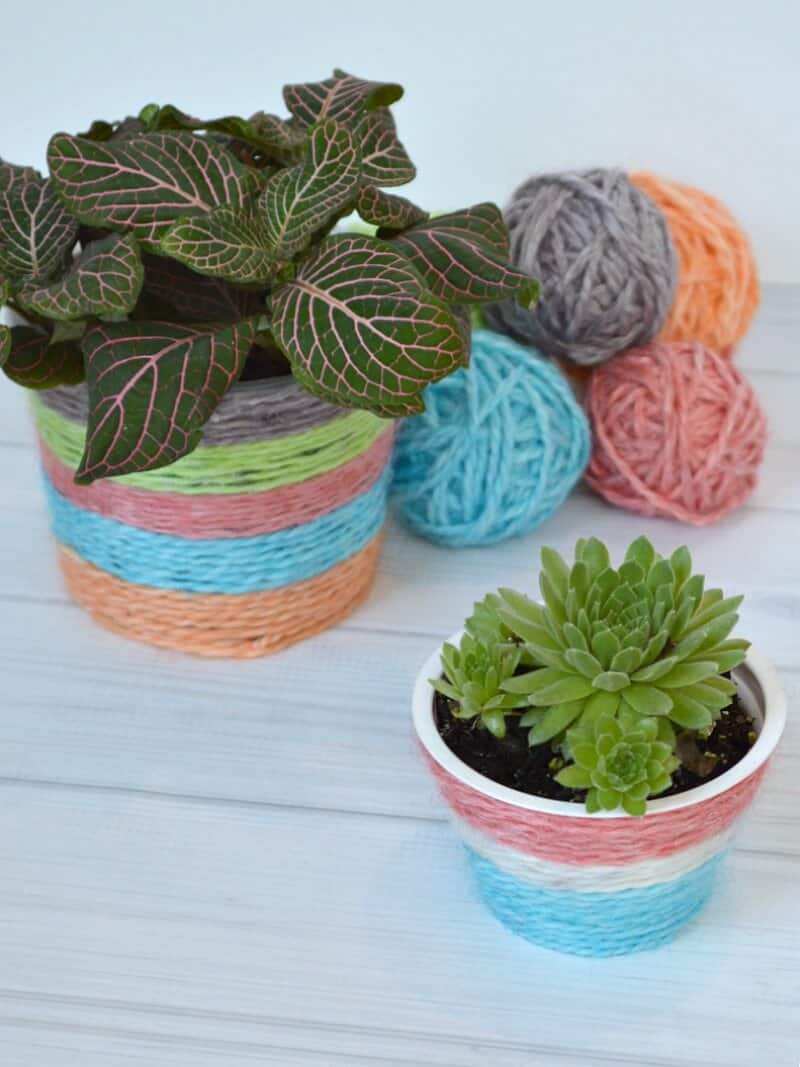
I divided my 2 skeins of yarn into 5 different balls of yarn to match my packets of Kool-Aid (I mixed the yellow and green Kool-Aid together to make a more vivid green color of dye). You can loosely roll your yarn into a ball to create a more ombre effect with the outer yarn resulting in a darker color than the center of the yarn. If you’d prefer a more uniform dye color, do not wind the yarn into a ball, but keep it loose.

Thoroughly soak the ball in water. Fill a pot with water so that it just covers the ball of yarn (the ball of yarn may float at first but will sink as more water is absorbed).
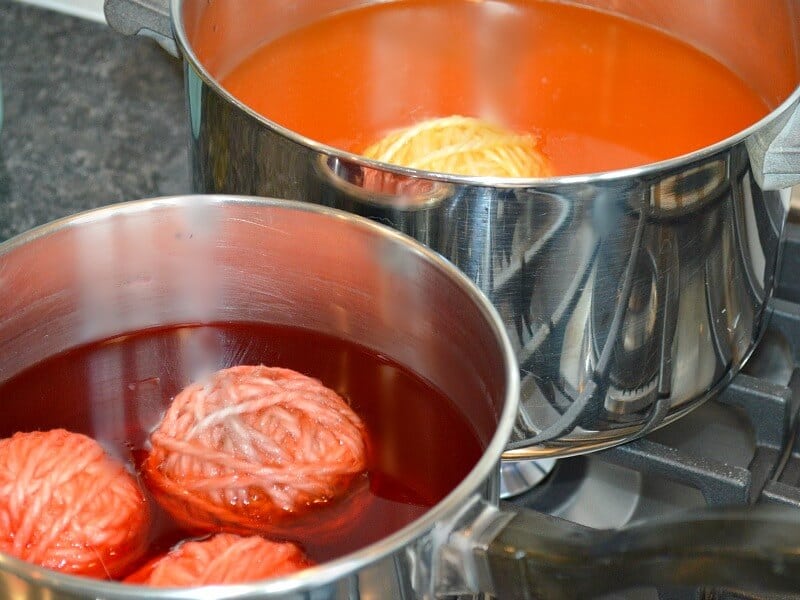
Mix the Kool-Aid packet well into the water and set it on the cook-top with the heat on medium. Once the pot starts steaming, lower the heat until you can maintain the steaming heat level. Periodically rotate the ball of yarn to make sure the entire ball of yarn is dyed. If you keep your yarn loose and not rolled into a ball, gently stir the yarn occasionally (be careful not to stir vigorously or the yarn may begin felting).

Keep the pot on the cooktop until the brightly colored water become clear or slightly cloudy. At this point, the yarn has absorbed the Kool-Aid dye. How cool (pun intended again)! It took 10-20 minutes for my yarn to absorb the Kool-Aid dye. My daughter wanted me to let you know that the smell of the heated Kool-Aid is very strong and unappealing to some people.

Carefully drain the water from the pot. I left the yarn in the pot until it cooled and then gently squeezed excess water from the yarn I then plaecd the yarn on several towels to dry. It took about a day and a half to completely dry. Do not roll the dyed yarn into a ball until it’s completely dried. Once the yarn is dry it still smells like the flavor Kool-Aid used as the dye. Both my kiddos and I found that so interesting and almost magical.
Step 2 – DIY Plant Pot
Supplies
Kool-Aid Dyed Yarn
Recycled Plastic Containers – I used a yogurt container and a feta cheese container
Hot Glue Gun – your favorite hot glue gun
Double stick Tape – a small amount of double stick tape is all you need
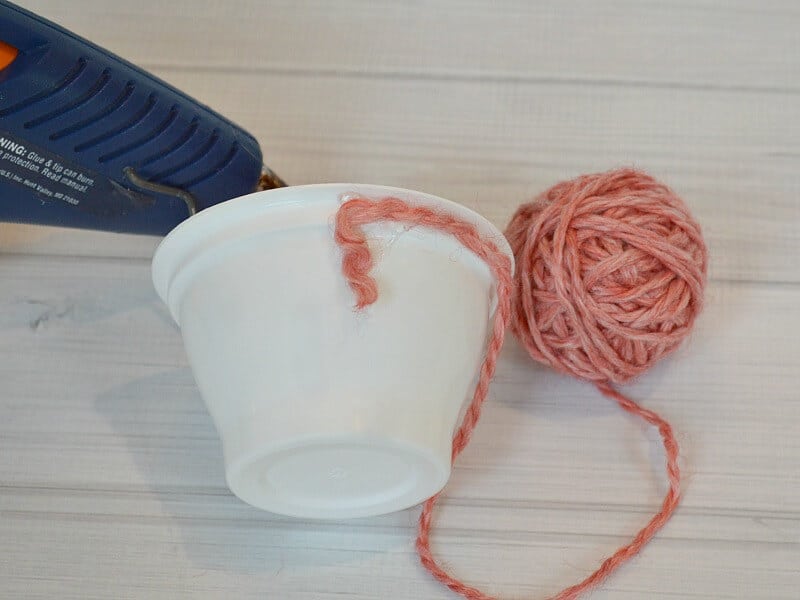
Add a small dot of yarn to secure the yarn to the recycled container. You can use dots of hot glue to secure the yarn to the container as you wrap it around the container. I found it easiest to use the hot glue to start the yarn but then use double-stick tape alternated with hot glue to keep the yarn in place as I wrapped it around the container. Secure the final end of the yarn with the hot glue.
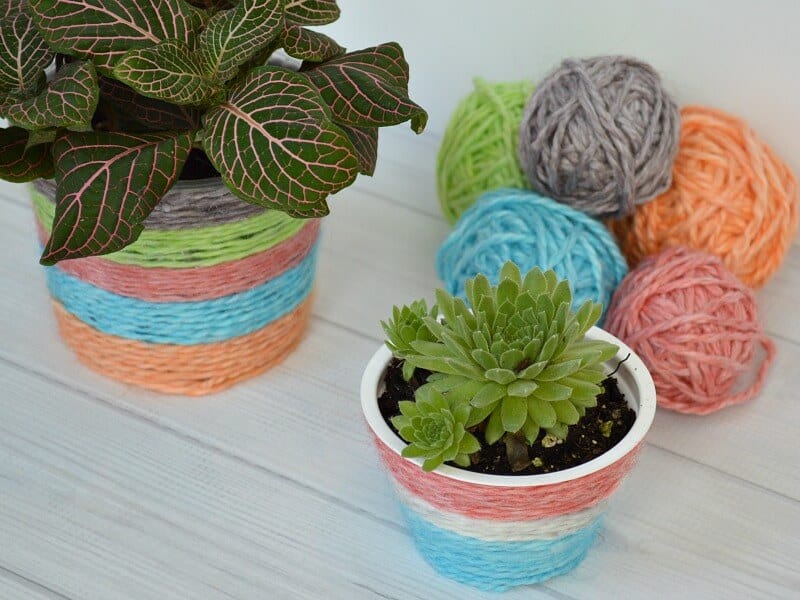
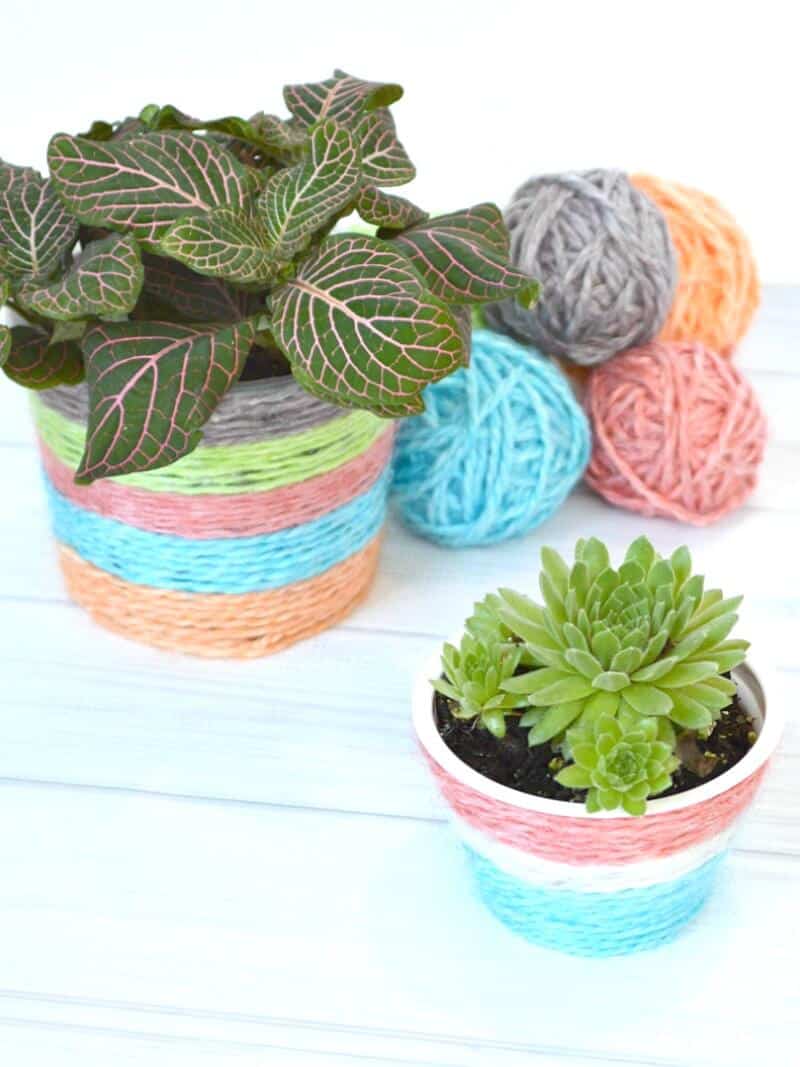
I added plants and voila! We had some fun happy plant pots.
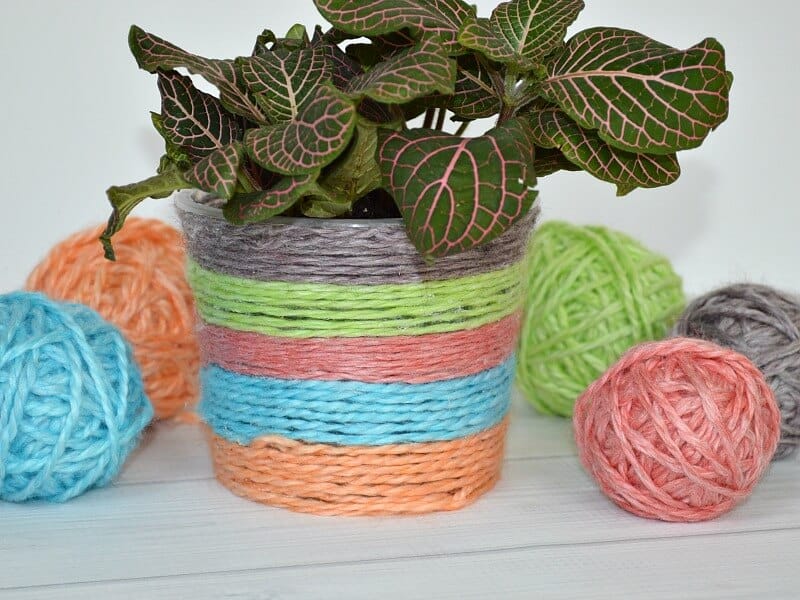
I love how the Kool-Aid dye created such vivid summery colors.
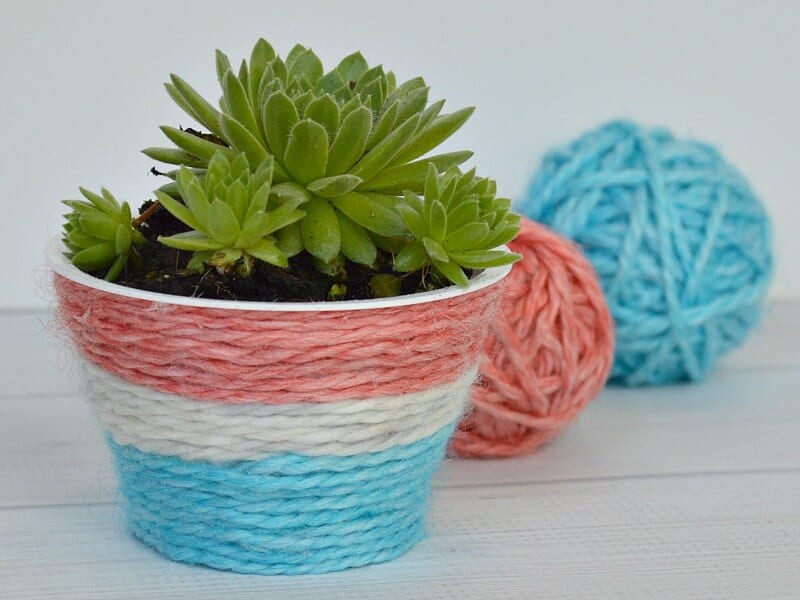
This patriotic plant pot is my favorite. The simplicity and the vivid colors say All-American summer.
My kids and I had so much fun creating these Kool-Aid Dyed Yarn DIY Plant pots and are already brainstorming more dyed yarn projects.
Have you ever tried dyeing yarn?
More Summer Crafts
DIY Pool Storage – Uses for an Empty Kitty Litter Container
Tie-Dyed T-Shirt Quilt Picnic Blanket
Hawaiian Beach Glass Party Lanterns

I’m a mom of 3, a veteran, military spouse. I’ve moved into 20+ homes all around the world. My passion is helping busy people make the space and time for what’s really important to them. Learn more about Organized 31 and me.


I love when you share crafts that even those of us who are craft-challenged can pull off. I can’t wait to try this one with the kids!
Wow, the Kool Aid yarn came out nicely. Such pretty colors. I imagine the colors are permanent. Or could they run if they got wet?
Thanks, Darlene. I absolutely love how vivid the colors are. I have only done this plant pot project so far, but the color is holding up to having water drip on it when I water the plants. All that I’ve read says that the dye is color fast through washing but does tend to fade in sunlight. Since the Kool-Aid packet is only about $.25, it would be worth running a small sample through the dye process and then washing. If you do, I’d be interested in your findings.
First off, I love this craft. So much fun to make these flower pots and you can easily make them to fit any room! Second off, I think using a natural dye like Kool-Aid is better for kids. Third, I didn’t know to look at the Kool Aid guys hand to see what flavor Kool-Aid he was drinking! I have learned so much. Off to find some yarn!
So fun, Susan! Love the colors!
Thanks, Amy. It was amazing to dye the yarn (like science experiment amazing)!
Clever! And the colors look great. Thanks for linking to the Do Tell Tuesday party!
I’ve been wanting to try this craft forever!!! Now I want to even more. Gotta stock up on some koolaid!
It is such a fun craft, Wendy. It’s almost like a science experiment. Enjoy!
I work with girls ages 8-12 years of age. I am going to try this out with them.
It’s a great project for that age, SarahLee. Hope you have fun with it.
Very cool I’m gonna do this ????????
Fun project!! Do you know if the color runs if it gets wet? Curious as sometimes rain or the sprinkler can get wet where it’s not intended. Thank You for sharing ideas like this. 🙂
We haven’t had problems with the dye running, but then it doesn’t get very wet (may one or two drops). I’m not sure how it would hold up to sprinklers day after day.
i DID NOT KNOW THAT YOU COULD DYE WITH COOL AID!!! bUT HAVE JUST ABOUT EVERY SO I WILL NOT HAVE TO DONE THAT!!!!
I felt the same way when I discovered you can dye with drink mix, Linda! 🙂 And it’s so easy to do!