Moving into a New Home? How to Set Up Your Kitchen
This post may contain affiliate links provided for your convenience. We earn commissions if you shop through the links on this page. I am also an Amazon Associate and earn from qualifying purchases Read my full disclosure policy.



Click to have Organized 31's content added as a trusted source of organizing information for your future searches.
Are you moving into a new home and wondering how to set up your kitchen? As a part of a military family with more than 20 moves, I’m often asked “How should I organize my kitchen after moving?” Every house is different and the way each family uses their kitchen is different, but there are some tips I’ve gained from 20+ moves myself and my experience as a professional organizer that will help you set up your kitchen so that it works well for your family.
At a glance: A three-phase plan for setting up a kitchen after a move, from a professional organizer who has moved into 20+ homes. Phase one places glasses, dishes, and silverware so your family can eat breakfast at home the next morning, and phases two and three fill in cooking tools, pantry items, and zones around them. A free Setting Up Your Kitchen Checklist is sent to your inbox when you sign up for the newsletter. It works for a brand-new home or for rethinking the kitchen you already have.

When I move into a new house, I always unpack the kitchen first. My goal is to be able to have breakfast in my home the next morning. I want to be able to use real dishes, silverware and glasses by the second day in my home. I may not do much cooking for a few days, but we can eat cereal and sandwiches and start feeling “settled” right away.
Having set up 16 kitchens myself and helped many clients and friends rearrange their kitchens, I’ve got the kitchen set up strategy down. When clients ask me, “What’s the best way to organize your kitchen,” I answer that it’s much easier if I can see the space and the “stuff” you have, but there are general principles that apply to every kitchen set up.
Use the Setting Up Your New Kitchen Checklist to help you plan your kitchen layout.
To get your free Setting Up Your Kitchen Checklist, simply sign up for our free newsletter. You’ll receive the checklist sent straight to your inbox.
window.fd(‘form’, { formId: ‘6671dcc9106aefaab1620c06’, containerEl: ‘#fd-form-6671dcc9106aefaab1620c06’ });
As a special opportunity, if you want printable and organizing resources, you definitely want to check out this limited time low price offer on the Organizied 31 Printables Vault filled with organizing resources, planners, games, gifting resources and so much more, including ones only available in the Vault and new ones added frequently.

How to Set Up Your Kitchen in a New Home, in Three Phases
I’m always asked how to best set up a kitchen in a new home or to better set up an existing kitchen layout.
I tackle the kitchen set up in three phases.
- Phase one, so you can eat: Place glasses near the fridge, plates and bowls between the dishwasher and the table, and silverware in the drawer closest to the table or dishwasher.
- Phase two, so you can cook: Put away hot pads, pots and pans, baking sheets, and spices near the stove, and dish towels by the sink.
- Phase three, everything else: Finish with pantry food, light and seasonal items up high, heavy items down low, and zones like baking or lunch boxes.
First Phase:

step 1: Glasses and mugs near the fridge
I start by placing glasses in the cabinet nearest the refrigerator. Since you will most often take a glass from the cabinet and the drink from the fridge, it makes sense to have the glasses located near the fridge. If you have young children, consider putting their cups in a lower cabinet near the fridge so they can get their own cups. The same strategy works for where to place coffee cups: place them near where you will locate your coffee maker, as well as the coffee, filters, creamer and sugar.
Make more of a small cabinet with these versatile organizing products:

step 2: Plates and bowls between the dishwasher and the table
Ideally, I locate my plates and bowls in a cabinet between the dishwasher/sink and the kitchen table. If that’s not possible, decide which cabinet better fits your dishes, one near the dishwasher or one near the table. Again, use the same strategy of using a lower cabinet for young children’s plates and bowls.
This placement of dishes saves time for you either when you’re getting the dishes out to eat because the cabinet is closer to the table or when you’re putting them away because it’s closer to the dishwasher. If I have a choice, I prefer having the dishes closer to the table so that when the children are helping me set the table for a meal, they are not in my way in the main part of the kitchen.
If you have limited cabinet space, these organizing tools will help you store more in small spaces:
step 3: Silverware in the drawer closest to the table
The next item to be placed is the silverware. There is usually one drawer large enough to hold the silverware tray. If you’re fortunate enough to have more than one large silverware-type drawer, pick the one nearest your dining table or your dishwasher/sink. Again, I personally try to pick one nearest the table to minimize how much the kids are in my way as I prepare dinner and they set the table.

These products are one’s I’d recommend to my organizing clients and use myself:
- Expandable Bamboo Silverware Tray
- Expandable Plastic Silverware Tray
- Customizeable Drawer Organizer
- Utensil Drawer Organizer
Those first 3 are the first tier “biggies”. By locating the cups, dishes and silverware first, I’m set up for my family to be able to eat in our new home. If that’s all I get done on the first move-in day, that’s okay because we’re functional for meals. Getting these first 3 categories located in the kitchen helps me determine where the second tier of items will be located.
Second Phase:
step 4: Hot pads and trivets in a drawer by the stove
I locate pot holders, hot pads and trivets in a drawer near the stove. The time I will need a hot pad is when I have a hot pot and that will be at the stove. In my current house, we have a cook top and a separate wall oven. They’re located 8 feet apart. I’ve chosen to put hot pads in 2 different drawers; one near the cook top and one near the oven.
step 5: Pots, pans, and lids near the stove
I put pots and pans in a cabinet near the stove. There are usually 1 or 2 cabinets large enough to hold pots and pans near the stove. Place the lids in the cabinet with the pots and pans.
step 6: Baking sheets and cutting boards stored upright
There’s usually one tall, thin cabinet near the stove where you can place cookie sheets, cooling racks and cutting boards. If there isn’t a cabinet designed for that purpose, you can often move the shelf up in a regular cabinet to accommodate the cookie sheets. If possible, store the cookie sheets, cutting boards, etc. vertically because they take up less space and are easier to access by sliding out the one you need.

step 7: Spices near your prep space, not right next to the stove
I prefer to store my spices on a 2-level lazy Susan in a cabinet near where I’ll prepare meals. This cabinet has been a corner cabinet on the wall with the stove in my past 3 houses. The spices are conveniently located for food prep but are not too close to the stove (having the spices too close to the stove can affect the shelf life of the spice).
I have more tips on specifically organizing spices:
step 8: Dish towels and cloths by the sink
I always locate the dish towels and dish cloths near the sink. Often there are oddly small drawers or cabinets near the sink. I put the towels and cloths there.
My goal is to be able to grab a towel when standing at the sink (usually with wet hands after I realize someone took the dish towel and didn’t put a new one out. argh!). In one house with extremely limited cabinet space, I put the towels in a basket sitting on the counter near the sink.
For even more kitchen organizing help, check out my How to Set Up a Kitchen workbook. It contains sample layouts and organizing suggestions.
For even more kitchen organizing help, check out my How to Set Up a Kitchen workbook. It contains sample layouts and organizing suggestions. It’s the same strategies and tips I’d give you if I were working with you in your kitchen.

Third Phase:
Third phase items fill in around the first and second phase items. You may not have room for all of your third tier items. You’ll have to assess the “stuff” you have and the space you have and then prioritize.
I’ve had to store appliances in other rooms in the house. This isn’t ideal, but in that situation it was the only solution. (Plus, I really don’t use the waffle iron or the blender all that often, or not as often as I do cups, dishes, and pots and pans.)
step 9: Pantry food between shoulder and knee height
Although I’ve listed pantry food items in the third phase, I consider where to store these items while locating tier 1 and 2 items. If you have a pantry, yea!, this is a no-brainer. But if you don’t have a pantry, look for a cabinet large enough to hold cans, jars and boxes.

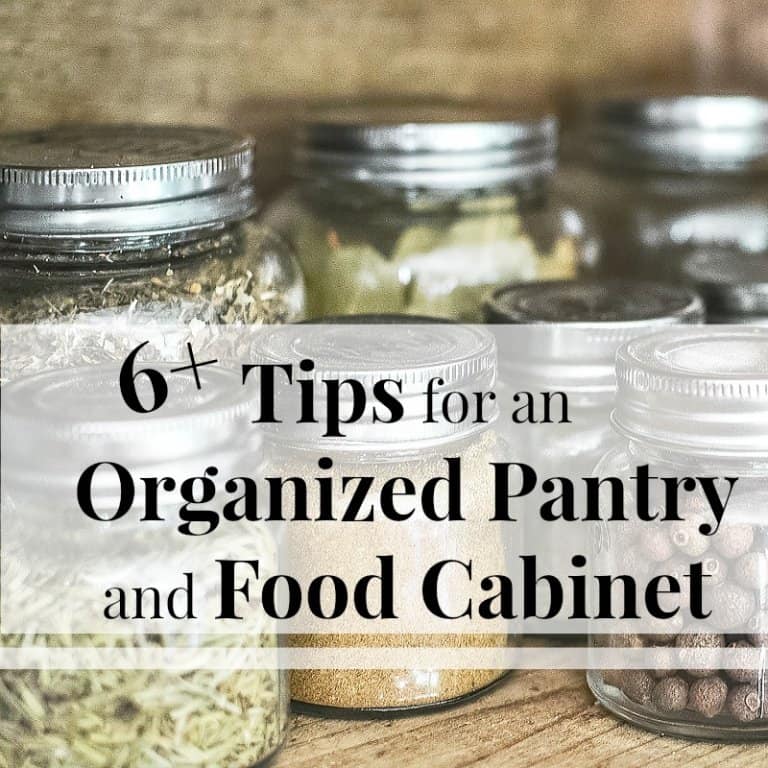
You’d like these items located between shoulder and knee level to make it easier to access. I keep cookies and potato chips on the highest shelf (a deterrent that makes it harder to grab them unthinkingly). For more pantry ideas, see my tips for an organized pantry and food cabinet.
Some of my favorite pantry organizing tools are:
- Easy-to-clean baskets in coordinating colors
- Easy-to-clean Lazy Susan
- 2-Tier Lazy Susan
- 3-Tier Can Organizer
- Expandable Can Riser
- Stackable Air-Tight Containers
- Wire Locker Baskets
- Bin with Handle for Hard to Reach Shelves
- Clear Easy-to-Clean Large Organizing Bin
- Waterproof Reusable Chalkboard Labels
- Printable labels I created for my organizing clients (click images below to see each set)


step 10: Lightweight and seasonal items up high
Put lighter weight items and seasonal items on the very top shelves and in that impossible cabinet over the refrigerator. I put seasonal serving bowls and dishes over the refrigerator because once a year I can handle the hassle of accessing that silly cabinet.
I also put lightweight plastic storage containers, plastic serving bowls and my plastic colander on a higher shelf. If those fall down as I reach for them, they won’t hurt me and they won’t break.
step 11: Heavy items down low
I put heavy items on the very lowest shelves. If these items fall, I want them closer to the ground to minimize damage. I also place seldom used items on awkward bottom shelves.

step 12: Group items into zones
Ideally, you’d like to locate items into usable zones, e.g. the baking zone will contain bowls, mixer, flour, sugar, cookie cutter, and so on. This has been possible for me in about 50% of my kitchens. But it’s still a goal when possible.
In my current kitchen I have a pull-out designated as the lunch box zone. With 3 children and a hubby taking lunch each day, we have a whole lotta lunch box stuff. With everything located in one spot, packing 20 lunch boxes a week is a little bit easier for everyone.
- Pull-out Cabinet Drawer you can easily install in your cabinet
- Expandable Pull-out Drawer that will maximize your storage space
- Clear Large Organizing Bins
Step 13: A spot for kids’ crafts
When my children were younger, it was important to have a craft area in the kitchen. They could color or glue while I was working in the kitchen. I wanted them doing these messy activities at the kitchen table.
When I didn’t have the luxury of a dedicated cabinet for crafts, I tucked a rolling drawer unit in a corner. Once, in a teeny tiny kitchen, a plastic dish tub with coloring books and crayons was all I could fit.
Setting up your new kitchen feels much more manageable when you take it one phase at a time. If you can do a puzzle (and I really don’t like puzzles much), you can unpack and set up your kitchen, a few pieces at a time.
Tips for Setting Up a Kitchen

Plan the Layout
- Every kitchen and every family’s needs are unique, so the first step in setting up a kitchen is to plan the layout.
- Consider the size of the kitchen, the traffic flow, and the placement of appliances and cabinets.
- It’s equally important to consider the needs of the people who will be using the kitchen. For example:
- If there are young children you may want to install cabinets with safety features.
- You’ll want to place commonly used items on the right side of a cabinet if you’re right-handed and on the left side if you’re left-handed.
- Shorter people will place items on lower shelves than taller people.
- Take advantage of vertical storage for organizing, especially in a small kitchen.
Create Zones
- Once the layout is planned, it is time to create zones.
- Three common zones in a kitchen are:
- The food preparation zone where you do most of your food prep work.
- The cooking zone where you cook your food.
- The cleanup zone where you wash your dishes and clean up after food preparation and cooking.

- You may also add additional zones based on your personal needs:
- Baking with all your ingredients, mixing, preparation and baking tools.
- Lunchbox zone with all containers, lunchboxes and individually packaged foods.
- Kids’ zone with all children sized or plastic dishes and cups.
- Kids’ activities zone with all arts and craft supplies.

Consider the Work Triangle
The triangle is a design concept that organizes your kitchen so that the three main zones are within easy reach of each other.
- The 3 points of the work triangle are:
- The stove
- The refrigerator
- The sink
- This layout will help you be more efficient in the kitchen and reduce the amount of time you spend walking back and forth.

Install Useful Storage
- Kitchens need plenty of storage space for food, appliances, and utensils.
- There are many different types of storage solutions available, so choose ones that fit the style and needs of your kitchen. Prioritize flexible storage options that can be adapted as your needs change.
- Choose cabinets, drawers, shelves, and baskets to maximize your storage space.

Setting Up a New Kitchen: Common Questions
Start with what you need to eat. Put glasses near the fridge, plates and bowls between the dishwasher and the table, and silverware in the drawer closest to the table. Once those are in place, add cooking items around the stove and sink, then fill in pantry food, seasonal items, and zones.
Place things where you use them. Glasses go near the fridge, hot pads and pots go near the stove, and dish towels go by the sink. Keep lightweight and seasonal items on high shelves and heavy items on low shelves, and group related things, like baking supplies, into zones when you have the space.
Glasses, dishes, and silverware. With those three in place, your family can have breakfast at home the morning after you move in, even if the rest of the kitchen is still in boxes.
Use vertical storage, store baking sheets and cutting boards upright, and keep only your everyday items in the prime spots. Seldom-used appliances can live in another room if you need the space. For more ideas, see how to have a clutter-free kitchen.
More Examples of Kitchen Layouts
How to Layout Your Kitchen – I’m happy to share with you some tips on how to layout your kitchen to make your life easier. I don’t know about you, but my life could use some more easier in it.

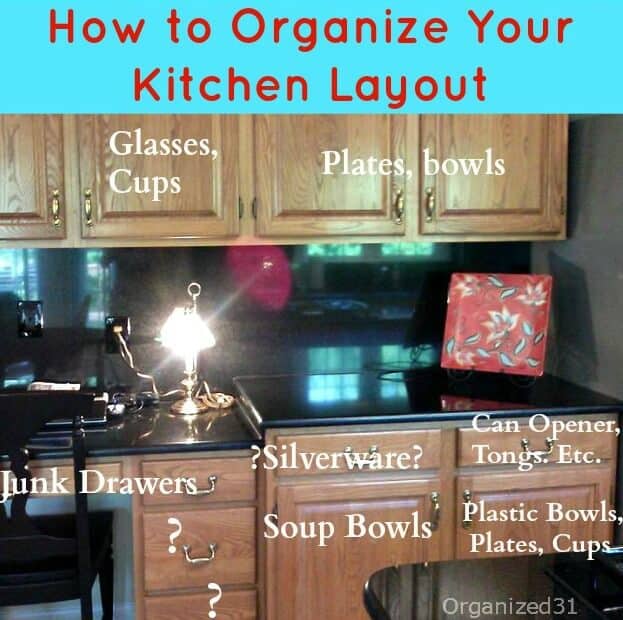
How to Organize Your Kitchen Layout – Organizing tips from I used in setting up my personal kitchen.
See all my favorite kitchen organizing tips, hacks, favorite products and more in the table below. You can scroll through the table and click on an idea that interests you or use the magnifying glass in the upper right corner to search for a specific topic.
I’m a mom of 3, a veteran, military spouse. I’ve moved into 20+ homes all around the world. My passion is helping busy people make the space and time for what’s really important to them. Learn more about Organized 31 and me.



This is a perfect strategy! Pining it for later this year when I make my first real move! Thanks!
Good luck with your move. Moving is both stressful AND exciting. Check back, I have more moving tips I’ll be adding in the next couple of months.
this has been so helpful. My husband of over 40+ years recently passed away quite unexpectedly. Our house and land was way too big for me, so I’m making my first real move in 30 years. It’s a scary decision and reading your ideas have at least giving me my starting points. Thanks for your valuable help!
I am so very sorry for your loss. I can certainly understand that making these changes would be daunting. I wish you much strength and that you find the perfect place to call home. Please don’t hesitate to email me at iorganize31@gmail.com if you have any organizing questions. With 20+ moves behind me, I may have an idea or two that would help. Take care.
Thank u! I am going to use this in a few weeks! 1st move. I have a lot of people nice enough to help, but they each have their own idea or way they want to help. This make sense to me! It’s like I have too many queen bee’s and not enough worker bee’s! Lol thank you!
Best of luck with your move, Amy. Let all those “queen bees” know that *I’m* the queen bee! lol
Where do you have a medicine cabinet ?
I have a linen closet that I use for storing medicine. If you’d prefer to store it in the kitchen, be sure to keep medicines away from heat, direct sunlight and moisture.
I think I can use these tips even for re-organizing my kitchen. My coffee cups need to move! Thank you.
Hope it helps, Heather. And let me know if you’d like to brainstorm any challenging areas together (I love problem solving!)
I tried to download the checklists and signed up but the links don’t work. How can I get the checklists?
I am so sorry about that, Lori. I am emailing it to you now. And thank you for letting me know – I’ve fixed the problem now.
I’m not getting ready to move but these are some GREAT tips and motivates me just to clean out and organize again!!
These ideas are also great for rethinking kitchen organization. Hope they help, Erin.
Thanks for these tips, Susan! All of the placements make so much sense. My brother is shopping for a house, so I will be sure to share this guide with him.
It’s cool.
Thank you for these wonderful ideas,God bless you. I have a very small kitchen to organize it is giving me headache because no matter how I try it is not looking nice to me. How do I organize a small kitchen please.
You may also want to check out this post for more kitchen organizing ideas. https://organized31.com/how-to-have-a-clutter-free-kitchen/
I normally also put heavy bowls/crockery etc in bottom cupboards since those cupboards are stronger and it’s easier to pick up something heavy than trying to pull it down, conversely lighter objects go in top cupboards.
That’s a great tip, Taiani! Heavy items lower and lighter weight items higher on shelves.
This post was a lifesaver!! I’m trying to organize my space and was in desperate need some some inspiration. Thank you for sharing!
Thanks, Sage. I’m so glad you found these ideas helpful. Enjoy your new home!