Tips to Organize a Craft Room
This post may contain affiliate links provided for your convenience. We earn commissions if you shop through the links on this page. I am also an Amazon Associate and earn from qualifying purchases Read my full disclosure policy.

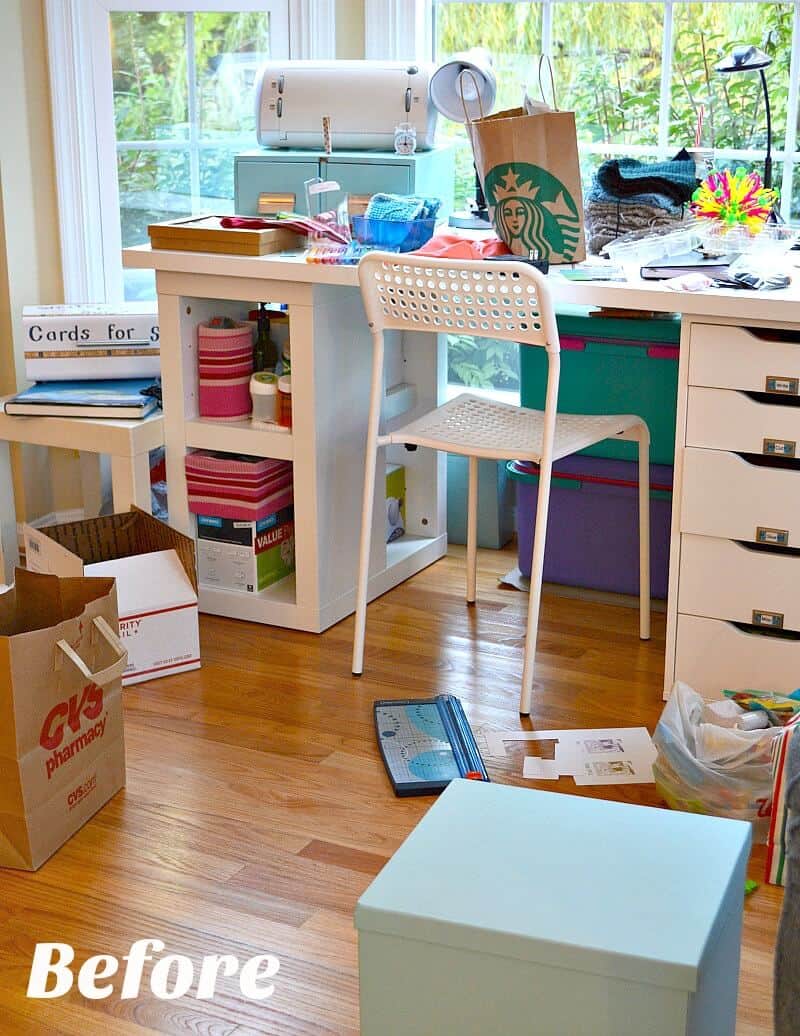
Some people like to window shop for clothes or shoes. Me, I like to window shop for craft room organizing ideas. Craft rooms are filled with happy, bright colors and I’m always fascinated with how people organize craft supplies. Recently, my craft room had gotten out of control and it desperately needed to be decluttered and organized. These are the tips I used to organize my craft room. Come see my embarrassing before photos and happy after photos.
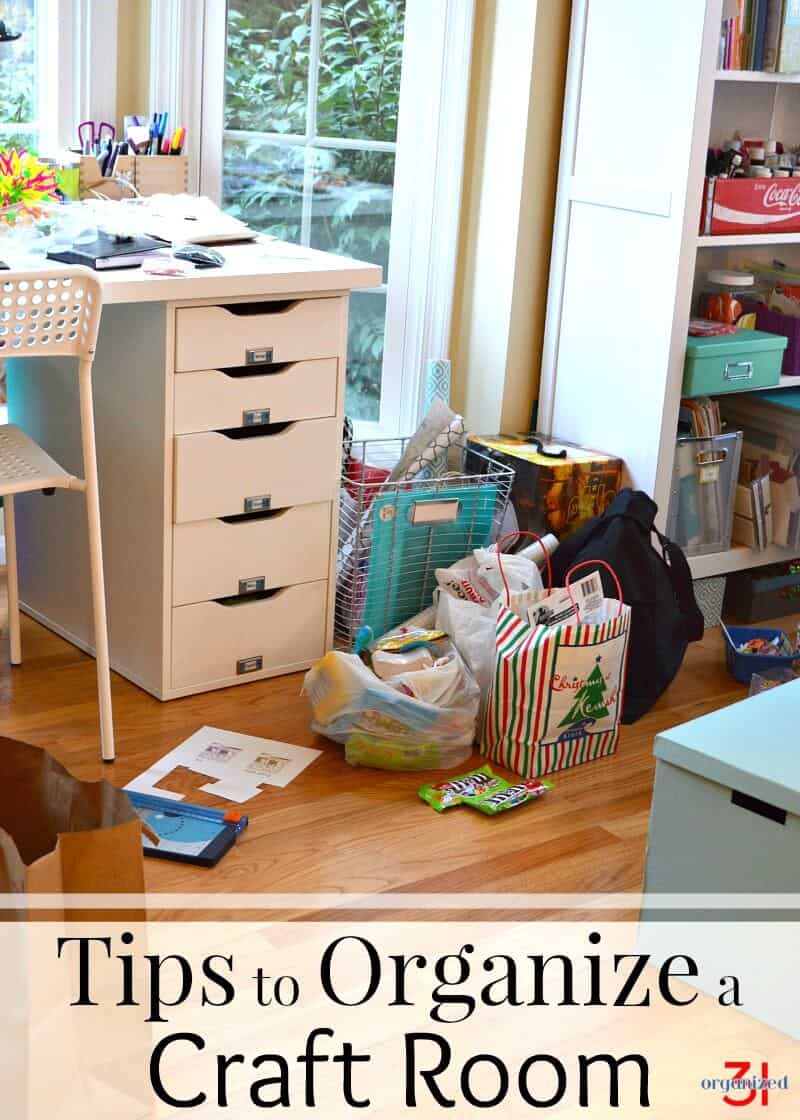
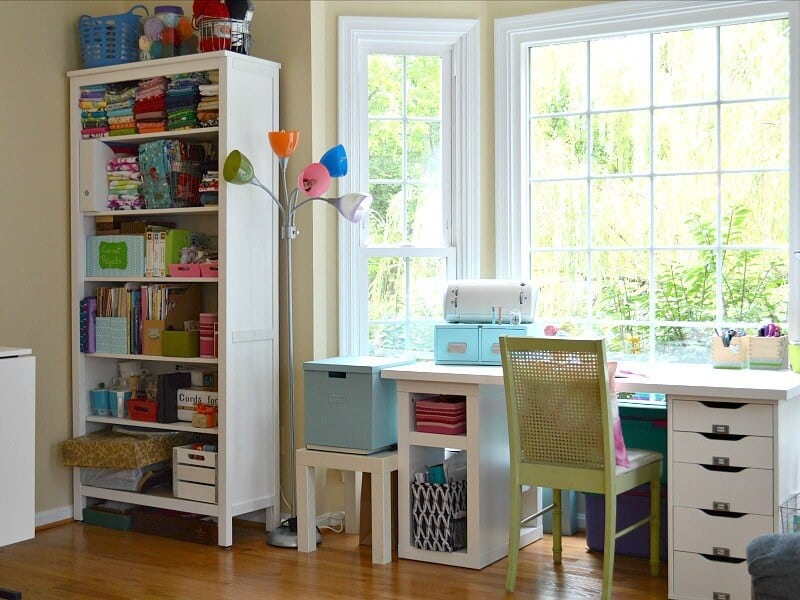
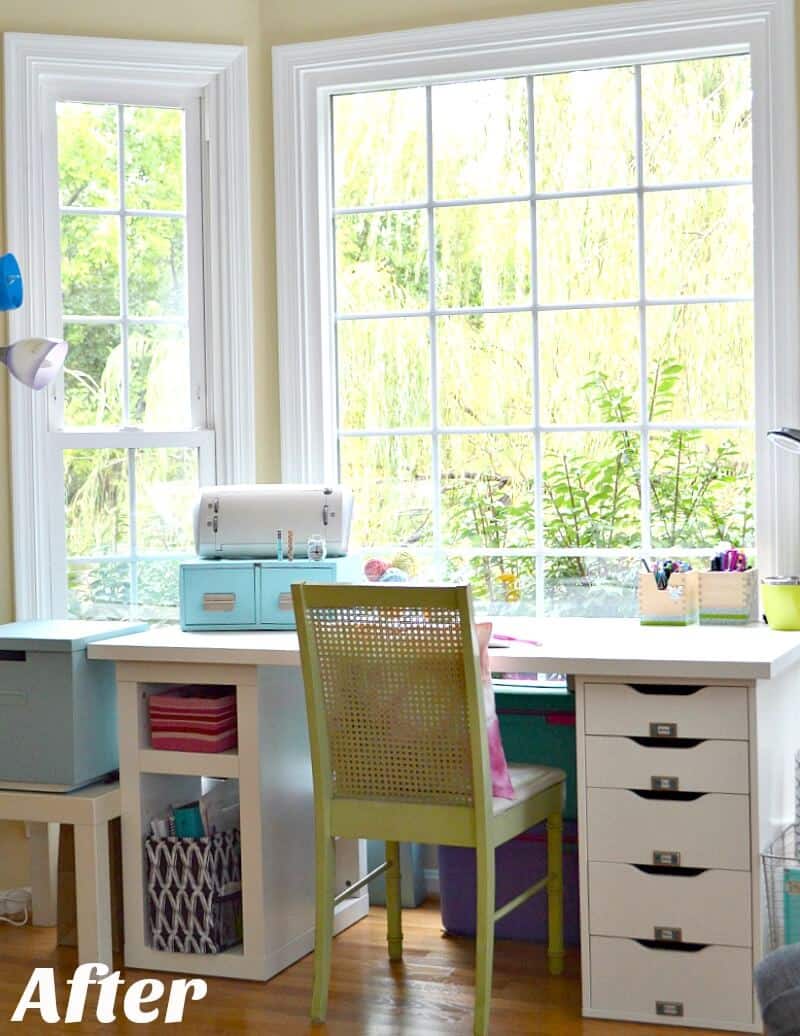
It took several hours of work, but look how beautifully my craft room turned out. I smile every time I look at this photo or even just pass by my craft room. You can imagine how happy I am when I enter the room to craft.
Tips to Organize a Craft Room
Affiliate links are provided for your convenience. Click here to read my full disclosure policy.
Separate Items
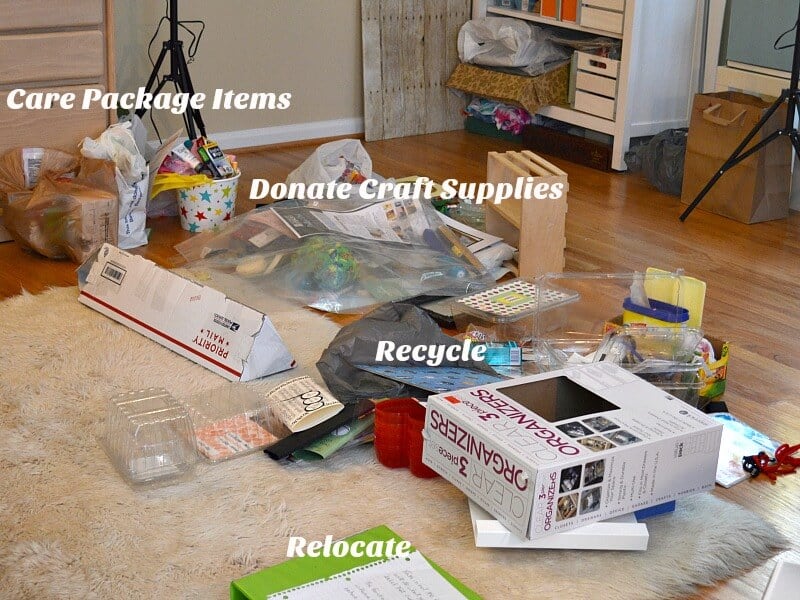
Start by separating all items that are laying around on the floor, on the table, on the desk…. any item that isn’t put away in a designated spot.
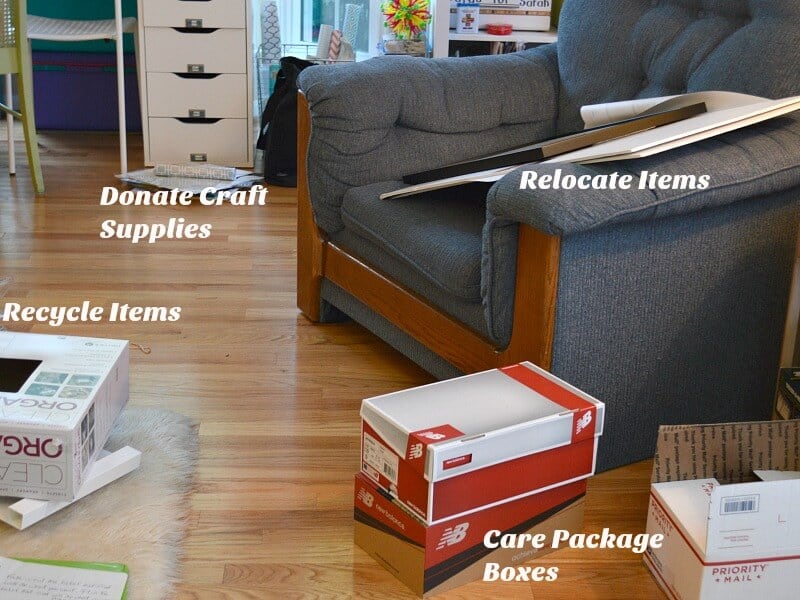
It may take the entire room to make your sorting piles. You may even find that you need to spread out into the hallway or adjacent room.
Make Decisions
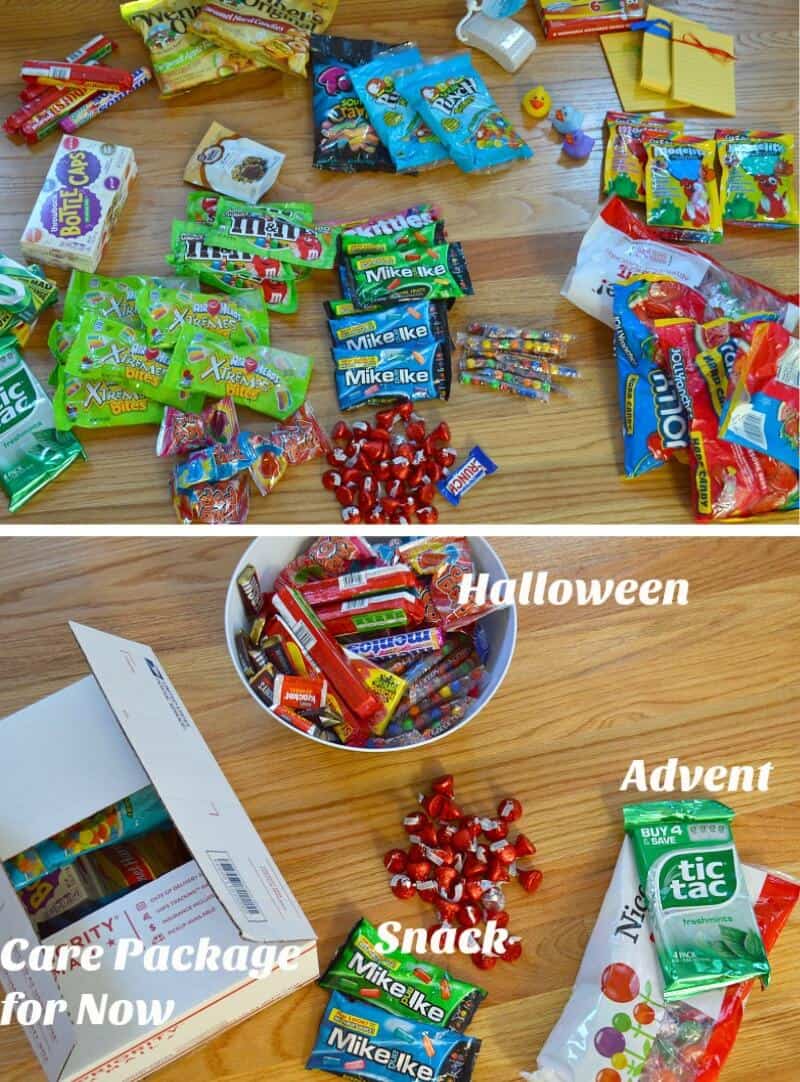
I’d been collecting candy and small items with coupons and when I found great sales for college care packages since I now have two babies away at college. But let’s get real – how much candy do I really need to send to two babies, even taking roommates into account? I mean, I have to pay their dental bills in addition to college bills, right? I took a good hard look at the candy and separated it out for care packages, to give at Halloween (I did this organizing September. I’m not totally crazy.), to use in our Advent calendars and put a few pieces aside for my baby that is still at home.
Once You Sort Items that Are Laying Around, Tackle Items that Are Put Away
Tackle items that you have put away. Now that you’ve practiced sorting with all those items that were laying around, you should put those sorting skills to work on everything else.
Be Critical
I bet you can guess from my candy hoard above, that I like to save money. And if you’re a friend of Organized 31, you know how much I love to repurpose items. Sometimes those two admirable traits lead to a bit of a mess and an excess of items. When you place all like items together in one big pile, it makes it easier to go through the pile with a critical eye and separate out the items you don’t really need or want.
It’s Okay to Split Up Sets
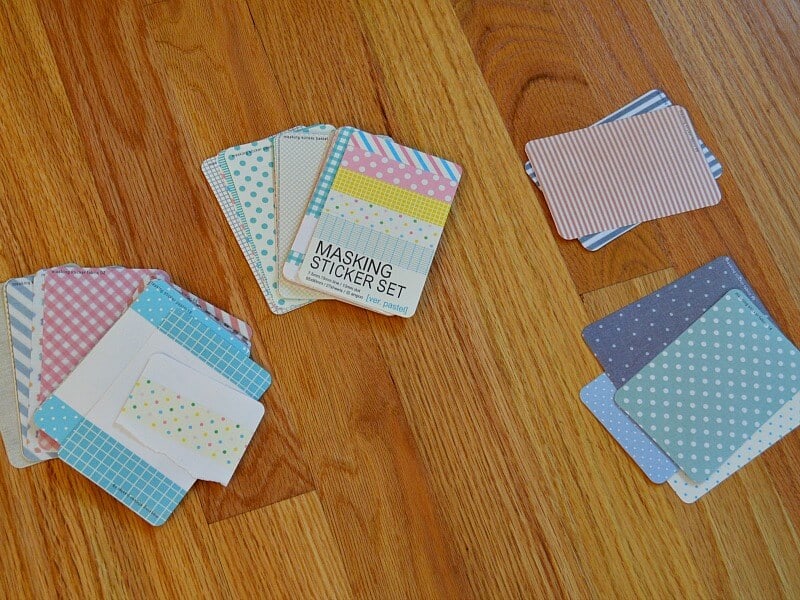
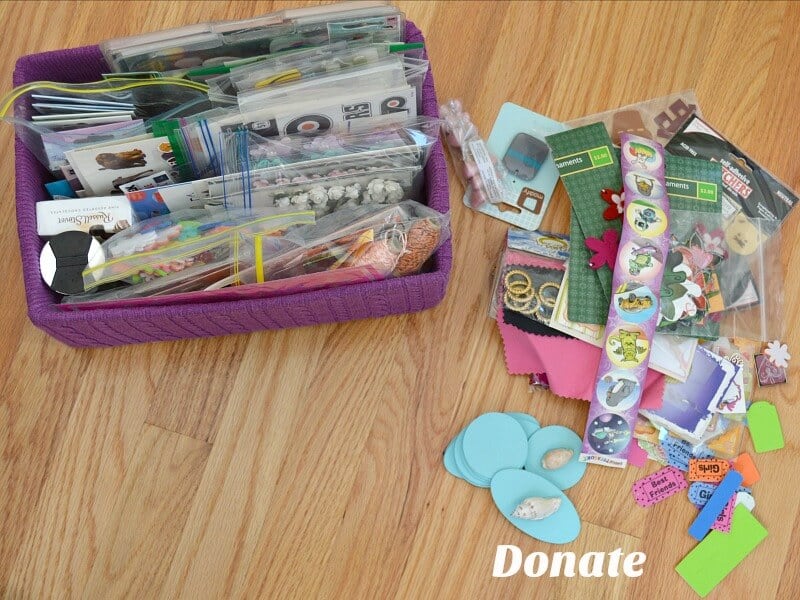
Organization and balance give me peace. It goes against my nature to separate items that came or belong in a set. But breaking up a set just makes sense sometimes. These washi tape sets are the perfect example. I went through each set and separated out the designs that I didn’t like. Why keep items that I won’t use just because they’re part of a set? I chose to donate those items to someone who would make use them.
Donate
Many of the items that I decided I did not need to keep are still perfectly useful. Useful to someone else, just not me. I always find places to donate craft items I no longer need. Of course, you can donate them to Salvation Army, Goodwill or a similar charitable thrift store. But often those items sit in bins unsold for months. Look for other organizations that will put your unwanted craft supplies to use right away.
- Preschool
- Elementary School
- Disabled Adult Organization
- Boy Scout or Girl Scout Troop
- Church
- Boys & Girls Club
- Senior Citizen Center
- Child Care Center
- Community Recreation Center
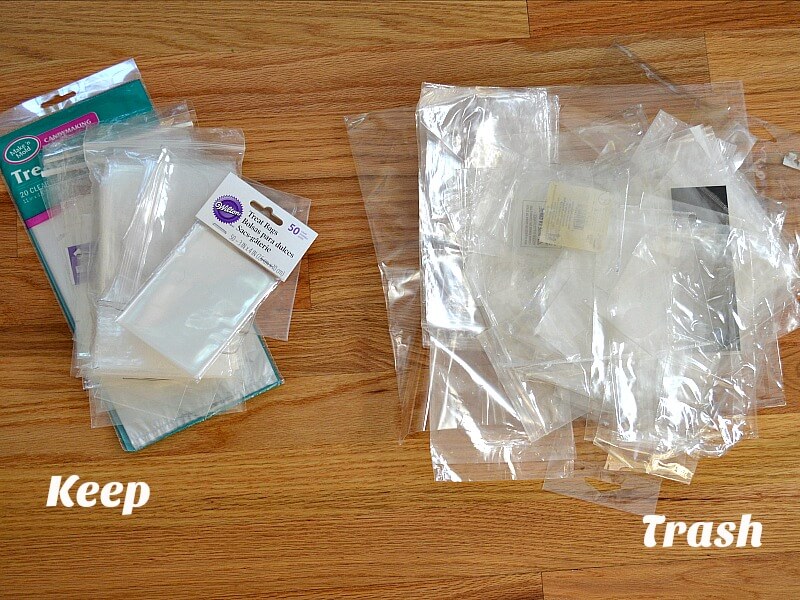
Trash vs. Recycle
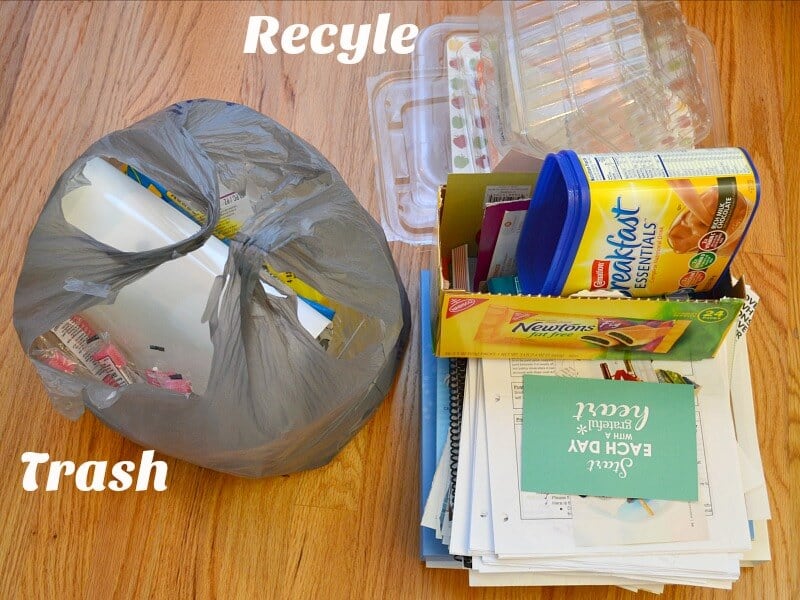
Don’t just automatically throw everything away. Please take the time to sort out items that can be recycled. My recycle pile was double the size of my trash pile.
Recycled Storage Containers
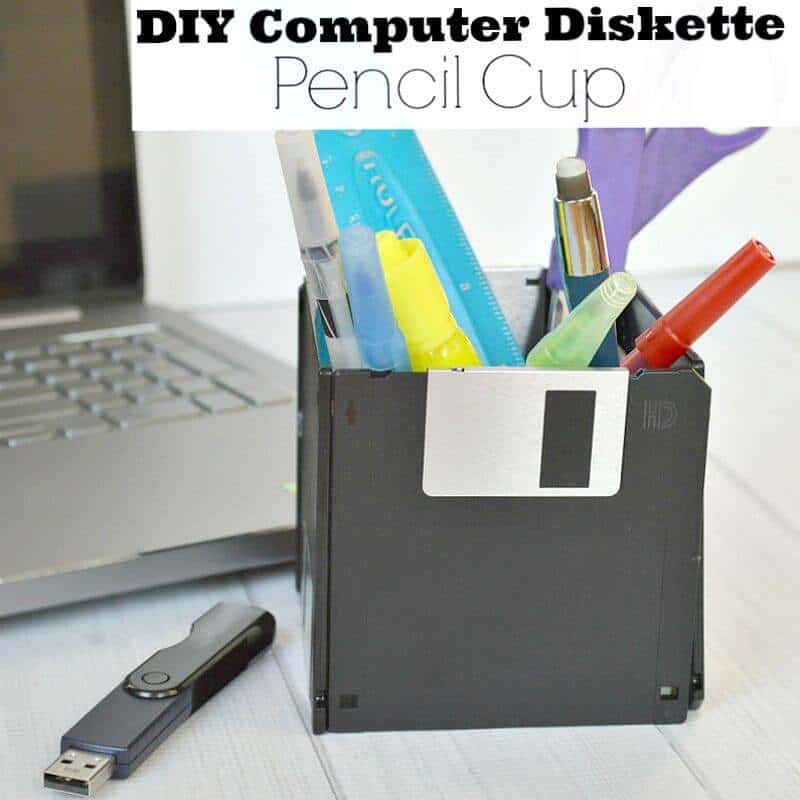
Use recycled items for organizing. It’s saves items from the landfill and saves you money. You can use shoe boxes, glass jars, plastic containers, and so much more. You can see how I made this sweater organizing box that I use to hold my stickers.
Repurposed Storage Containers
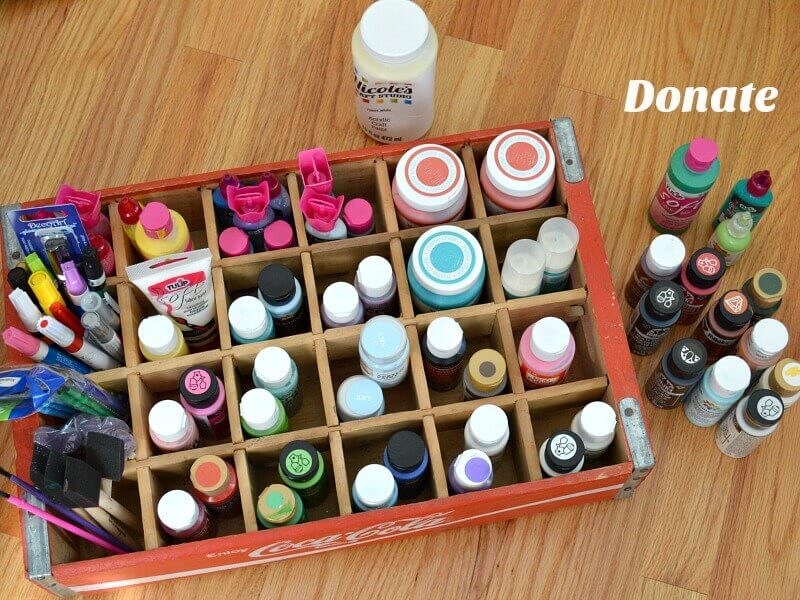
Repurpose storage containers that you already have. I love this Coke crate and was using it as home decor. I repurposed it so that it is now organizing and home decor. Look at how perfect it is for holding my craft paints.
Purchase When Necessary
As much as I like to save money and the landfill, there are just sometimes when purchasing the exact item you need is the best solution. I had been using this repurposed bar cart to hold craft supplies and for taking blog photos. The bar cart was not a large enough surface, was too low and didn’t really hold much for organizing purposes. I’d been dragging my feet on replacing it because I couldn’t find what I wanted. I knew that I didn’t want:
- a big table that would make my craft room feel crowded
- a heavy table that I couldn’t move myself
- a low table, I wanted to be able to stand and craft
- anything dark or ornate

photography light kit, white wood crates (similar), wood photography background (similar)
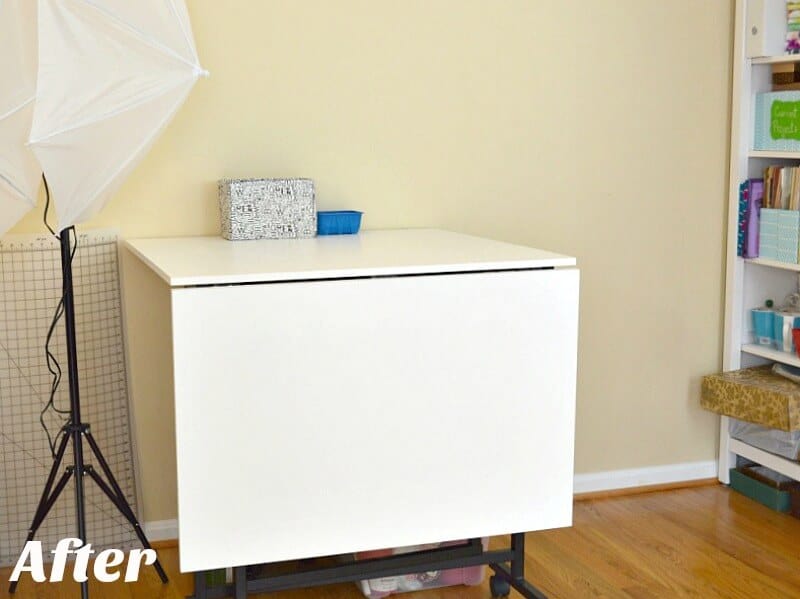
This craft table is perfectly functional. I use it for crafting when I need a large space and it’s the perfect height for taking blog photos. I love that it folds up when I don’t need as much space. This craft table is the perfect solution for my needs and my craft room. I wished I hadn’t dragged my feet for so long.
similar craft table, photography light kit, large cutting mat
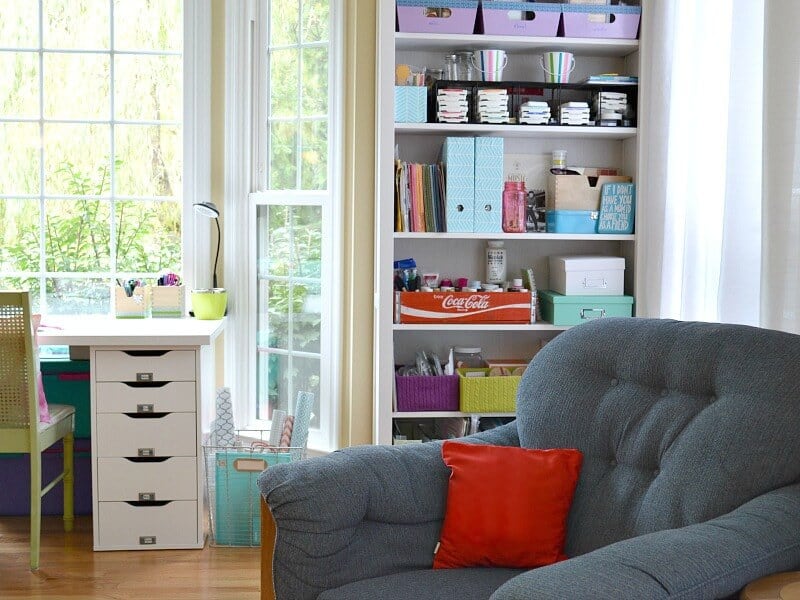
Little Changes
Don’t underestimate the importance of even little organizing changes. You may not be able to see much difference in the before and after photos of the shelf on the right side of my craft room. But the small changes I made make a big impact on my daily use of my craft room.
- Move frequently used items to an easy-to-reach level, between shoulder and hip level.
- Use stackable boxes to organize items and make it easy to move for access.
- Use containers with handles to make them easy to move to your crafting area.
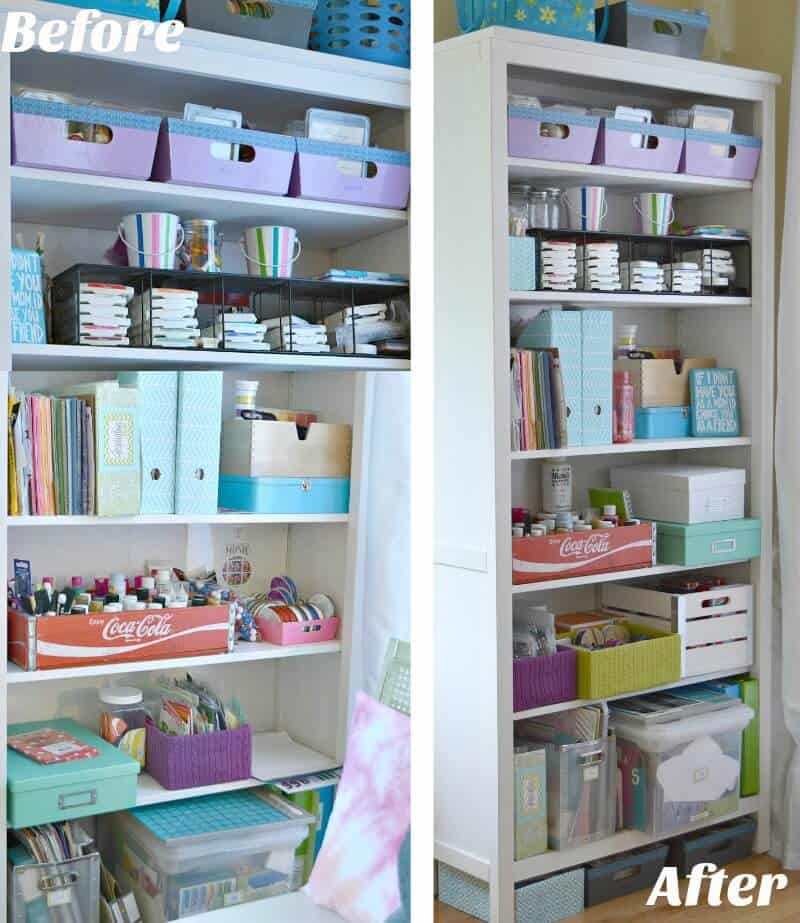
turquoise document storage box, white storage box (similar), scrap book paper storage (similar), white wood crate (similar), low profile storage bin (similar), mini white metal buckets, IKEA magazine file box
- Use slim boxes to organize items under the shelf neatly. I’m actually using repurposed box tops that fit perfectly (below).
- Put pretty items at eye level and less attractive items where they’re not as easily seen.
- Sometimes the perfect organizing container just isn’t perfect for your situation. It needs to find another use or be donated.
- Purging recycled items that can easily be replaced if needed, gives you more space.
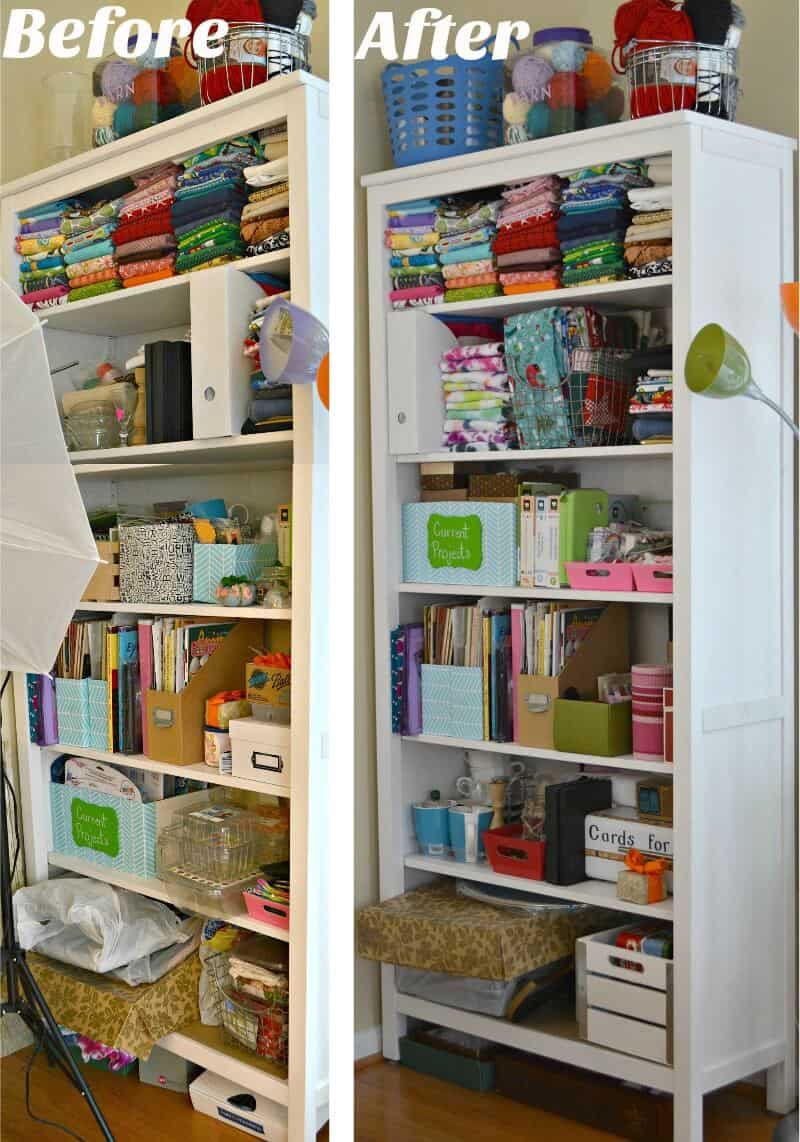
IKEA white magazine file box, white wood crate (similar), IKEA magazine holder with label holder (similar), wire storage basket (similar), round wire storage basket (similar), white bread box (similar), low profile storage bin (similar), round plastic basket (similar), floor lamp (similar)
Make Space to Work
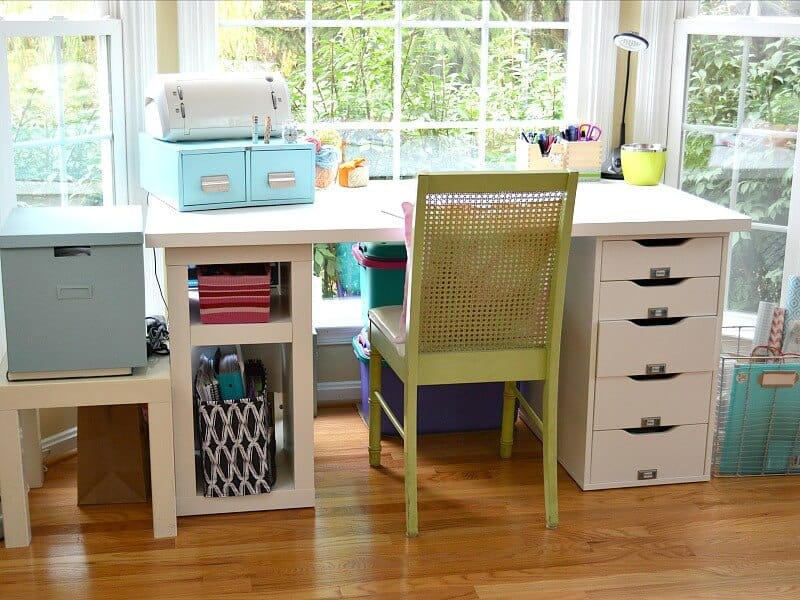
The purpose of a craft room is to create. Organize your craft room to give yourself a nice clean space to create.
Craft Table (similar), blue storage box (similar), library card drawers (similar), Cricut Cutting Machine, label holders with adhesive back, craft storage tub with handles (similar), fabric file storage (similar)
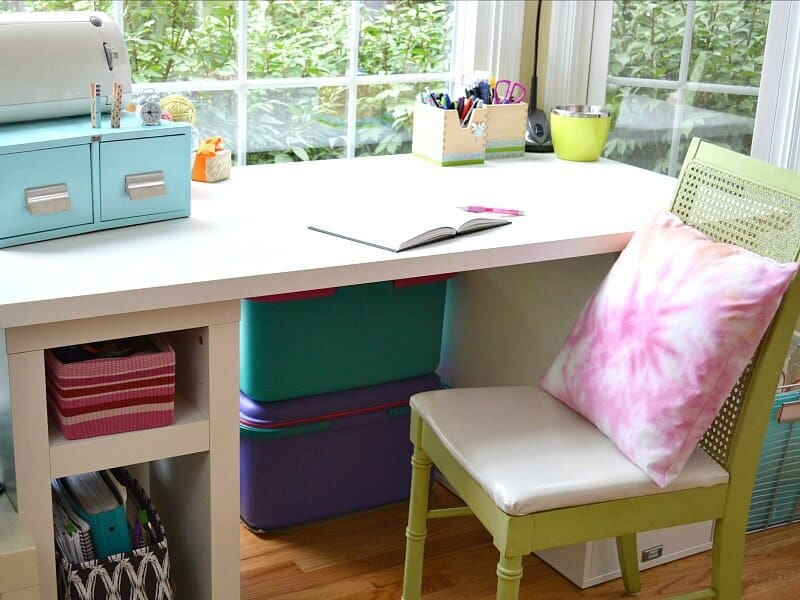
Make your work space welcoming and comfortable.
tie dye pillow tutorial, sweater box organizer tutorial, make organizing match your style tutorial
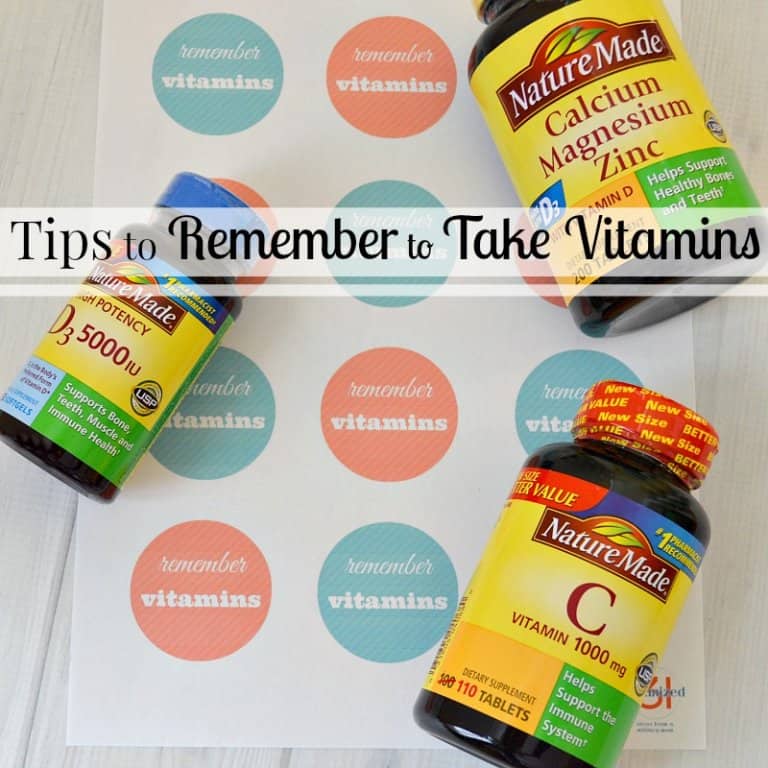
Use Labels
Not only do labels look great, but you should use labels to organize your craft room because:
- You’ll be able to easily find exactly what you want.
- You’ll be able to quickly put things away where they belong (so you can find them quickly again next time).
- Your family members and craft friends can find what they need.
- Your family members and craft friends can put away any items that they borrow.
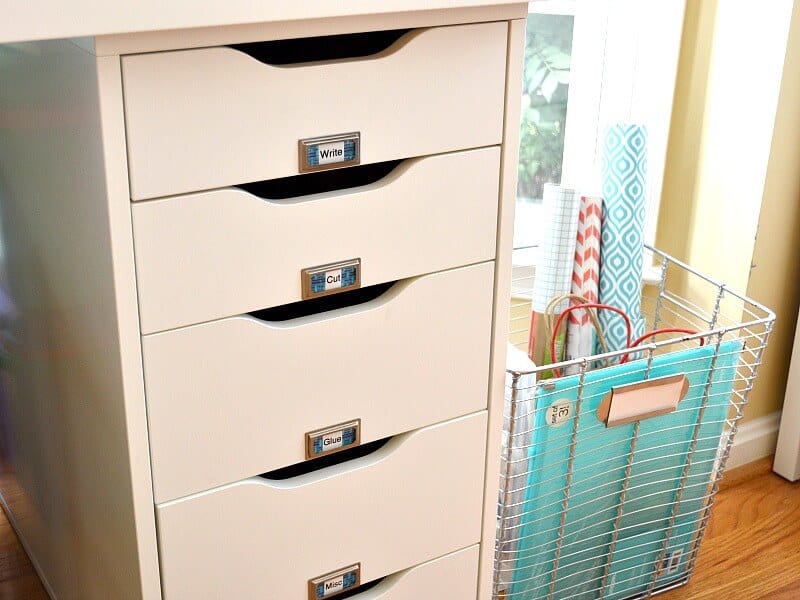
label holders with adhesive back, washi tape, label maker, wire basket (similar), blue shelf paper, blue zippered folder (similar)
Craft Room Labeling Resources
| Product Image | Product Name / Primary Rating / Price | Primary Button |
|---|---|---|
|
|
|
|
|
|
|
|
|
|
|
|
|
|
|
Remember where we started?
Who else is inspired to begin crafting now? This organized craft room is so peaceful and welcoming.
I find that I often walk into my craft room just to look around and smile.
I now often find one of my children curled up in this comfy chair in my happy craft room reading a book. That makes me even happier than my organized craft room makes me.
What tips to organize a craft room do you have? I’ll be sharing more craft room organizing projects this month. Stay tuned.
Find all my best organizing tips, hacks, printables and favorite products in the table below. You can scroll through the table and look for ideas or search for specific ideas with the magnifying glass in the upper right-hand corner (on desktop). Click on the topic and then click through the specific article.

I’m a mom of 3, a veteran, military spouse. I’ve moved into 20+ homes all around the world. My passion is helping busy people make the space and time for what’s really important to them. Learn more about Organized 31 and me.
If that were my craft room, I don’t think I would ever leave! I love that it is so light and airy while still accommodating everything you need. It doesn’t feel crowded or closed it – very inspiring!
Thanks, Seana. I do love it and wish I could spend more time in it each day.
It is so easy to get a big mess in your craft room! you have such great tips for getting things in control. I love all of the light coming in the room. So nice.
My craft room can quickly become a big ol’ mess when I’m in the middle of a project. But having it organized is so peaceful and inspiring that I try my best to keep it organized and neat. 🙂
Wow, your craft room looks great! Thanks for being willing to be honest and show us that everyone needs to reorganize things once in awhile. I really like the view you have while you craft – it’s beautiful.
Thanks, Brenda. I love looking out that window as well. It’s my favorite view in my home.
Very nice!! I love to see what others have done with their craft rooms. I too look around mine and smile! Fun huh? Love it! Thank you for sharing yours.
Happy (organized) craft room fist bump, Roz. 🙂
This looks great! Come do mine! Haha. I’m trying to picture what I want it to look like in the end, but it’s so difficult. I’m trying to make it pretty and bright but keep my dark colored desk. I absolutely love your after product though! <3 Beautiful!
Thanks, Emily. It makes me smile every time I walk into the room. Can’t wait to see what you do with your craft room. Good luck.