How to Use a Sharpie Marker on Glass
This post may contain affiliate links provided for your convenience. We earn commissions if you shop through the links on this page. I am also an Amazon Associate and earn from qualifying purchases Read my full disclosure policy.
I’ve shared my obsession with Sharpie dot projects with you and my obsession continues with today’s Easy Valentine’s Day gift. Ever since I learned how to use a Sharpie marker on glass last year, my family jokes that if they sit still too long, I might try a Sharpie dot project on them. It’s just that it’s so easy to do and I’m always looking for cute ways to share gifts with my family and friends.
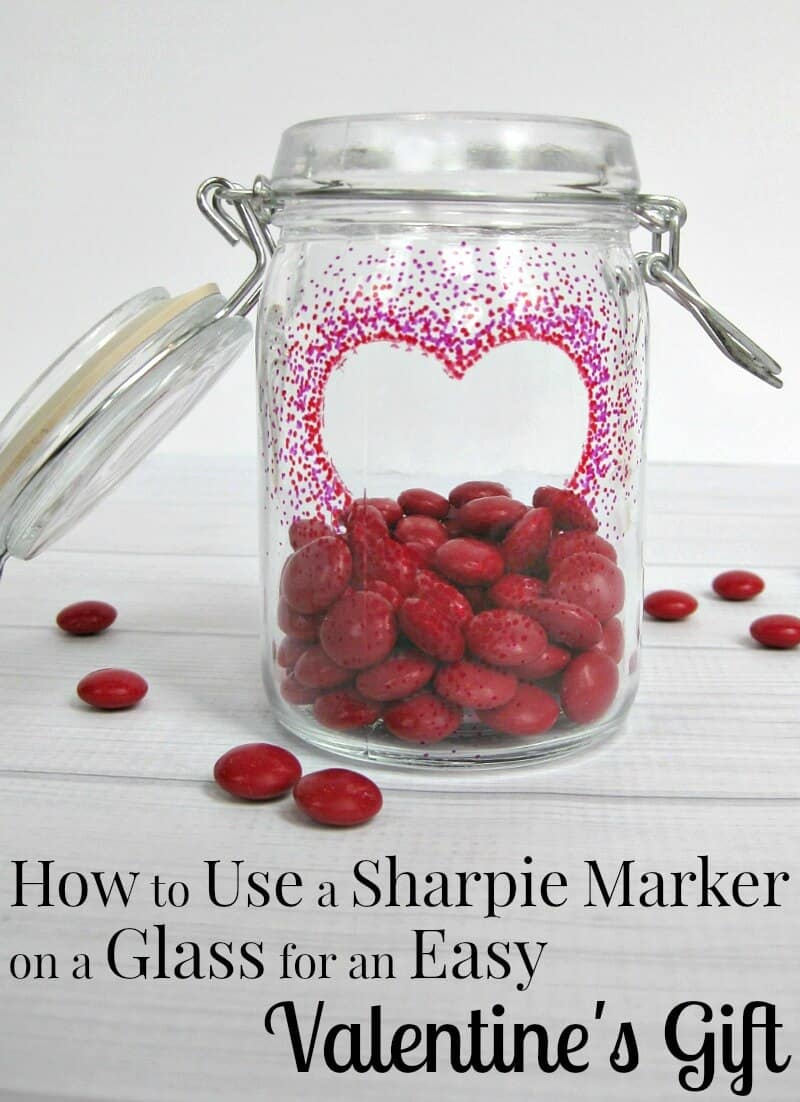
You may already have the supplies you need in your home. You can make this Sharpie dot heart jar in about 5 – 10 minutes. This project is easy enough for children to make and nice enough that you can be proud to give it as a gift.
How to Use a Sharpie Marker on Glass Supplies
Supplies
Vinyl Heart Shape or Removeable Heart Sticker
Glass or Ceramic Jar (you can use a recycled glass jar)
You can use one color of marker, but for a more festive Valentine’s look, I chose to use a red and a purpley-pink marker. Simply position your vinyl shape on your glass surface. Take time to smooth out the edges and make sure the edges are well adhered to the surface.

Then it’s time for the fun part. Simply dot around the vinyl heart. It’s easiest to dot around the edge of the heart and then work your way out from the heart. Concentrate your dots closely together at the edge of the vinyl to make a more crisp outline of the heart when you remove the vinyl.
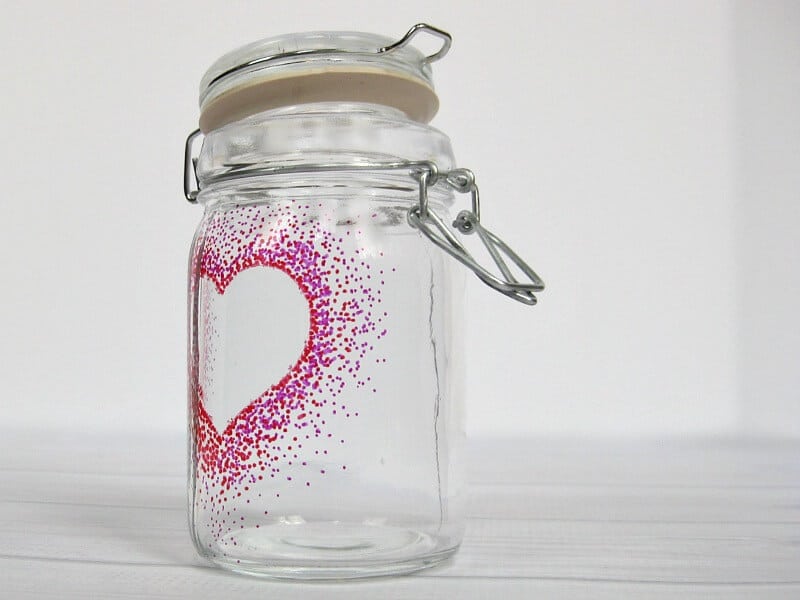
On this project I made the dots less concentrated as they move farther from the heart. You can make the concentration more consistent, if you prefer. Just remember that you can always add more dots, but you can’t take them off once you’ve added them. Start lightly with the dotting and then go back and add more if you want. You can dip a cotton swab in rubbing alcohol to remove a smudge if you need to.
Remove the sticker or vinyl after you’ve added as many dots as you’d like.
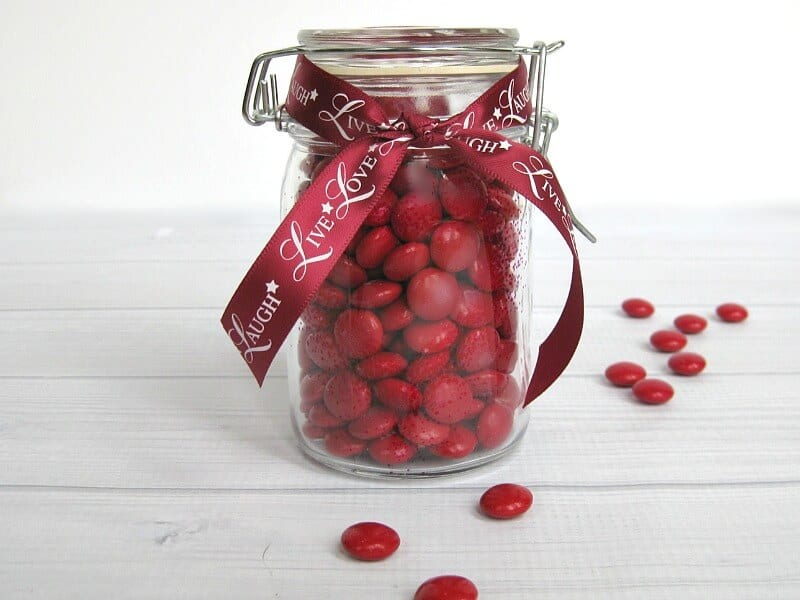
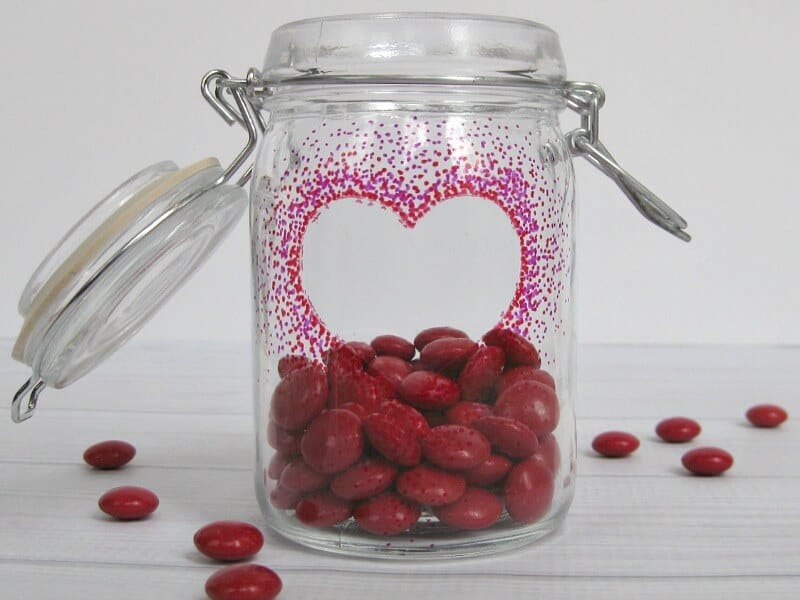
I filled the jar with red candy and added a ribbon. This is a gift for a dear friend of mine. I think Valentine’s Day is the perfect time to give your close friends a small gift and an easy Valentine’s Day gift is something I can actually do.
As the candy is eaten, the heart slowly shows up. The empty decorated jar is perfect for organizing items around the house. You could store cotton balls or cotton swabs in it. You could use this jar in the office to store office supplies. It could be used in the kitchen to hold cup cake liners or other small kitchen items. You could use it on your dresser to hold jewelry or hair bands. Of course, it could be used to hold candy year round.
Now that you know how to use a Sharpie marker on glass, you could use a recycled glass jar to make your own Sharpie dot jar today. Who will you give an easy Valentine’s Day gift to? A friend? A teacher? A coworker? Your sister or brother? The options are endless. And once you start making Sharpie dot crafts, you’ll be addicted like I am, so you’ll be looking for people to give gifts to. Luckily, Valentine’s Day is the perfect opportunity to give a small gift to show your appreciation to someone.
More Sharpie Project Ideas:
- Sharpie Dot Mug
- Sharpie Dot Cup
- DIY Tie Dye Shoes Made with Sharpies
- Personalized Christmas Tree Ornament
- Tie Dye Shibori Napkins Made with Sharpie

I’m a mom of 3, a veteran, military spouse. I’ve moved into 20+ homes all around the world. My passion is helping busy people make the space and time for what’s really important to them. Learn more about Organized 31 and me.


I always gave coupons like these to my kids at Valentine’s Day. I used to do a little treasure hunt… it became a nice tradition and avoided the materialistic trend of Valentine’s Day.
What a fun idea to turn it into a treasure hunt, Seana. I used to do that with birthday gifts when my kids were little to prolong the excitement. I’ll have to bring the idea back for Valentine’s Day thanks to your suggestion.
I am craft-challenged so I LOVE that you share projects like these that are within my limited range of abilities. This is such an easy way to create a customized gift for someone. I love it!
I’m all about easy crafts that you can be proud of. Enjoy crafting, Corinne.
I adore these! I am planning on making these and filling them with goodies for my co-workers. Thank you for the easy craft idea!
Happy to help. Easy crafts are my “thing.” 🙂
Great tutorial! Love it!! Holly 🙂
Thanks, Holly. It’s so easy to make and to give as a gift.
Hi Susan. I just knew you were addicted to sharpie projects. Well at least you can admit you have a problem. But I can definitely see why. The possibilities are endless and they turn out so awesome.
Did you spray the glass with a clear lacquer or anything to protect it a bit more?I have used clear nail polish to coat SMALL areas I didn’t want to wash off, but wonder how permanent Sharpies are on glass. Loved the idea.
I did not use a protective coat. I use these more for decorative or one time uses. You can look up how to bake the item to make the Sharpie more permanent. Glad you enjoyed it, Kathy. Happy crafting.
Can sharpie markers be used on light bulbs??
It should work the same as it does on glass. I’m not sure how it would work if you plan on turning the lightbulb on – be sure to research if that is safe.
I have enjoyed your products and look forward to seeing more. Thank you.
When during the process do you remove the vinyl or sticker? I obsessed with the monogram ideas and I want to get this right! Thanks so much for the idea and instructions on how to do this great project. Happy Holidays!!
I’m sorry that wasn’t clear, Christina. I’ll add it to the tutorial. Remove the sticker or vinyl after you’ve added all the dots. It’s the final step of the process.