Money Lei Tutorial with Ribbon Lei
This post may contain affiliate links provided for your convenience. We earn commissions if you shop through the links on this page. I am also an Amazon Associate and earn from qualifying purchases Read my full disclosure policy.

Originally published May 7, 2018 and updated April 100, 2024.
I grew up in Hawai’i where graduation means leis and lots of leis. There are many different types of leis that are given for graduation, but a money lei is the iconic graduation lei. This ribbon money lei tutorial starts with a ribbon lei as the base and it’s much more comfortable to wear. It’s a quick and easy money lei to make. Oh, and it’s so pretty, too!

The traditional money lei is made up of 50 or more dollar bills and money flowers are aligned to create a fuller look. It’s impressive to see a lei made of 50 or more dollar bills, but it’s not very comfortable to wear.
A traditional money lei uses many more folded money flowers that are strung onto a ribbon like beads.

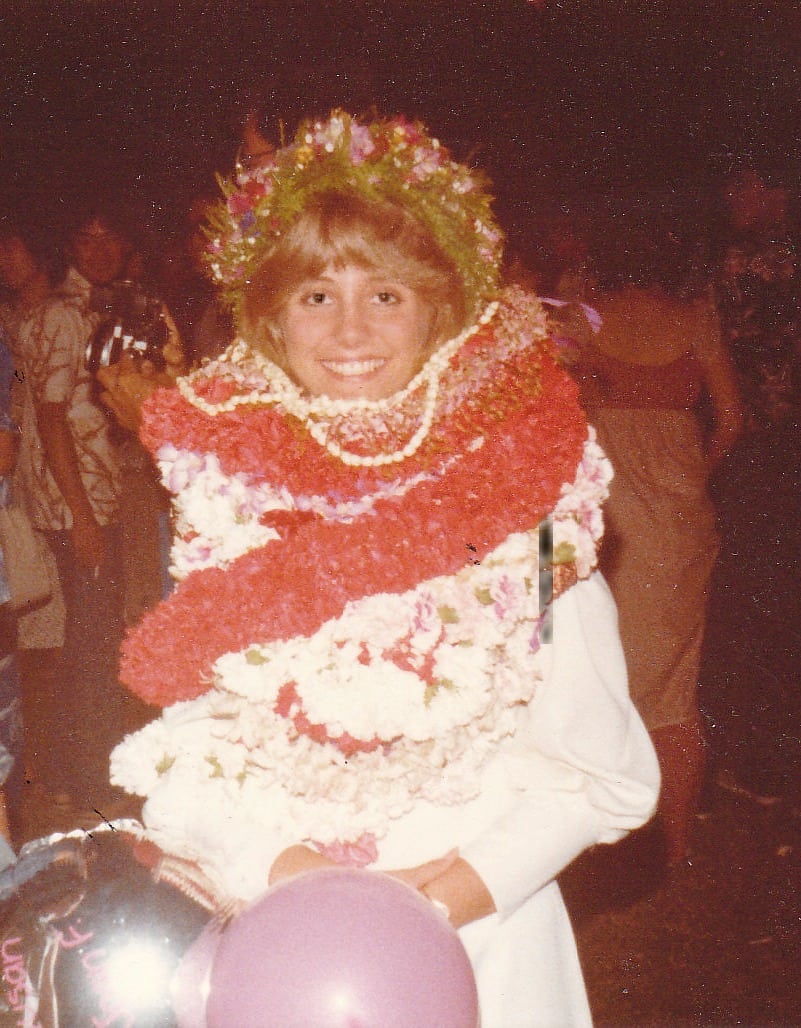
While a money lei is always fun to receive, the traditional money lei is uncomfortable to wear. Especially since graduates usually receive many leis that pile up on top of each other. This is my graduation photo and I did not receive anywhere near the number of leis some graduates received, so you can see how it can be very uncomfortable.
The money lei I make has folded money flowers that lay flat and you are able to leave the back of the lei (the part that hangs on your neck) free of money flowers. This is what helps make this money lei more comfortable to wear.
By adding the money flowers to a ribbon lei, the graduate is able to keep the ribbon lei as a keepsake after the money is removed.
Money Lei Tutorial with Ribbon Lei
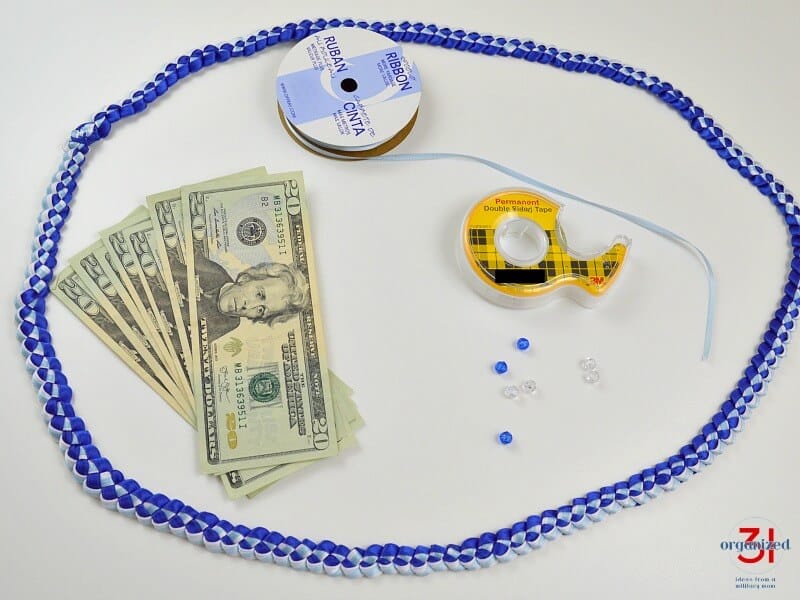
Money Lei Supplies
- Ribbon Lei – Choose one of these ribbon lei tutorials and make a lei using the graduate’s school’s colors:
- How to Make a Ribbon Lei – Easy-to-follow make tutorial on how to make a ribbon lei in about 30 minutes. Hawaiian ribbon leis are traditional made for graduation in the graduate’s school colors.
- How to Make a Ribbon Lei with 3 Colors – How to make a ribbon lei with 3 colors in about 30 minutes. Hawaiian ribbon leis are traditionally made for graduation in the graduate’s school colors.
- Double-Braided Ribbon Lei Instructions – How to make a double braided ribbon lei with 4 strands of ribbon. An easy-to-follow ribbon lei tutorial perfect for Hawaiian graduation lei gifts.
- Double Sided Tape
- 1/8 inch satin ribbon – This ribbon is in addition to the ribbon used to create your ribbon lei above.
- Pony Beads – Choose colors to coordinate with your ribbon lei.
- Crisp Dollar Bills – They don’t have to be brand new bills, they just need to be crisp and not wrinkled. I went to my bank and explained what I needed. The cashier and I looked through the cash she had until we found the number of crisp bills that I needed. To determine how many bills you need, first decide the value of the lei you want to give. Once you decide on the value, divide that number by 7, 9 or 11. You may need to adjust your total amount or use several different denominations of bills. The important thing is that you use an odd number of bills. I used 7 on this lei, but I recommend 9 or 11.
- Bone Folder Creasing Tool – Optional
How to Make a Flat Money Lei
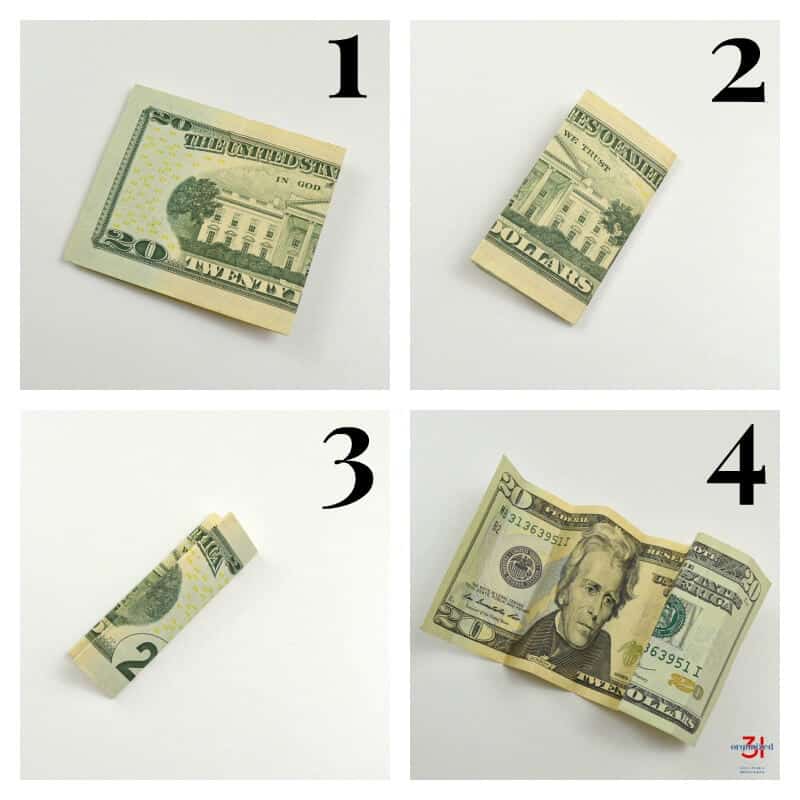
Money Lei – Creasing the Bill
When you fold the bills be sure to carefully align the edges of the bill and use the nail of you thumb or a bone folder creasing tool to sharply crease each fold. It’s important that you keep the edges aligned when you make each new fold so that your final flower will not be symmetrical.
- Fold the bill in half.
- Fold it in half again.
- Fold it in half one more time. Take the time to align all the edges and hold them in place carefully while you crease the fold, which will be a bit more difficult because of the thickness.
- Gently unfold the bill.
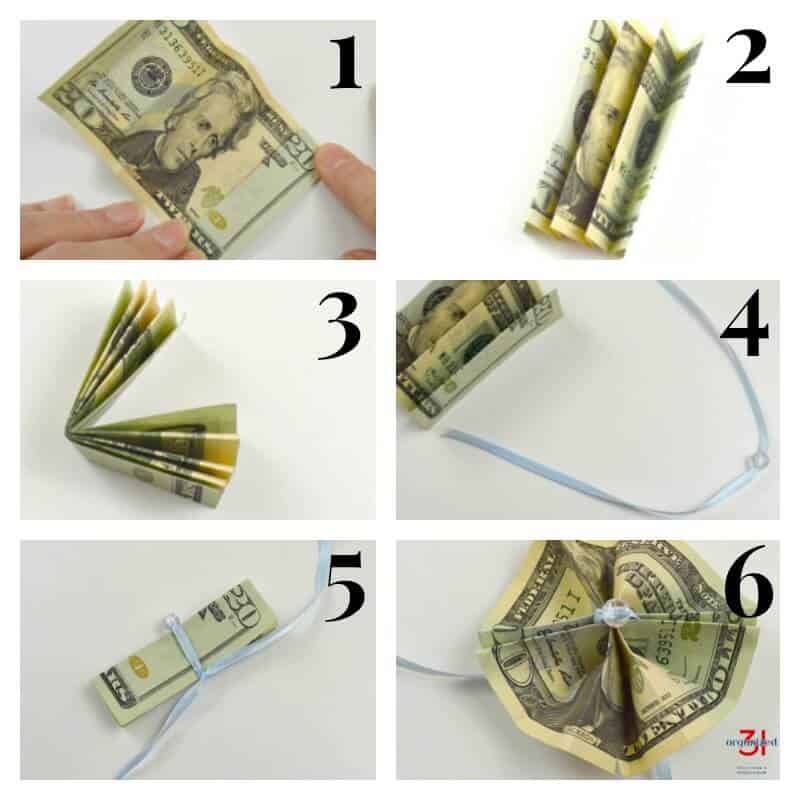
Money Lei with Beads – Money Lei Flower
- Using the creases you created in the steps above, fold the bill accordion fashion back and forth. Take the time to line up the edges with each new fold and crease the folds carefully.
- The folded bill will look like an accordion.
- Holding the bill together, carefully align edges and fold the bill in half. Crease firmly.
- Cut a length of ribbon approximately 9 inches long. Thread a pony bead onto the ribbon.
- Tie the ribbon around the middle of the folded bill. Hold the pony bead in place on the edge of the folded bill (the bead will tend slide to the side of the folded bill) and carefully tie the ribbon tightly around the folded bill.
- Open up the folded bill and use double-sided tape to attach the edges together and form a flower.
Look at how lovely these simple money lei flowers are!
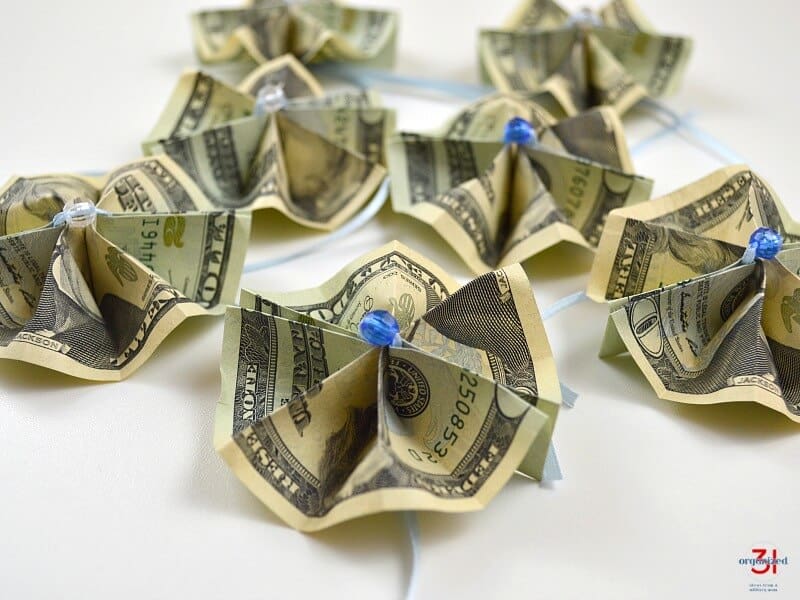
Determine the placement of the flowers along the length of the ribbon lei. In determining the placement, place one money flower at the center of the front of the lei (this would hang at the center bottom of the lei in the front). Leave 10 to 12 inches open with no flowers at the opposite end of the lei. This area will be at the back of the neck. Leaving this area free of money flowers will make it more comfortable to wear.
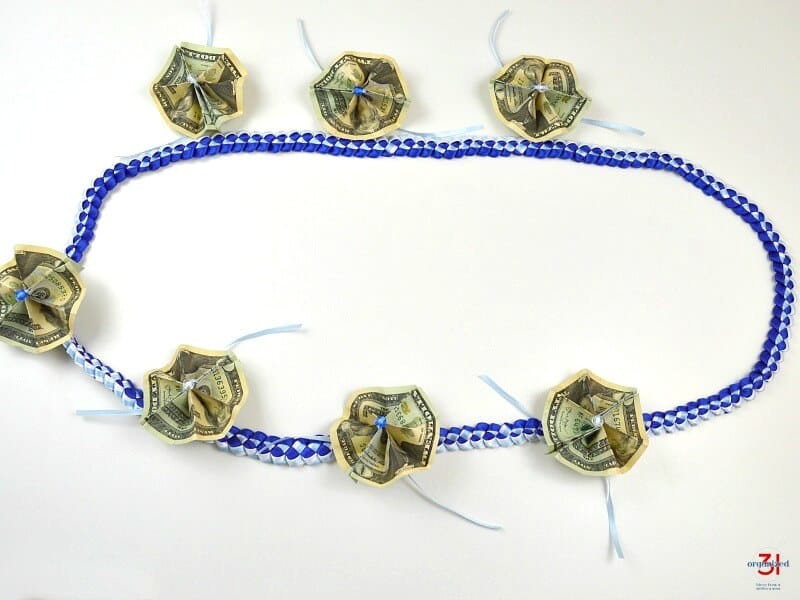
Once you establish the one flower at the front center and the open area at the back of the lei, then arrange the remaining money flowers evenly along the rest of the lei.
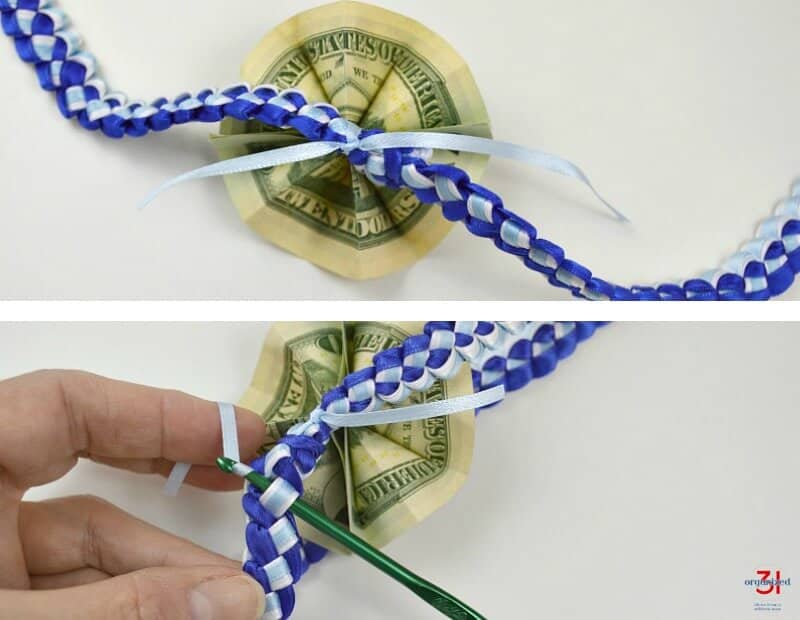
Tie the money flower onto the ribbon lei and weave the tails of the ribbon into the lei so they won’t show.
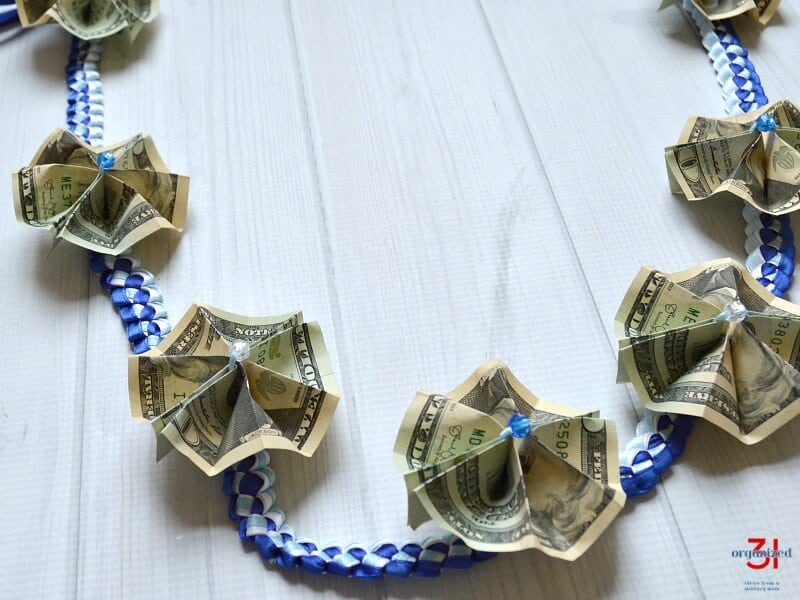
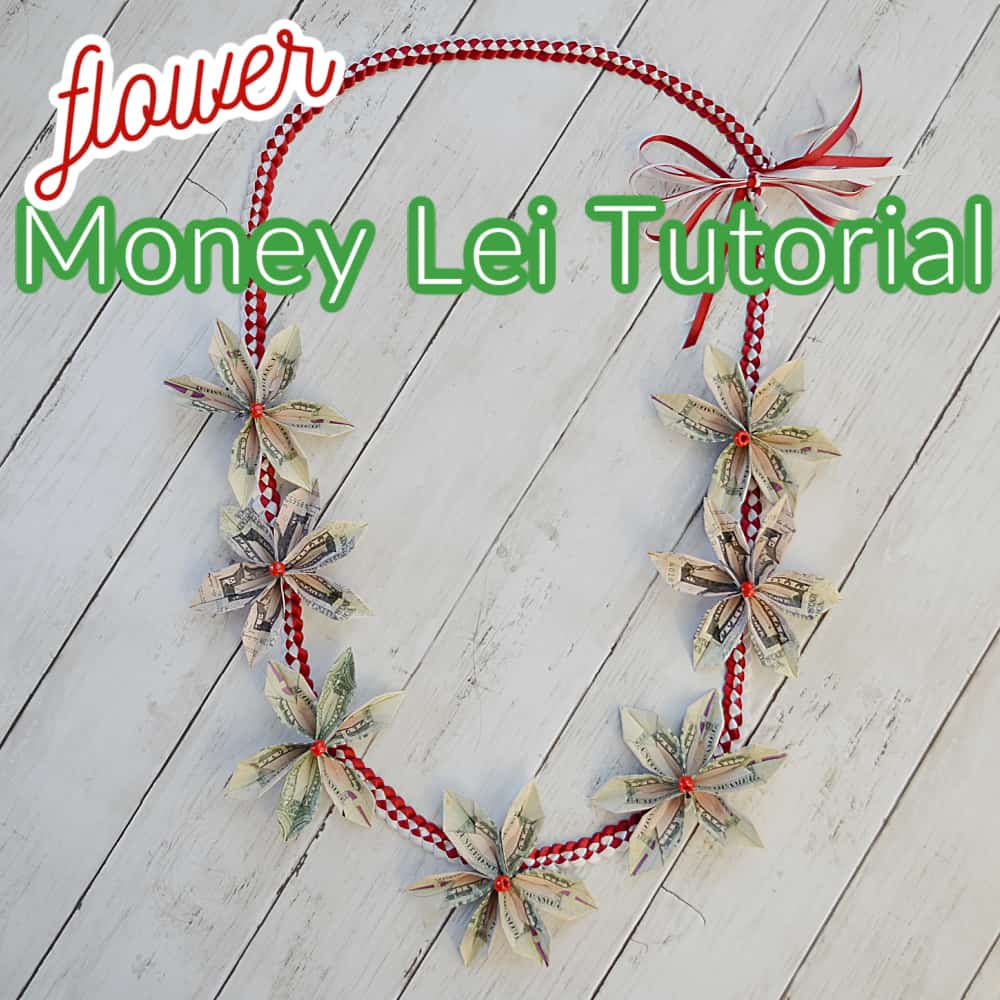
Look how festive this money lei is! With the money flowers tied onto the ribbon lei they are more visible than in the traditional money lei. You can clearly see how pretty they are. Adding a coordinating pony bead to the center of each flower really jazzes it up.
You may find my video tutorial helpful in making your first money lei.
Print Out Instructions for Making a Ribbon and Money Lei
Print out the tutorial’s instructions in the box below.

Money Lei with Ribbon Lei Base Tutorial
Equipment
- ruler or bone folder
Materials
- 1 ribbon lei Make a ribbon lei to be the base of the lei and attach the folded money flowers to.
- 7 – 9 crisp dollar bills How many you need depends on the monetary value you'd like to give.
- 1 spool 1/8 inch satin ribbon You may not need an entire spool. If you have at least 3-5 feet of ribbon.
- 7-9 pony beads You need one bead for the center of each money flower.
- double stick tape
Instructions
- Fold the bill in half, short side to the other short side.
- Fold it in half again
- Fold it in half one more time
- Gently unfold the bill
- Using the creases you created above, fold the bill accordion fashion.
- Holding the accordion folds together, fold the bill in half. Crease firmly.
- Thread a pony bead onto a piece of 9" long ribbon.
- Tie the ribbon around the middle of the folded bill with the pony bead on the edge of the folded bill.
- Open up the folded bill and use double-sided tape to form a flower.
- Attach the money flowers to the ribbon lei. Space the flowers symmetrically on the bottom three-fourths of the lei.
- Add a ribbon embellishment so it will sit on the shoulder.
Notes
Just imagine how excited a graduate would be to receive this flat money lei! In addition to being more comfortable, your graduate will appreciate receiving fewer larger denomination bills. Imagine how awkward it is to take $50 in $1 bills to the store.
More Lei Tutorials
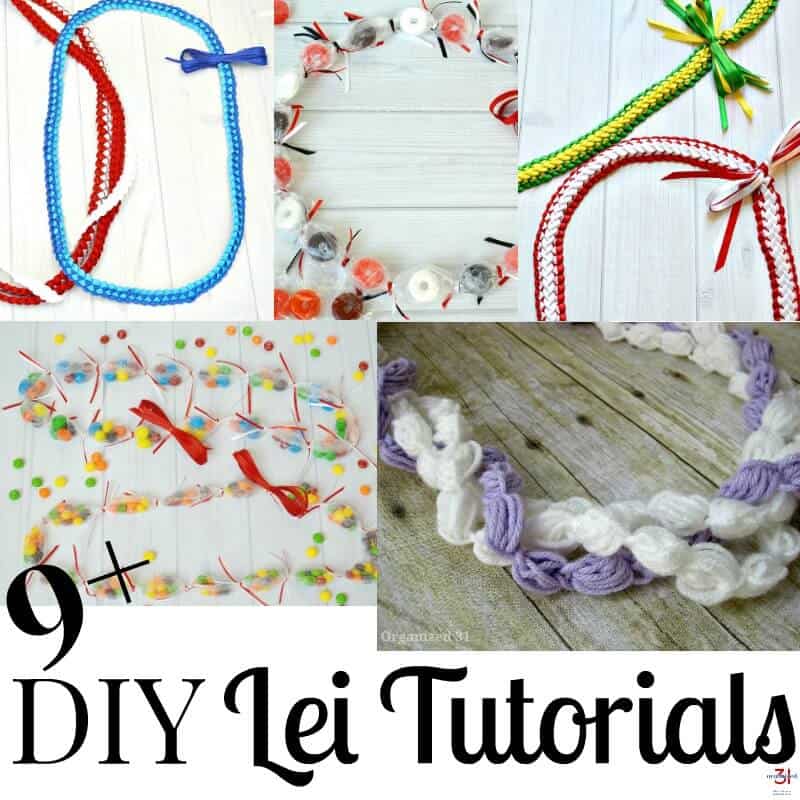
DIY Lei Tutorials and Instructions – More than 12 step-by-step tutorials for a variety of lei styles.
Flower Money Lei Tutorial – This simple tutorial guides you through creating a delightful handmade floral money lei, a thoughtful and meaningful present for any graduate celebrating their accomplishments.
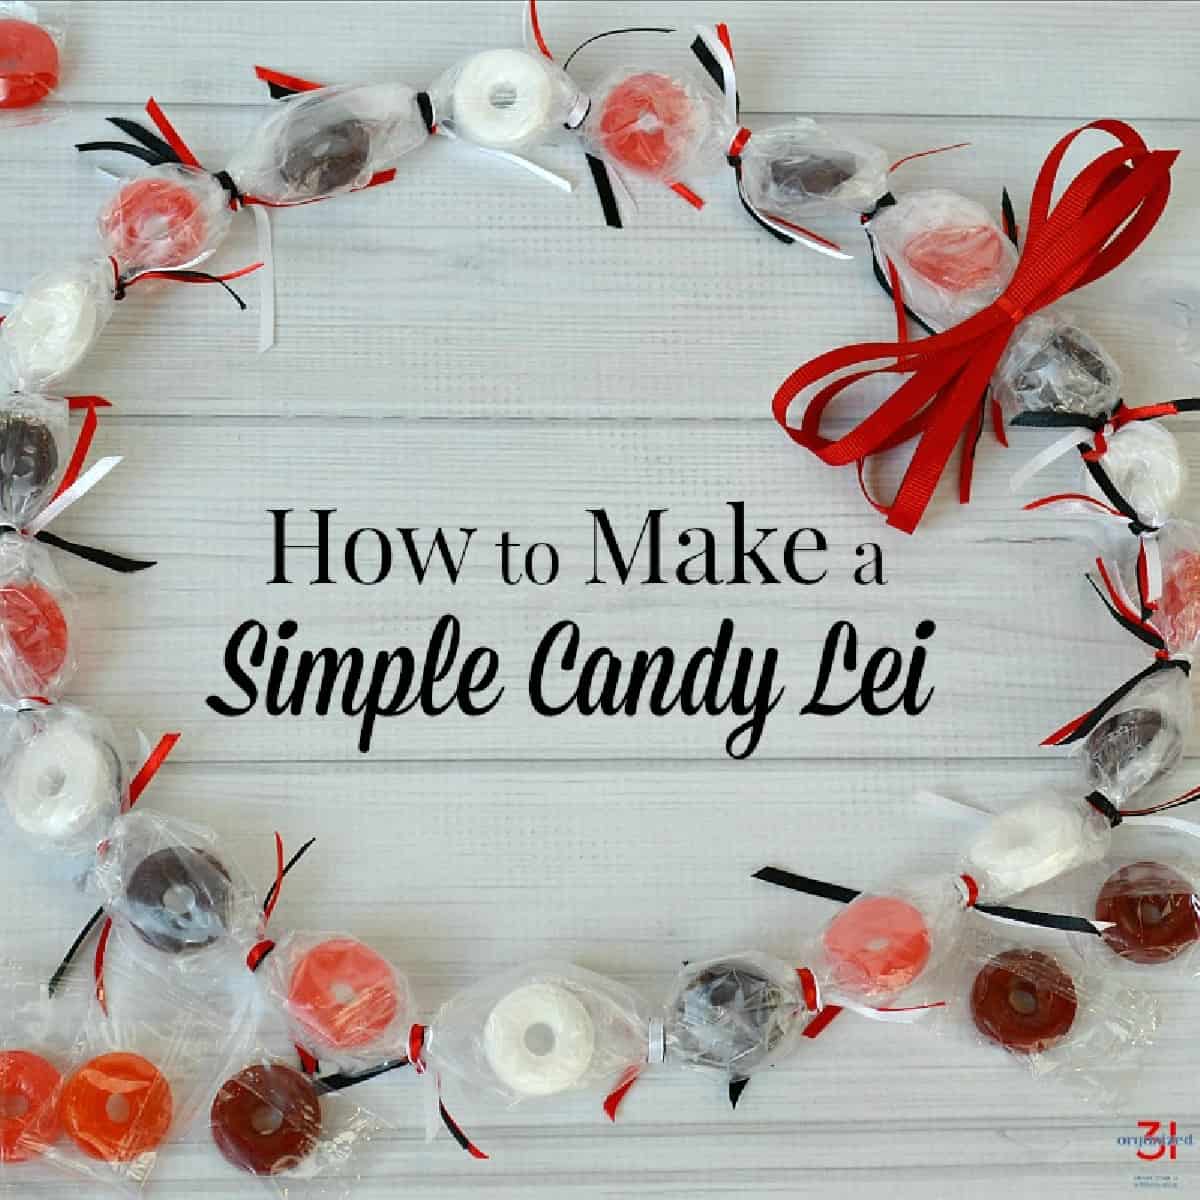
How to Make a Candy Lei – Sweeten any celebration with a homemade candy lei. This straightforward guide teaches you how to craft a vibrant and delectable lei, an ideal festive gift for marking graduations, birthdays, or any joyous occasion.
Who do you know that would be thrilled with a money lei? This money lei tutorial will earn you the best graduation gift giver award this year.
More Graduation Lei Ideas
See all my favorite graduation crafts, party ideas, printables and recipes in the table below. You can scroll though the table and look for ideas or search for specific ideas with the magnifying glass in the upper right-hand corner (on desktop). Click on the topic and then click through the specific article.

I’m a mom of 3, a veteran, military spouse. I’ve moved into 20+ homes all around the world. My passion is helping busy people make the space and time for what’s really important to them. Learn more about Organized 31 and me.


Wow! That is absolutely beautiful! It always amazes me what you’re able to make. You’re also very thoughtful, to think about the comfort of the person wearing it. Money leis are very popular gifts for graduation. One of the teachers at the school I work at, paid someone to make a money lei for her son. You could sell all of these things you make!